
Finding the right phone mount for the redesigned Tesla Model Y (Juniper refresh) requires a clear understanding of the cabin’s updated geometry. Because the refresh introduces a completely overhauled dashboard, a modified central infotainment screen, and a clean, ventless fascia, older mounting solutions designed for previous Model Y iterations will not fit. The most reliable options for the Juniper cabin are custom-engineered screen-back brackets, precision-molded console friction clips, and specialized magnetic mounts that respect the vehicle’s minimalist design while ensuring safety and stability.
Selecting an incompatible accessory can lead to loose fittings, distracting vibrations, or even permanent damage to the premium interior materials. By focusing on mounts specifically tailored to the updated cabin layout, you can maintain a clutter-free dashboard while keeping your device securely positioned for navigation and hands-free use.
Understanding the Juniper Dashboard Layout and Mounting Constraints
The Juniper refresh introduces several structural changes that directly impact how and where you can mount a phone. The central touchscreen features updated dimensions, a slimmer bezel, and a revised mounting bracket design at the rear. These changes mean that any mount designed to clamp onto the screen frame of older Model Y vehicles will not align correctly and could put undue pressure on the new display assembly, potentially damaging the sensitive LCD panel or the touch interface.
Products mentioned in this guide
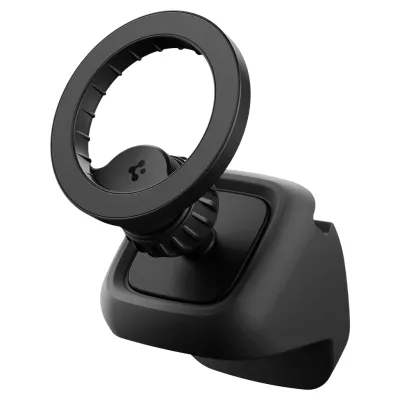
Prices are valid at publication and may change. Please refer to the product page for the latest price.
Additionally, the complete absence of traditional adjustable air vents eliminates standard vent-clip mounts from your list of options. The dashboard now features a continuous, streamlined ventilation strip integrated into the dash face, where airflow is directed electronically rather than through manual plastic slats. Attempting to force a generic vent clip into this narrow slot can damage the delicate directional fins, scratch the surrounding trim, and disrupt the climate control airflow.
The materials used in the redesigned dashboard also require careful consideration. The Juniper cabin utilizes updated textile or soft-touch materials on the dash face, which are far more sensitive to pressure marks, tearing, or adhesive staining than the hard plastic or wood trims of the past. Furthermore, any mounting location must be chosen with strict adherence to safety, ensuring the phone does not obstruct your forward sightlines or interfere with the passenger airbag deployment zones located within the upper dashboard structure.
Key Selection Criteria for Juniper-Compatible Phone Mounts
When shopping for a phone mount for your refreshed Model Y, verifying explicit manufacturer compatibility is the most critical step. Look for product descriptions that specifically mention the “Juniper” refresh or the “2025+ Model Y” designation. Avoid products labeled generically for “Model Y” without a specified year, as these are almost certainly designed for the pre-refresh geometry and will not fit the updated dashboard contours.

The attachment mechanism must be carefully evaluated against the new interior contours and material finishes. Custom-molded clips that snap into existing panel gaps offer a secure fit without the need for sticky adhesives. If you opt for an adhesive-based mount, ensure the adhesive pad is designed for automotive use and is compatible with the specific surface material—whether it is the glass back of the touchscreen or a smooth plastic trim piece—to prevent peeling or surface damage under high cabin temperatures.
Phone retention styles should match your typical driving conditions and device specifications. MagSafe-compatible magnetic mounts offer the convenience of quick, one-handed attachment and a clean aesthetic, but they require a compatible phone or case. For rougher roads or heavier devices, mechanical gravity grips or spring-loaded clamps provide a more positive physical lock, though they add visual bulk to the cabin and can sometimes produce minor rattles when empty.
Finally, consider whether you require integrated wireless charging. Charging mounts keep your device powered during navigation-heavy trips but require a cable connection. Ensure the mount’s power cable routing is designed to tuck away neatly, preventing wires from draping across the center console or interfering with the sliding storage covers and wireless charging pads already built into the vehicle.
Evaluating Mounting Mechanisms for the Juniper Interior
Different mounting styles offer distinct advantages depending on your preference for visibility, ease of installation, and cabin aesthetics. Understanding how each mechanism interacts with the Juniper interior will help you make an informed decision.
Screen-Back and Display-Mounted Solutions
Screen-back mounts are highly popular because they leverage the sturdy structure of the central infotainment screen while keeping the dashboard face completely clear. These mounts typically clamp onto the rear housing of the display or use a custom bracket that wraps around the screen’s edge, positioning the phone either directly beside or slightly behind the screen.
While these solutions offer excellent visibility and keep the phone within your natural line of sight, you must consider the weight limits of the screen mounting bracket. The central display is engineered to support its own weight and the pressure of touch interactions. Adding a heavy phone, a robust mounting arm, or a secondary instrument cluster screen can stress the display pivot or internal wiring over time, especially when driving over speed bumps or rough terrain.
When installing a screen-back mount, verify that the phone’s position does not block your forward visibility through the windshield. The device should be positioned so that it remains within your peripheral vision without overlapping the active area of the main touchscreen or blocking your view of the passenger-side side mirror.
Center Console and Dashboard Friction or Clip Mounts
Friction-fit and custom-molded clip mounts utilize the precise panel gaps between the dashboard trim and the center console. These mounts are engineered to wedge securely into these seams, providing a rock-solid anchor point without the need for sticky adhesives or mechanical fasteners.
The primary advantage of friction mounts is their zero-residue installation. Because they do not rely on glues or tapes, you can easily remove or reposition the mount for routine cabin cleaning or when preparing the vehicle for resale. This preserves the pristine condition of the factory trim and avoids the risk of peeling away delicate dashboard finishes.
However, you must avoid generic universal clips that claim to fit any vehicle gap. These universal options often rely on high spring tension or sharp metal claws that can pinch, scratch, or permanently deform the premium interior panels of your Model Y. Only use clips that are explicitly molded to match the exact panel tolerances of the Juniper refresh.
Magnetic and Wireless Charging Integrations
For drivers who prioritize convenience, magnetic mounts offer a seamless mounting experience. Standalone magnetic pucks provide a minimalist look, allowing you to snap your phone into place instantly. If you choose this route, ensure the mount utilizes high-strength neodymium magnets to prevent the phone from shifting or falling during sudden braking or sharp turns.
If you opt for a mount with integrated wireless charging, look for models that support the Qi2 standard. Qi2 provides faster charging speeds and improved thermal efficiency compared to older Qi standards, which is particularly important when running demanding navigation and music apps simultaneously.
Cable management is essential to maintaining the clean, minimalist aesthetic of the Juniper cabin. Look for mounts that include dedicated cable routing clips or channels. These allow you to tuck the power cable into the panel gaps along the side of the center console, leading it discreetly to the internal USB-C ports without creating a cluttered look on your dashboard.
Installation Safety and Interior Protection Guidelines
Proper installation is key to protecting both your vehicle’s interior and your personal safety. Before mounting any accessory, prepare the surface thoroughly. If you are using an adhesive-based mount, clean the designated mounting area with a mild, non-abrasive automotive interior cleaner. Avoid using harsh household detergents or high-concentration isopropyl alcohol on sensitive dashboard textiles or plastics, as these can cause permanent discoloration or dry out the materials.
Establish strict boundaries for the placement of your phone mount. The phone must never obstruct your view of the road, the steering wheel, or any critical instrument cluster sightlines. Most importantly, ensure the mount and phone are positioned well clear of the passenger airbag deployment zones. Consult your vehicle’s owner’s manual to identify the exact locations of the airbag modules before finalizing your mount placement.
To prevent micro-scratches and annoying squeaks caused by road vibrations, consider using protective barriers. When installing friction-fit or clip-on mounts, placing a thin piece of transparent paint protection film (PPF) or a soft microfiber barrier between the mount’s contact points and the dashboard trim can safeguard the factory finishes.
If at any point during the installation you find that the mount requires excessive force to snap into place, or if it seems to deform the interior panels, stop immediately. Do not attempt to modify original vehicle panels or force a poorly fitting accessory. Consult the mount manufacturer’s instructions or seek assistance from a qualified professional to ensure a safe and secure fit.
Frequently Asked Questions (FAQ)
Will a standard Model Y phone mount fit the Juniper refresh?
While some universal suction-cup mounts designed for the windshield may still work, custom-fit mounts designed for pre-refresh Model Y vehicles will not fit the Juniper cabin. The redesigned dashboard contours, the updated dimensions of the central touchscreen, and the complete removal of traditional horizontal air vents mean that older custom brackets cannot align or attach correctly. To ensure a proper fit and prevent damage to your interior, always look for product descriptions that explicitly state compatibility with the Juniper refresh or the 2025+ model year.
How can I remove adhesive mounts without damaging the Juniper screen or dashboard?
To safely remove an adhesive mount, apply gentle heat to the adhesive pad using a hair dryer on a low setting to soften the glue. Once the adhesive is warm, use a piece of dental floss or high-strength fishing line to carefully slice through the foam backing behind the mount, rather than pulling directly on the dashboard surface. Avoid using harsh chemical solvents, abrasive scrubbing pads, or sharp metal tools, as these can permanently scratch the screen’s anti-glare coating or tear the dashboard’s textile wrap. Always test any commercial adhesive remover on a small, hidden area first to ensure it does not react with the interior materials.

Community discussion
Share your experience or ask a question. Comments are reviewed before publication.