
Maintaining correct tire pressure is one of the most straightforward yet critical aspects of vehicle ownership. Properly inflated tires ensure optimal grip, responsive handling, shorter braking distances, and maximum fuel efficiency. Conversely, driving on underinflated or overinflated tires accelerates tread wear, compromises safety, and increases the risk of a sudden blowout. To achieve and maintain the correct pressure, a reliable portable air compressor pump is an invaluable tool that allows you to perform routine top-ups at home or handle unexpected pressure drops on the road.
Using an air compressor pump effectively requires more than simply connecting the hose and turning on the power. Different tire types—such as standard passenger tires, low-profile performance tires, and run-flat tires—have unique structural characteristics that dictate how they respond to inflation and how they must be handled. By understanding these differences and following a systematic, safety-first approach, you can keep your tires in peak condition and extend their service life.
Preparation and Safety Checks Before Inflating
Before connecting any inflation equipment to your vehicle, you must establish a safe working environment and verify your target pressure. Always park your vehicle on a flat, level surface, engage the parking brake firmly, and turn off the engine unless the compressor manufacturer’s instructions specifically require it to run.
Products mentioned in this guide

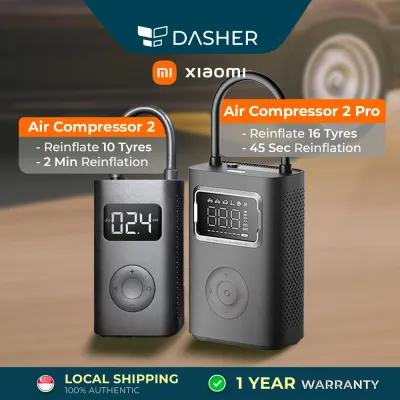
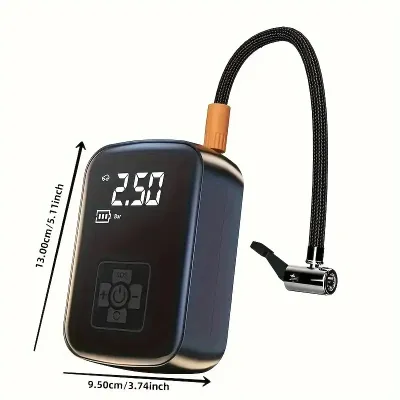
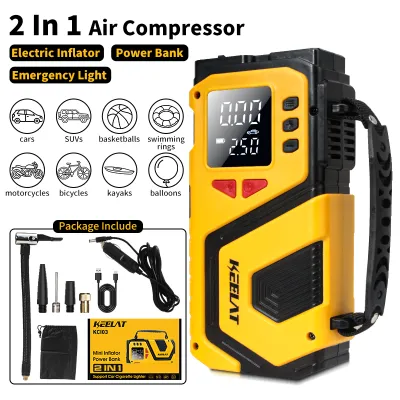
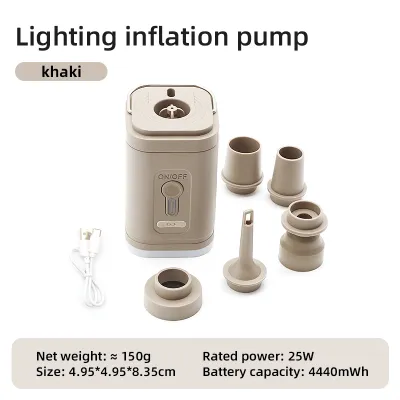
Prices are valid at publication and may change. Please refer to the product page for the latest price.
To find the correct inflation pressure for your vehicle, locate the tire information placard, which is typically affixed to the driver’s side door jamb, B-pillar, or inside the fuel filler flap. This placard lists the manufacturer’s recommended cold inflation pressure for both the front and rear tires. Never use the maximum pressure rating printed on the tire’s sidewall; this figure represents the maximum pressure the tire can safely hold under maximum load, not the optimal pressure for daily driving and vehicle handling.
Next, perform a thorough visual inspection of your air compressor pump and its accessories. Examine the power cord for frayed wires, check the air hose for cracks or dry rot, and inspect the fittings for dirt and damage. A compromised hose or fitting can leak pressurized air, leading to inaccurate gauge readings or sudden equipment failure during operation.
For the most accurate pressure readings, always check and inflate your tires when they are cold. Tires are considered cold when the vehicle has been stationary for at least three hours, or if it has been driven less than 1.6 kilometers at moderate speeds. Driving generates friction, which heats the air inside the tire and causes it to expand, temporarily raising the internal pressure. If you must inflate warm tires, be aware that the reading will be higher than the cold baseline; consult your vehicle’s manual for guidance, or recheck the pressure once the tires have cooled down completely.
Step-by-Step Guide to Inflating Standard and Low-Profile Tires
Once your preparations are complete, you can begin the inflation process. Start by unscrewing the valve cap from the tire’s valve stem. Place the cap in a secure location, such as your pocket or a clean tray, to prevent it from rolling away or collecting dirt, which could later contaminate the valve core.

Align the air compressor’s chuck or fitting with the valve stem and press it on firmly. Depending on your compressor model, you will either flip a locking lever to secure a clamp-on chuck or thread a screw-on connector directly onto the stem threads. A secure, airtight connection is essential; if you hear a continuous hissing sound, the chuck is not seated correctly. Remove the fitting, realign it, and reattach it until the escaping air stops completely.
Turn on the air compressor pump to begin inflating. Because the vibration of the compressor motor can cause the built-in pressure gauge to fluctuate, do not rely solely on the active reading while the pump is running. Periodically switch off the compressor or release the trigger to allow the pressure to stabilize, then read the static pressure on the gauge. This practice prevents overshooting your target pressure.
As you approach the recommended pressure, use short, controlled bursts of inflation. If you accidentally overinflate the tire, use the compressor’s integrated bleed valve—or gently depress the center pin of the valve stem using a small tool or the back of a mechanical pressure gauge—to release excess air until the reading matches the placard specification exactly.
When working with low-profile tires, which feature short, stiff sidewalls and a smaller internal air volume, you must exercise extra caution. Because of the reduced air volume, low-profile tires inflate much faster than standard tires, meaning a few extra seconds of run time can easily lead to significant overinflation. Additionally, when attaching or removing the compressor chuck, apply force strictly along the axis of the valve stem. Avoid applying lateral or bending force, as the tight clearance and stiff sidewalls of low-profile setups can make the valve stem vulnerable to cracking or tearing away from the wheel rim, potentially damaging internal tire pressure sensors.
Special Considerations for Run-Flat and Specialty Tires
Run-flat tires are engineered with heavily reinforced sidewalls that allow them to support the weight of the vehicle even after a complete loss of inflation pressure. This design enables you to drive a limited distance at reduced speeds to reach a safe service location. However, this unique construction requires specific safety checks before you attempt to add air.
Before inflating a run-flat tire that has lost pressure, conduct a meticulous visual inspection of the entire tire, focusing closely on the inner and outer sidewalls. Look for signs of severe structural stress, such as deep creases, bulging, discoloration, blistering, or rubber shredding. These symptoms indicate that the tire has been driven on while completely deflated or at an excessively low pressure, which compromises the integrity of the internal reinforcing elements.
If you observe any of these warning signs, or if you know the tire was driven on while completely flat, do not attempt to reinflate it. The internal structure may be permanently damaged, and introducing high-pressure air could trigger a sudden, dangerous blowout. In this scenario, the safety boundary has been crossed; you must stop immediately and arrange for professional roadside assistance or have the vehicle towed to a qualified tire service center.
Always consult the tire manufacturer’s specific guidelines regarding run-flat tires. Some manufacturers allow repairs under highly restricted conditions, while others strictly prohibit repairing or reinflating any run-flat tire that has experienced a low-pressure event, requiring a complete replacement instead. Never bypass these manufacturer instructions, as doing so can compromise your vehicle’s stability and safety on the road.
Verifying Pressure and Post-Inflation Maintenance
After inflating your tires to the target pressure using the air compressor pump, it is vital to cross-verify the readings. Built-in gauges on portable compressors, especially budget-friendly models, can suffer from calibration drift over time due to mechanical vibration and environmental exposure. Use a separate, high-quality digital or calibrated dial-type tire pressure gauge to take a final reading on each tire, ensuring all four wheels are balanced according to the manufacturer’s specifications.
Once the pressure is verified, reinstall the valve caps on all tire stems, turning them clockwise until they are snug. The valve cap serves as the primary barrier protecting the delicate inner valve core from road grit, moisture, dust, and corrosive debris. Without a cap, contaminants can lodge inside the valve, causing slow, persistent air leaks or preventing the valve from sealing properly during future inflation sessions.
To maintain optimal tire health, establish a routine to check your tire pressure manually at least once a month, as well as before embarking on long road trips or carrying heavy loads. In tropical climates like Singapore, where ambient temperatures remain high and road surfaces can become extremely hot, tire pressure can fluctuate significantly. Regular monitoring helps you catch slow leaks early and adjust for natural pressure loss over time.
After completing your maintenance, store your air compressor pump properly to prolong its service life. Coil the air hose loosely to prevent kinks or internal structural damage, secure the power cord neatly, and place the unit in a protective bag or case. Store the compressor in a cool, dry location inside your vehicle’s boot, away from direct sunlight and moisture, to prevent the rubber seals, hoses, and electrical connectors from degrading prematurely.
Troubleshooting Common Air Compressor and Tire Valve Issues
Even high-quality air compressor pumps can encounter operational issues during routine tire maintenance. Understanding how to identify and resolve these common problems ensures a smooth inflation process and prevents damage to your equipment or vehicle.
One common issue during extended use is thermal shutdown. Portable 12V air compressors generate substantial heat as they compress air, and many models feature an automatic thermal overload switch to prevent the motor from burning out. If your compressor suddenly stops running mid-inflation, turn off the power switch, disconnect it from the power source, and allow it to cool down completely in a shaded area for 15 to 30 minutes before attempting to use it again.
If you notice air continuously leaking from the connection point between the compressor chuck and the tire valve stem, the issue is likely a worn or misaligned seal. Inspect the inside of the compressor chuck for a damaged rubber O-ring or gasket. Many compressor kits include replacement seals, or you can use a high-quality thread-on adapter to establish a more secure, airtight connection with the valve stem.
If the compressor runs continuously but the tire pressure gauge fails to rise, stop the process immediately. This symptom can indicate a stuck or damaged valve core that is blocking air entry, a mechanical failure within the compressor’s internal piston assembly, or a severe puncture in the tire itself. Inspect the tire tread and sidewall for visible punctures, embedded nails, or cuts. If you suspect a tire puncture or a faulty valve stem, do not attempt to drive the vehicle; instead, seek professional tire repair services to assess and resolve the issue safely.
Frequently Asked Questions (FAQ)
Is it safe to use a portable air compressor pump while the engine is running?
Yes, it is generally safe and often recommended to keep your vehicle’s engine running while operating a portable air compressor pump, provided you follow specific safety precautions. Many portable compressors draw a significant amount of electrical current, typically between 10 and 15 amps. Operating the compressor solely on battery power with the engine turned off can rapidly deplete your car’s battery, potentially leaving you stranded with a flat battery after inflating your tires.
However, you must distinguish between different power connection methods. If your compressor plugs into a standard 12V accessory socket, keeping the engine running ensures a stable voltage supply and prevents battery drain. If your compressor uses heavy-duty alligator clamps connected directly to the battery terminals, consult the device manual for specific current requirements and safety steps.
Whenever you operate the compressor with the engine running, the vehicle must be parked securely on a level surface with the parking brake fully engaged and the transmission in Park (or Neutral for manual vehicles). Most importantly, never run the engine in an enclosed or poorly ventilated space, such as a closed residential garage or an unventilated underground car park, to prevent the dangerous and potentially lethal buildup of carbon monoxide exhaust fumes.
How often should I check tire pressure if my car has a TPMS?
You should still check your tire pressure manually at least once a month, even if your vehicle is equipped with a Tire Pressure Monitoring System (TPMS). While a TPMS is an excellent safety feature designed to alert you to sudden pressure drops or severe underinflation while driving, it is not a substitute for regular, proactive tire maintenance.
Most standard TPMS systems are calibrated to trigger a dashboard warning light only when the pressure in one or more tires drops significantly—often 20% to 25% below the manufacturer’s recommended cold inflation pressure. By the time the warning light illuminates, your tires are already severely underinflated, which can lead to accelerated tread wear, compromised handling, increased fuel consumption, and elevated tire temperatures.
Furthermore, indirect TPMS systems, which estimate pressure by monitoring wheel speed sensors rather than measuring internal air pressure directly, can sometimes take time to detect gradual, uniform pressure loss across all four tires. Performing a manual check with a standalone digital gauge or your air compressor pump monthly ensures that your tires remain at their optimal operating pressure, maximizing safety, performance, and tire longevity.

Community discussion
Share your experience or ask a question. Comments are reviewed before publication.