
Maintaining correct tire pressure is one of the simplest yet most critical aspects of vehicle safety, fuel efficiency, and tire longevity. Using a portable air compressor allows you to check and adjust your tire pressure at home or on the roadside, eliminating the need to search for a functioning service station pump.
To do this properly, you must measure the pressure when the tires are cold, identify the manufacturer’s recommended specifications, connect the compressor securely, and adjust the air level to match the target value. This guide outlines the exact steps and safety precautions required to manage your tire inflation independently and accurately.
Preparation and Safety Checks Before Inflating
Before plugging in your portable air compressor, you must establish a safe working environment. Park your vehicle on a flat, level surface such as a concrete garage floor or a level parking bay. This prevents the vehicle from rolling and ensures that weight is distributed evenly across all four wheels, which is essential for accurate physical inspections.
Products mentioned in this guide
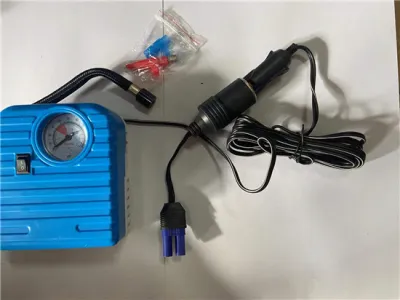
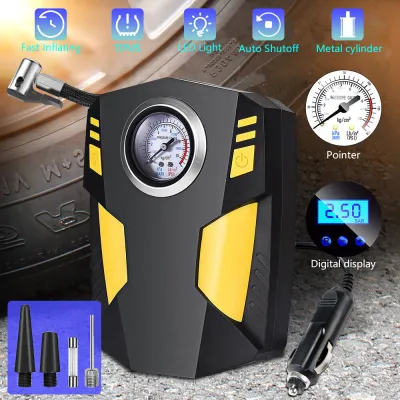
![[✅SG Ready Stock] 10000mAh Electric Air Compressor Inflator Car Or Bicycle Pump Wireless Air Pump Car Air Pump Tyre Pump](https://img.lazcdn.com/g/p/f0221063150bd090a973b049b20672b9.png_400x400q80.png_.webp)

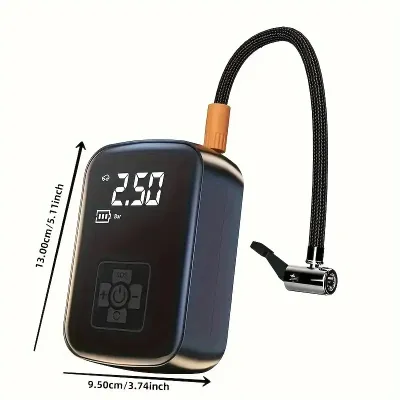
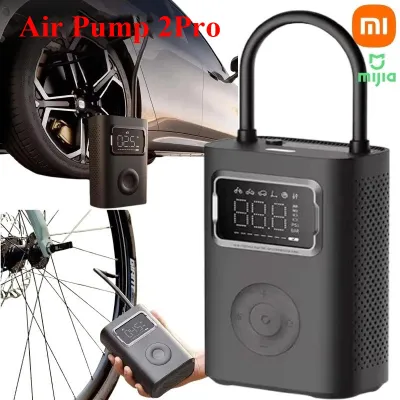
Prices are valid at publication and may change. Please refer to the product page for the latest price.
Engage the parking brake firmly and turn off the engine completely before stepping out to inspect the tires. This safety boundary is critical to prevent accidental movement while you are working close to the wheels.
Tire temperature plays a fundamental role in pressure readings because air expands when heated. For an accurate measurement, tires should be “cold,” meaning the vehicle has been parked for at least three hours or has been driven less than two kilometers.
If you must inflate tires that are warm from recent driving, keep in mind that the reading will be artificially elevated by ambient heat and friction. Adjusting warm tires to the cold specification can lead to dangerous under-inflation once the tires cool down.
Next, perform a thorough visual inspection of your portable air compressor and its accessories. Uncoil the power cable fully and check for any exposed wires, cracks in the insulation, or bent plug pins.
Examine the air hose for dry rot, deep kinks, or cracks that could leak air under pressure. Ensure the connector nozzle—whether it is a screw-on chuck or a quick-release thumb lock—is clean and free of debris that might prevent an airtight seal with the tire valve stem.
Finding the Correct Tire Pressure Specifications
To achieve optimal handling and tire wear, you must inflate your tires to the vehicle manufacturer’s specified pressure rather than guessing. This recommended pressure is not printed on the tire itself; instead, it is located on the tire information placard.

You can typically find this placard on the driver’s side door jamb, visible when the door is open, though on some vehicles it may be located inside the fuel filler flap or the glove compartment.
The placard lists the recommended cold inflation pressure for both the front and rear tires, which often differ depending on the vehicle’s weight distribution.
For specialized driving conditions, such as carrying heavy passenger loads, towing, or sustained high-speed driving, consult your vehicle owner’s manual. The manual frequently provides alternative pressure recommendations to maintain stability and safety under these increased loads.
It is vital to distinguish between the manufacturer’s recommended operating pressure and the maximum pressure limit molded into the tire’s sidewall. The number on the sidewall represents the absolute maximum pressure the tire can safely hold under maximum load, not the pressure your vehicle requires for daily driving.
Over-inflating your tires to this maximum limit will result in a harsh ride, reduced traction, accelerated center-tread wear, and an increased risk of a blowout. Always stick to the placard or manual specifications.
Step-by-Step Guide to Checking and Inflating Tires
Once your vehicle is prepared and you know the target pressure, you can begin the inflation process. Start by unscrewing the plastic valve stem cap from the first tire and placing it in a secure location, such as your pocket or the vehicle’s cup holder, so it does not get lost.
Inspect the valve stem briefly to ensure it is straight and free of dirt or corrosion that could interfere with the compressor’s connection.
Attach the air hose of your portable compressor to the valve stem. If your compressor uses a screw-on chuck, thread it clockwise onto the stem until you hear a brief hiss of escaping air, then tighten it until the hiss stops completely.
For quick-release thumb-lock connectors, push the chuck firmly onto the valve stem and flip the lever down to lock it in place. A secure, airtight connection is necessary to get an accurate initial pressure reading from the compressor’s gauge.
Turn on the compressor’s power source—typically by plugging it into the vehicle’s 12V accessory socket or connecting clamps directly to the car battery, depending on the unit’s power requirements.
Read the initial pressure displayed on the gauge and compare it to your target specification. If the reading is lower than recommended, turn on the compressor switch to begin adding air.
It is best to add air in short, controlled bursts of 10 to 15 seconds, turning the unit off briefly to let the gauge stabilize before checking the progress. This prevents overshooting your target pressure.
If you accidentally over-inflate the tire, or if the initial reading was already too high, you must release the excess air. Many portable compressors feature a built-in bleed valve or a small deflation button near the gauge that allows you to release air without disconnecting the hose.
If your device lacks this feature, you can gently depress the center pin inside the valve stem using a small tool or the back of a tire pressure gauge until the pressure drops to the correct level.
When the target pressure is reached, turn off the compressor and disconnect the hose chuck immediately. Work quickly to minimize the amount of air that escapes during the detachment process.
Once the hose is clear, inspect the valve stem one last time and screw the valve stem cap back on tightly. The cap acts as a primary seal against dirt, moisture, and road debris, which can otherwise clog the valve core and cause slow leaks over time.
Repeat this entire sequence for the remaining three tires, and do not forget to check the spare tire periodically as well.
Adapting to Digital vs. Analog Compressor Gauges
The technique you use to monitor pressure depends heavily on whether your portable compressor is equipped with an analog dial gauge or a digital display. Analog gauges use a physical needle that sweeps across a printed scale.
To read an analog gauge accurately, position your eyes directly in front of the dial to avoid parallax errors, and remember that the needle will vibrate or jump while the compressor motor is running. You must turn the compressor off to obtain a steady, reliable reading.
Digital gauges offer a more straightforward user experience, often displaying readings in precise decimal increments.
Many modern digital compressors feature an auto-shutoff function, allowing you to program your exact target pressure using control buttons before you begin. Once activated, the compressor runs continuously and shuts off automatically when the internal sensor detects that the tire has reached the preset limit, reducing the risk of over-inflation.
Post-Inflation Verification and Ongoing Tire Care
Even if your portable air compressor features a built-in gauge, it is highly recommended to perform a post-inflation verification. Built-in gauges on portable consumer units can sometimes lose calibration due to vibrations and rough handling during storage.
Use a separate, high-quality handheld digital or dial tire pressure gauge to verify the final pressure of each tire. If there is a discrepancy between the two devices, rely on the dedicated handheld gauge, as these are generally more accurate and less prone to mechanical drift.
After adjusting your tires, monitor their behavior closely over the next few days. If you notice that one tire consistently loses pressure faster than the others, it may indicate a slow puncture from a nail, a leaking valve core, or a poor seal along the wheel rim.
Addressing these minor issues early prevents unexpected roadside emergencies and protects the tire from running flat, which can ruin the internal sidewall structure within a few meters of driving.
Proper storage of your portable air compressor is essential to maintain its accuracy and prolong its operational lifespan. Allow the unit to cool down completely after use, as the pump housing can become extremely hot during operation.
Neatly coil the power cables and air hose without bending them at sharp angles, which can cause internal wire breaks or hose splits. Store the compressor in its protective carrying case in a dry, temperature-controlled environment, such as a dedicated storage compartment in your trunk, away from direct moisture and extreme heat.
Frequently Asked Questions (FAQ)
Why does my portable air compressor keep shutting off before reaching the target pressure?
Portable air compressors often shut off prematurely due to electrical limitations or thermal overload protection. Many consumer-grade 12V compressors draw significant current, which can overheat the vehicle’s accessory socket or blow its fuse if the socket’s rating is exceeded.
Additionally, these compact units have strict duty cycles—often limited to 10 or 15 minutes of continuous run-time—before requiring a cool-down period. If the compressor gets too hot, its internal thermal switch will automatically cut power to prevent motor damage. Always check your device manual for its specific duty cycle and allow the unit to rest between tires if it feels hot.
Is it safe to inflate tires immediately after a long drive in warm weather?
Inflating tires immediately after a long drive in warm weather is not recommended because friction and ambient heat cause the air inside to expand, resulting in an artificially high pressure reading. If you adjust the pressure to the cold specification while the tires are hot, you will inadvertently under-inflate them once they cool down.
Under-inflated tires suffer from increased rolling resistance, poor handling, and excessive heat buildup. If you must add air to a hot tire due to a low-pressure warning, add approximately 3 to 4 psi (20 to 30 kPa) above the recommended cold specification as a temporary measure, then recheck and adjust the pressure once the tires have cooled completely.
How often should I check my tire pressure with a portable air compressor?
You should check your tire pressure at least once a month and before embarking on long road trips or carrying heavy loads. Tires naturally lose about 1 to 2 psi of pressure per month through microscopic pores in the rubber and temperature fluctuations.
In consistently warm climates like Singapore, high ambient temperatures accelerate this natural pressure loss and increase thermal stress on the rubber. Regular monthly checks ensure your tires remain at their optimal operating pressure, maximizing fuel efficiency, ensuring predictable braking performance, and extending the overall lifespan of the tread.
Community discussion
Share your experience or ask a question. Comments are reviewed before publication.