
A tyre valve opener is a specialized hand tool designed to engage the inner core of a standard Schrader valve, allowing you to safely depress the spring-loaded pin for controlled deflation or unscrew the core entirely for replacement. To use it successfully, you must match the slotted tip of the tool to the valve core’s twin flats, turning counter-clockwise to remove the core or using the reverse end to gently depress the center pin to bleed off excess air. Mastering this tool ensures you can maintain precise tyre pressure and resolve slow leaks caused by faulty valve seals right in your own garage or driveway.
Understanding the Tyre Valve Opener and Safety Precautions
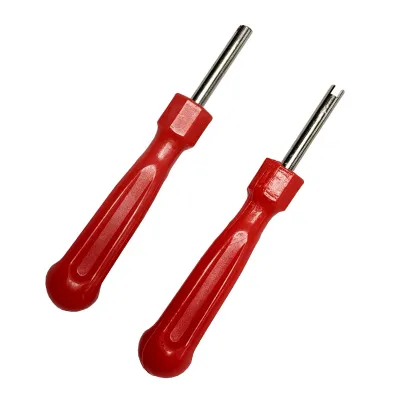
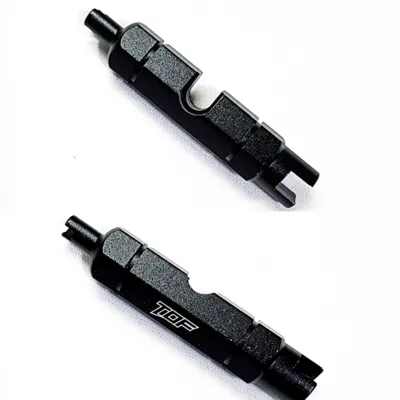
A standard dual-ended tyre valve opener, often referred to as a valve core tool, features two distinct functional ends. The forked or pin-depressing end is designed to slide into the valve stem and push down on the central pin, allowing air to escape smoothly during manual pressure adjustments. The opposite end features a slotted, cylindrical tip designed to slip over the valve core’s metal shoulders, locking into the flats so you can thread the core in or out of the stem.
Working with pressurized pneumatic tyres carries inherent safety risks that require strict adherence to safety boundaries. You must never attempt to unscrew or fully remove a valve core while the tyre is still highly pressurized. Doing so can cause the core to shoot out of the stem like a projectile under extreme force, potentially causing severe eye injury or loss of the component. Always use the pin-depressing end of your tool or a dedicated pressure gauge tip to bleed off the bulk of the air pressure before attempting any core extraction.
Products mentioned in this guide
Prices are valid at publication and may change. Please refer to the product page for the latest price.
Before making any adjustments to your tyre pressure, verify the vehicle manufacturer’s recommended cold tyre pressure specifications. This information is typically located on the tyre information placard on the driver’s door jamb, or within the vehicle’s owner’s manual. Adjusting pressure based on the maximum PSI listed on the tyre sidewall itself is a common mistake; the sidewall figure represents the maximum load capacity limit, not the optimal inflation level for your specific vehicle’s handling, braking, and tyre wear characteristics.
Additionally, you must establish clear stop conditions before proceeding with a DIY repair. Inspect the rubber valve stem thoroughly for signs of dry rot, deep cracking, or weathering, especially in hot, humid climates like Singapore where rubber degrades more rapidly. If you observe cracks, or if soapy water reveals air is bubbling from the base of the stem where it meets the wheel rim, stop immediately. A damaged valve stem cannot be resolved by replacing the inner core; it requires complete tyre dismounting and professional replacement at a qualified tyre workshop.
Tools and Materials Required
To perform these maintenance tasks effectively, assemble a small selection of specialized tools and materials. The primary tool is a high-quality, dual-ended tyre valve opener made of hardened steel to prevent the slotted tip from spreading or stripping under torque. You will also need an accurate digital or dial tyre pressure gauge to monitor your progress, as pencil-style stick gauges can become inaccurate over time due to internal friction and dirt buildup.

For valve core replacement, keep a pack of new, high-quality replacement Schrader valve cores on hand. Ensure these replacement cores match the original specifications of your vehicle; standard passenger cars, motorcycles, and light commercial vehicles almost universally use standard Schrader valves, but verifying compatibility with your vehicle documentation is always recommended.
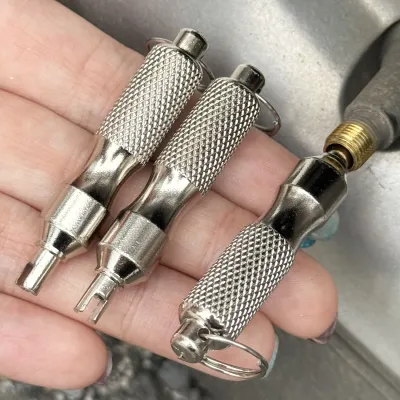
Optional but highly useful items include a dedicated valve core removal tool equipped with a sliding, retractable sleeve. This sleeve holds the core securely during extraction, preventing it from falling into the dirt or rolling away. You should also have a set of clean, threaded valve caps to seal the stem after work is completed, and a small spray bottle filled with a mild soapy water solution to perform leak testing.
Step-by-Step Guide to Adjusting Tyre Pressure
Begin by preparing your vehicle and ensuring the tyres are cold, meaning the car has been parked for at least three hours or driven less than two kilometers. Measuring hot tyres will yield artificially high pressure readings due to the heat generated by road friction. Park on a flat, level surface, engage the parking brake, and remove the plastic or metal valve cap from the tyre stem, placing it in a secure spot like your pocket or a magnetic tray.
Take an initial pressure reading using your digital or dial gauge and compare it directly to the manufacturer’s recommended cold inflation pressure on the door placard. If the reading is higher than recommended—which often happens after professional servicing or seasonal temperature shifts—you will need to use your tyre valve opener to bleed off the excess air.
To deflate the tyre safely, insert the forked end of the tyre valve opener into the center of the valve stem. Gently press the tool inward to depress the central valve pin, which opens the internal seal and allows air to escape. Release the air in short, controlled bursts lasting only a few seconds at a time, rather than holding the valve open continuously, to maintain precise control over the deflation process.
After each brief burst of air release, remove the tool and recheck the pressure with your gauge. This frequent verification prevents over-deflation and saves you from having to connect a portable air compressor to reinflate the tyre. If you do accidentally release too much air, simply connect a reliable tyre inflator to bring the pressure back up to the exact target level.
Once the target pressure is reached, inspect the opening of the valve stem to ensure the pin has fully sprung back into its closed position and is not sticking. Finally, thread the valve cap back onto the stem tightly by hand. The valve cap is not merely cosmetic; it acts as a secondary seal and prevents road grit, dust, moisture, and salt from entering the valve chamber, where debris could otherwise jam the pin open and cause a slow leak.
How to Remove and Replace a Tyre Valve Core
If you suspect a slow leak is originating from the valve core itself, replacing this inexpensive component is a straightforward process. First, completely depressurize the tyre. Use the pin-depressing end of your valve opener or a pressure gauge to bleed out all the air until no more rushing sound is heard and your pressure gauge reads zero. Attempting to unscrew the core while pressure remains inside can cause the core to shoot out violently, damaging the internal threads of the stem or causing personal injury.
Once the tyre is fully deflated, insert the slotted end of the tyre valve opener into the valve stem. Gently press down until you feel the slot engage securely with the two flat shoulders of the valve core. Turn the tool counter-clockwise to begin unscrewing the core. Keep your fingers aligned with the stem to avoid applying lateral pressure, which can bend or snap a brass valve stem. Once fully unthreaded, carefully pull the core straight out of the stem.
With the old core removed, take a moment to inspect the internal threads of the valve stem. Use a clean, dry cotton swab or a blast of compressed air to clear out any accumulated dirt, corrosion, or debris that might prevent the new core from seating properly. Inspect the old core’s rubber seal; if it is flattened, torn, or brittle, it was likely the source of your leak.
To install the new core, insert it gently into the valve stem by hand. Thread it clockwise for the first few turns using your fingers or the tool held lightly between your fingertips to ensure the threads align correctly. This initial hand-threading is crucial to avoid cross-threading, which can permanently ruin the internal threads of the valve stem.
Once the threads have caught, use the slotted end of the tyre valve opener to tighten the core clockwise. Tighten the core firmly but gently; do not overtighten. Excessive force can easily strip the delicate brass threads or crush the small rubber seal on the core, rendering it useless. A snug fit is all that is required to create an airtight seal.
After securing the new core, reinflate the tyre to the manufacturer’s recommended cold pressure using a reliable air compressor. To verify the success of your repair, spray a small amount of soapy water directly into the opening of the valve stem. Watch the area closely for several minutes; if you see expanding bubbles forming, the core is either loose or the seal is improperly seated. If no bubbles appear, the valve is perfectly sealed, and you can reinstall the valve cap.
Troubleshooting Common Valve Issues
If you hear a persistent hissing sound after replacing the valve core, the core may not be seated correctly. First, try tightening the core slightly with your valve opener to see if the leak stops. If the hissing continues, unscrew the core completely and inspect the rubber seal for defects or debris that may have entered during installation. If the seal is damaged, discard it and install a fresh, clean valve core.
Tool slippage during removal is another common issue, particularly on older vehicles where the valve core has corroded inside the stem. If the slots on the old core are stripped or damaged, a standard valve opener may slip and fail to grip. In this scenario, a dedicated extractor tool with a reverse-threaded, tapered tip can be used to bite into the damaged core and back it out. However, if the internal threads of the stem are severely corroded or stripped, the entire valve stem must be replaced.
If you notice air bubbling from the base of the valve stem rather than the center opening during your soapy water test, the issue lies beyond the valve core. This indicates a failure of the rubber grommet or corrosion on the alloy stem where it seals against the wheel rim. This type of leak cannot be fixed with a valve opener or a new core; it requires taking the vehicle to a professional tyre workshop where the tyre can be safely dismounted from the wheel to install a complete new valve stem assembly.
Frequently Asked Questions (FAQ)
Can I use pliers instead of a tyre valve opener?
Using pliers or other makeshift tools to adjust or remove a valve core is highly discouraged. Pliers cannot reach inside the narrow valve stem to grip the core properly, and attempting to force them can easily crush the soft brass stem, strip the delicate internal threads, or bend the central pin. This damage can cause immediate, severe air leaks that cannot be repaired, forcing you to replace the entire valve stem. Always use a properly sized, dedicated tyre valve opener to ensure the components remain undamaged.
How often should tyre valve cores be replaced?
Tyre valve cores do not have a strict replacement schedule based on mileage or time, but they should be inspected regularly. It is best practice to replace the valve cores whenever you install new tyres or have a puncture repaired, as tyre workshops typically include new valves as part of the service. Additionally, replace the core immediately if you notice any signs of corrosion, if the rubber seal appears degraded, or if the valve pin fails to spring back quickly after being depressed.
Why does my tyre keep losing air even with a new valve core?
If your tyre continues to lose pressure after installing a new valve core, the leak is likely located elsewhere on the wheel assembly. Common culprits include a damaged or corroded valve stem base, a slow puncture from a nail or screw embedded in the tread, or a poor seal along the tyre bead where it meets the metal rim. To locate the leak, spray the entire tyre and wheel assembly with soapy water, paying close attention to the tread, sidewalls, and rim edges, or consult a professional tyre technician for a comprehensive inspection.

Community discussion
Share your experience or ask a question. Comments are reviewed before publication.