
Using a tyre tread gauge is the most reliable way to ensure your vehicle remains safe, efficient, and legally compliant on the road. While a quick visual inspection can help you spot severe damage, it cannot provide the precise measurements needed to detect early uneven wear patterns or accurately predict when a replacement is necessary. Regularly measuring your tread depth allows you to catch wheel alignment issues early, optimize fuel economy, and maintain maximum grip on wet surfaces.
To measure your tyre tread depth correctly, you must insert the gauge’s probe into the main tread grooves, press the base flat against the surrounding tread blocks, and take readings across multiple points on each tyre. This process requires a systematic approach to ensure that human error or minor surface debris does not skew your data. By mastering this simple maintenance task, you can make informed decisions about tyre rotations, wheel alignments, and replacements.
Before performing any tyre inspection, it is vital to establish a safe working environment. Park your vehicle on a flat, level surface away from active traffic, turn off the engine, and firmly engage the parking brake. If you discover deep cuts, sidewall bulges, exposed steel cords, or extremely uneven wear during your inspection, do not attempt to drive the vehicle; instead, consult a qualified tyre professional immediately to assess the safety of your tyres.
Products mentioned in this guide
![[MADE IN UK] PCL TDG16C05 TYRE TREAD DEPTH GAUGE 1-26MM](https://img.lazcdn.com/g/p/eec3fc2ed4620f36122374be5f320b5c.jpg_400x400q80.jpg_.webp)
![[SG 🚚] Depth Color Car Tire Tool Measures Gauge Motors Tester Imperial Gage Tyre](https://img.lazcdn.com/g/p/10c9000d599f3d965113a863ec86805f.jpg_400x400q80.jpg_.webp)
![⭐️ [SG SELLER] ⭐️ Depth Color Car Tire Tool Measures Gauge Motors Tester Imperial Gage Tyre Tread](https://img.lazcdn.com/g/p/37b580b78193e70c650628265fb33dff.jpg_400x400q80.jpg_.webp)
Prices are valid at publication and may change. Please refer to the product page for the latest price.
Preparing for the Measurement
Getting accurate readings starts with proper preparation of both your vehicle and your measuring tool. Park on a level surface to prevent weight shifts, engage the parking brake, and turn the steering wheel fully to one side to angle the front tyres outward. This adjustment exposes the entire width of the front tread, allowing you to take measurements easily without raising the vehicle on a jack.
Next, inspect the tread grooves for trapped gravel, stones, or mud. Debris prevents the gauge probe from reaching the bottom of the groove, leading to a falsely shallow reading. Use a small tool or key to gently clear any obstructions from the measurement areas, taking care not to puncture the rubber.
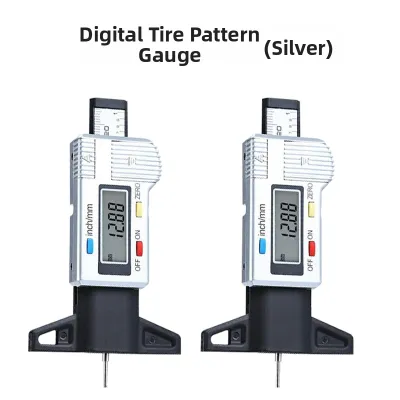
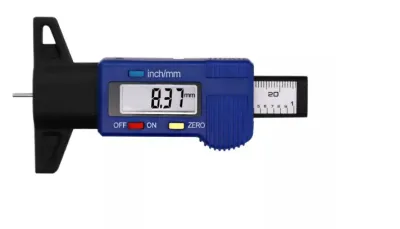
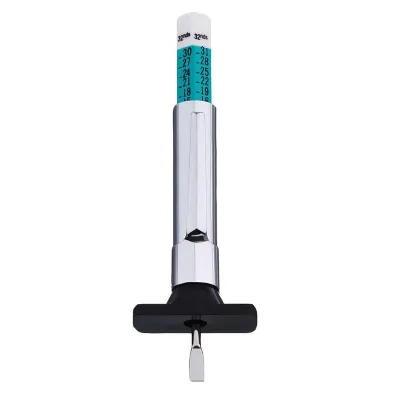
You must also ensure your tyre tread gauge is properly calibrated before you begin. For an analog sliding-scale gauge, push the probe in until it is flush with the base, verifying it aligns with the zero mark. For a digital gauge, turn it on, press the base against a flat surface, push the probe down fully, and press the zero button. These tools are highly accessible, with basic manual gauges often costing under S$10 on online marketplaces, while digital models offer easier readability for a slightly higher price.
Always consult your vehicle’s owner manual to verify the correct tyre specifications, load ratings, and recommended inflation pressures for your specific model and year. Maintaining the correct tyre pressure is essential, as under-inflation or over-inflation directly causes uneven tread wear and can distort your measurements.
Step-by-Step Guide to Measuring Tread Depth
To begin, locate the main tread grooves on your tyre. These are the deep, continuous channels running around the circumference of the tyre designed to disperse water. Avoid placing the gauge probe in smaller lateral sipes, decorative shoulder grooves, or on top of the raised wear bars, as these areas do not represent the primary tread depth.

Hold the gauge firmly by its outer barrel, keeping your fingers clear of the sliding scale or screen. Position the gauge perpendicular to the tyre surface so the probe enters the groove at a ninety-degree angle. Gently lower the probe into the centre of the groove until it makes solid contact with the bottom of the channel.
While keeping the probe in contact with the groove bottom, slide the flat base of the gauge down until it rests completely flush against the tread blocks on either side of the groove. Apply gentle, even downward pressure to ensure there are no gaps between the gauge base and the rubber surface. Avoid pressing too hard, as excessive force can compress the rubber tread blocks or bend the probe, resulting in an inaccurate reading.
Once the gauge is securely in place, read the measurement carefully. If you are using a digital gauge, wait for the reading on the screen to stabilize before recording the number. If you are using an analog gauge, ensure your line of sight is directly perpendicular to the scale. Reading an analog scale from an angle introduces a parallax error, which can cause you to misread the measurement by half a millimetre or more.
Where to Measure on Each Tyre
Tyres rarely wear down in a perfectly uniform manner across their entire surface. To get a complete and accurate picture of your tyre health, you must take measurements at three distinct points across the width of the tread: the inner shoulder, the centre rib, and the outer shoulder. Comparing these three readings helps you identify specific mechanical issues, such as incorrect wheel alignment or improper tyre inflation.
For instance, if the centre of the tread is significantly more worn than the outer edges, your tyres may be over-inflated, causing the middle section to bulge and bear the brunt of the vehicle’s weight. Conversely, if both the inner and outer edges are worn while the centre remains deep, the tyres are likely under-inflated. If you notice heavy wear concentrated on only one edge—either the inner or outer shoulder—it typically indicates a wheel alignment issue, such as incorrect camber or toe, which requires professional adjustment.
In addition to measuring across the width, you should repeat this three-point check at three or four different intervals around the circumference of the tyre. Rotating the tyre slightly or rolling the vehicle forward allows you to check different sections of the tread. This step is crucial for identifying localized flat spots, which can be caused by emergency braking, or cupping wear, which often points to worn suspension components like shock absorbers.
After completing all the measurements for a single tyre, record the lowest reading you obtained. Even if most of the tyre has ample tread, the lowest reading represents the actual safety limit of the tyre. A tyre with a bald inner edge is just as dangerous and legally non-compliant as a tyre that is completely bald across its entire surface, making the lowest measurement your primary decision-making data point.
Interpreting the Readings and Legal Limits
Once you have recorded the lowest tread depth reading for each tyre, you must evaluate these figures against safety standards and local regulations. In Singapore, the legal minimum tread depth for passenger vehicles is 1.6 mm across the entire width of the tread. Driving on tyres with a tread depth below this limit is a serious safety hazard and a legal offense, which can result in fines and vehicle inspection failures.
However, waiting until your tyres reach the legal minimum of 1.6 mm is not recommended for optimal safety. As tyre tread wears down, its ability to disperse water decreases significantly. Industry safety guidelines suggest that tyres approaching 3.0 mm of tread depth experience a noticeable drop in wet-weather performance, leading to longer stopping distances and a much higher risk of aquaplaning on wet roads during heavy downpours.
Use your measurements to plan your tyre maintenance strategy. If your lowest readings are 4.0 mm or deeper and the wear is uniform, your tyres are in good condition; simply continue to monitor them monthly. If the readings are between 3.0 mm and 4.0 mm, you should begin planning for a replacement in the near future, especially if you frequently drive in wet conditions.
If your measurements reveal uneven wear patterns but the overall tread depth is still safe, schedule a professional wheel alignment and tyre rotation. Rotating your tyres according to your vehicle manufacturer’s guidelines helps distribute wear more evenly, extending the lifespan of your tyres. If any measurement falls below 1.6 mm, or if you observe any structural damage, you must replace the affected tyres immediately. Always consult a qualified tyre professional for proper tyre selection, mounting, and balancing to ensure your vehicle remains safe on the road.
Common Measurement Mistakes to Avoid
Achieving consistent and accurate results with a tyre tread gauge requires avoiding several common pitfalls. One of the most frequent mistakes is placing the gauge probe directly on top of the tread wear indicators (TWI) or minor sipes. The TWI bars are raised rubber platforms set at exactly 1.6 mm from the bottom of the groove; measuring on top of them will give you a falsely shallow reading of your remaining tread, leading to premature tyre replacement.
Another common error is holding the gauge at an angle rather than perpendicular to the tyre surface. When the gauge is tilted, the probe travels diagonally through the groove, which artificially inflates the depth reading. Always ensure the flat base of the gauge is resting completely flush on the surrounding tread blocks, and keep the probe aligned straight down into the groove.
Finally, never rely on a single measurement spot to represent the condition of the entire tyre. It is easy to assume that if one section of the tyre looks healthy, the rest of the tyre is in a similar state. However, suspension wear, steering geometry, and braking habits can cause dramatic differences in wear across different parts of the same tyre. Skipping the multi-point check can leave you unaware of a dangerously worn inner edge that is hidden from plain view.
Frequently Asked Questions (FAQ)
How often should I check my tyre tread depth?
You should check your tyre tread depth at least once a month and before any long road trips. Regular monthly checks allow you to monitor the rate of wear and catch alignment issues before they ruin your tyres. If you frequently drive on rough roads, carry heavy loads, or drive in hot climates, your tyres may wear down faster, making more frequent bi-weekly inspections a wise habit.
Can I rely on the built-in tread wear indicators instead of a gauge?
While built-in tread wear indicators (TWI) are helpful visual cues, they are not a substitute for a tyre tread gauge. The TWI bars only become flush with the tread blocks when the tyre has already reached the absolute legal limit of 1.6 mm, which is too late for proactive safety planning. A gauge allows you to measure precise wear rates, detect uneven wear early, and replace your tyres before their wet-weather performance drops dangerously.

Community discussion
Share your experience or ask a question. Comments are reviewed before publication.