
Maintaining proper tyre tread is one of the most critical aspects of vehicle safety, directly affecting how your car handles wet roads and stops in emergencies. To get an accurate reading, you must place the gauge’s base flat against the tyre tread block, extend the measuring pin into the groove without resting it on a wear indicator, and take multiple measurements across the tyre’s width and circumference. This simple routine helps you monitor tyre health, maximize fuel efficiency, and identify alignment issues before they become costly repairs.
Why Accurate Tread Depth Measurement Matters
The tread on your tyres is the only point of contact between your vehicle and the road. This contact patch is responsible for maintaining grip, transferring braking force, and dispersing water. When tread depth decreases, the tyre’s ability to perform these essential functions drops significantly.
In tropical climates with sudden, heavy downpours, such as Singapore, wet grip is of paramount importance. Tyre tread grooves act as channels to evacuate water from beneath the rubber. If the tread is too shallow, water cannot escape fast enough, causing a layer of water to build up between the tyre and the road surface. This leads to hydroplaning, where the vehicle loses steering control and braking capability entirely.
Products mentioned in this guide
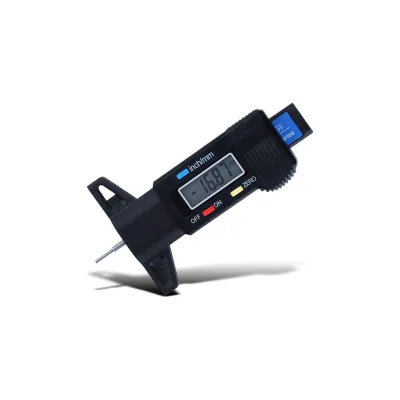

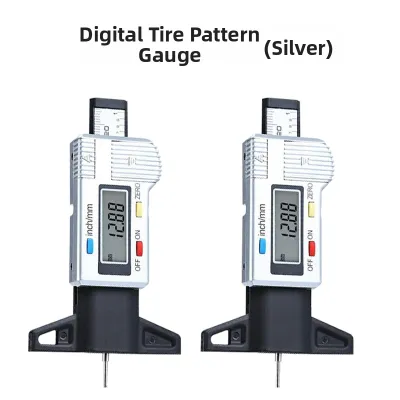
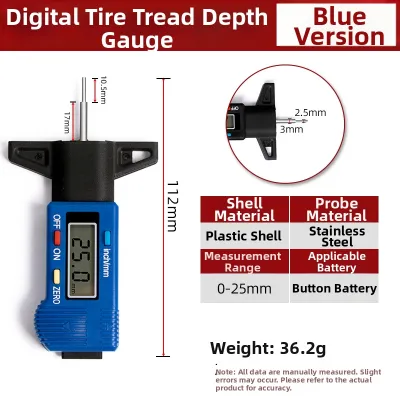
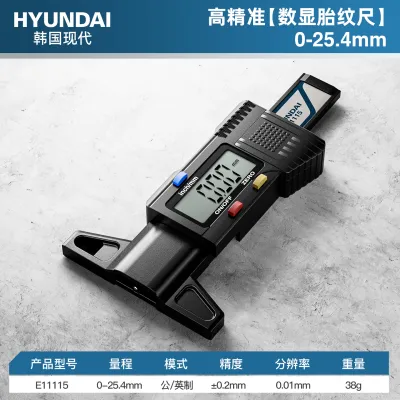
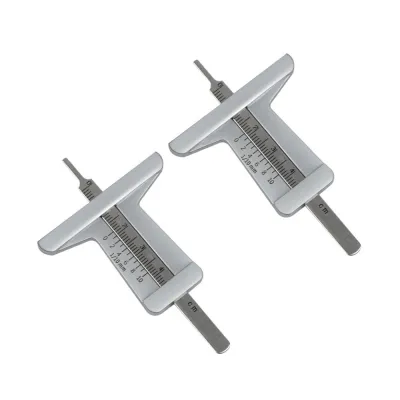
Prices are valid at publication and may change. Please refer to the product page for the latest price.
Braking distance is also directly tied to tread depth. As the rubber wears down, the distance required to bring your vehicle to a complete stop increases, particularly on wet asphalt. Regular measurements allow you to track this wear progress and plan replacements before your stopping distance compromises your safety on the road.
Beyond immediate safety, monitoring tread depth helps you detect early signs of mechanical issues. Tyres that wear unevenly often point to underlying suspension problems, worn steering components, or incorrect wheel alignment. By identifying these patterns early through regular gauge measurements, you can address the root cause before it ruins a brand-new set of tyres.
Finally, keeping track of your tread depth ensures compliance with local transport regulations. Most jurisdictions mandate a minimum legal tread depth of 1.6mm across the central three-quarters of the tread width. Driving on tyres below this limit is illegal, risks heavy fines, and invalidates insurance coverage in the event of an accident.
Choosing and Preparing Your Tyre Depth Gauge
Selecting the right tool is the first step toward achieving consistent and reliable measurements. Tyre depth gauges generally fall into two categories: digital and mechanical. Both are highly portable and affordable, but they offer different user experiences.

Digital tyre depth gauges feature an electronic LCD screen that displays precise measurements, often down to two decimal places in millimeters. They are incredibly easy to read and usually include a zeroing button, allowing you to calibrate the tool on a flat surface before each use. The main trade-off is their reliance on small button batteries, which can run out over time.
Mechanical gauges, which include dial gauges and sliding-pin pocket gauges, are favored for their simplicity and durability. They require no batteries and can withstand being tossed into a glovebox or tool kit without risk of electronic failure. Reading a mechanical gauge requires a bit more care, as you must align the indicator line with the printed scale on the barrel or dial, which can be difficult in low-light conditions.
Before performing any tyre inspections or adjustments, ensure the vehicle is parked safely on a flat, level surface with the parking brake fully engaged and the engine switched off. For any tyre replacements, wheel alignments, or suspension repairs, always consult a qualified professional technician to ensure the work is carried out safely and in accordance with original-vehicle manufacturer specifications.
To make the front tyres easier to access, turn the steering wheel fully to one side. This exposes the entire width of the tread, giving you ample room to position the gauge. For the rear tyres, you will need to work within the wheel arch or roll the vehicle forward slightly to access different sections of the tread.
Next, inspect the tread grooves and clear away any debris. Small stones, gravel, twigs, or packed mud frequently lodge themselves in the tread pattern. If the probe of your gauge lands on a piece of debris instead of the bottom of the groove, it will record an artificially shallow reading. Use a small, non-sharp tool to gently clear these obstructions before measuring.
Lastly, locate the Tread Wear Indicators (TWI) on your tyres. These are small, raised rubber bars situated at the bottom of the main tread grooves, measuring exactly 1.6mm in height. You can find their locations by looking for small triangles, arrows, or the letters “TWI” molded into the tyre’s outer sidewall. Identifying these indicators is crucial because you must avoid placing your gauge probe directly on top of them during your measurements.
Step-by-Step Technique for Accurate Readings
Achieving an accurate measurement requires a systematic approach. A single hasty reading can easily lead to incorrect assumptions about your tyre’s remaining lifespan. Follow this step-by-step technique to ensure your data is reliable.
First, calibrate your gauge. If you are using a digital model, turn it on and press the flat base of the gauge against a hard, completely flat surface, such as a clean pane of glass or a smooth metal sheet. Press the zero button to establish a baseline. For mechanical sliding-pin gauges, push the pin all the way down until the base is flush, and verify that the scale reads exactly zero.
Next, position the gauge over the chosen tread groove. Hold the body of the gauge firmly, ensuring that the base rests flat across the raised tread blocks on either side of the groove. It is vital to keep the gauge perfectly perpendicular to the tyre surface. If you tilt the gauge even slightly, the measuring pin will enter the groove at an angle, resulting in a longer travel distance and an inaccurate, deeper reading.
Gently push the measuring pin down into the groove until it makes light contact with the bottom of the tyre channel. Do not apply excessive force, as pushing too hard can compress the rubber at the bottom of the groove or flex the gauge base, skewing the measurement.
Once the pin is fully extended, carefully read the measurement. If using a digital gauge, you can read the screen while the tool is in place. If using a mechanical sliding-pin gauge, carefully lift the tool straight up off the tyre, taking care not to bump or slide the pin, and read the value indicated on the scale.
To get a complete assessment of the tyre’s condition, implement the three-point measurement rule. For each tyre, take measurements at three distinct points across the width of the tread: the inner shoulder, the center rib, and the outer shoulder. This cross-sectional mapping is the only way to detect uneven wear patterns that indicate alignment or inflation issues.
In addition to measuring across the width, you should take measurements at multiple points around the circumference of the tyre. Roll the vehicle forward or backward slightly to access different sections of the tyre loop, taking readings at three separate intervals. Calculate the average of these readings to determine the overall remaining tread life, but always use the lowest individual measurement to make safety and replacement decisions.
Interpreting Your Results and Identifying Wear Patterns
Once you have collected your measurements, the next step is to interpret the numbers and translate them into actionable maintenance decisions. Understanding what the measurements mean is key to keeping your vehicle safe and running efficiently.
If your measurements show a consistent tread depth of 4mm or more across all areas, your tyres are in good condition and require only routine monitoring. If the depth falls between 3mm and 4mm, the tyre’s wet-weather performance is beginning to decline, and you should start planning for a replacement in the near future.
When the tread depth drops to 2mm or below, the tyre is approaching the end of its safe service life. At this stage, the rubber has very little capacity to disperse water, dramatically increasing the risk of hydroplaning. If any part of the tread measures 1.6mm or less, the tyre has reached the legal limit and must be replaced immediately.
Discrepancies between your three-point measurements across the tyre width reveal specific mechanical issues. If the center of the tread is significantly more worn than the outer shoulders, the tyre is over-inflated. The high internal pressure causes the center of the tyre to bulge outward, carrying the majority of the vehicle’s weight and wearing down prematurely.
Conversely, if both the inner and outer shoulders are worn down while the center remains deep, the tyre is under-inflated. The lack of air pressure causes the center of the tread to sag, shifting the vehicle’s weight to the outer edges.
If only one side of the tyre is heavily worn, your vehicle’s wheel alignment is likely out of specification. This is often caused by incorrect camber or toe settings, which drag the tyre sideways as you drive.
Scalloped dips or diagonal wear patterns across the tread suggest worn suspension components, such as shock absorbers or struts, which allow the wheel to bounce excessively on the road.
If you identify any of these uneven wear patterns, check and adjust your tyre pressures to the manufacturer’s recommended levels immediately. If the pattern persists, schedule a professional wheel alignment and suspension inspection. For tyres that have reached the legal limit or show signs of structural damage, consult a qualified tyre specialist to arrange for a replacement.
Common Measurement Mistakes and How to Avoid Them
Even with a high-quality gauge, minor errors in technique can lead to highly inaccurate readings, potentially masking dangerous wear. Being aware of these common pitfalls will help you maintain the highest standards of safety.
One of the most frequent mistakes is resting the gauge’s measuring pin directly on top of the raised Tread Wear Indicators (TWI). Because these wear bars are molded 1.6mm above the bottom of the groove, placing the pin on them will make your tread appear 1.6mm shallower than it actually is. Always ensure the pin lands on the true bottom of the groove, away from these indicators.
Another common error is failing to keep the gauge perfectly vertical. Holding the tool at an angle creates a diagonal path for the measuring pin, which artificially inflates the depth reading. To avoid this, use both hands if necessary to steady the gauge base flat against the tread blocks before extending the pin.
Relying on a single measurement spot is also a major pitfall. It is tempting to take one quick reading from the easily accessible outer edge of a front tyre and assume the entire tyre is in the same condition. However, severe inner-edge wear can go completely unnoticed until the tyre suffers a sudden failure. Always commit to the three-point, multi-location method for every tyre on your vehicle.
Frequently Asked Questions (FAQ)
How often should I check my tyre tread depth?
You should perform a quick visual inspection of your tyres weekly and a precise measurement using a tyre depth gauge at least once a month. It is also wise to check your tread depth before embarking on long road trips, after driving over severe potholes or road debris, or when entering seasons with frequent heavy rainfall. Regular checks help you catch alignment and inflation issues early, extending the lifespan of your tyres.
Can I use a coin instead of a dedicated tyre depth gauge?
While a coin test can serve as a quick, rough estimate in an emergency, it is not a reliable substitute for a dedicated tyre depth gauge. Coins do not provide numerical measurements, making it impossible to track wear rates over time or detect subtle differences across the tread width. To accurately diagnose alignment issues and ensure your vehicle remains safe and road-legal, investing in a dedicated digital or mechanical tyre depth gauge is highly recommended.

Community discussion
Share your experience or ask a question. Comments are reviewed before publication.