
Maintaining the correct tyre pressure is one of the simplest yet most critical aspects of vehicle maintenance, directly affecting your safety, fuel economy, and tyre longevity. For drivers in Singapore, where high ambient temperatures and sudden tropical downpours are the norm, keeping tyres properly inflated is even more essential. A reliable air compressor portable unit allows you to check and adjust your tyre pressure at home, in a multi-storey car park, or on the roadside without having to rely on petrol station air pumps, which are often crowded or poorly calibrated.
Always consult your vehicle’s owner’s manual and the specific tyre manufacturer’s guidelines before adjusting tyre pressures or operating electrical equipment on your car. Understanding how to operate your portable compressor safely ensures your vehicle remains roadworthy and performs optimally under all driving conditions.
Why Correct Tyre Pressure Matters for Singapore Driving
Under-inflation is a primary cause of tyre failure and premature wear. When a tyre lacks sufficient air, its contact patch with the road distorts, causing the outer shoulders of the tread to wear down much faster than the center. This distortion increases rolling resistance, which forces your engine to work harder and consume more fuel. More dangerously, under-inflation causes excessive flexing of the tyre sidewalls, generating high internal heat. In Singapore’s hot tropical climate, where asphalt temperatures can climb significantly during midday, this heat buildup accelerates rubber degradation and dramatically increases the risk of a sudden blowout on expressways like the PIE or KPE.
Products mentioned in this guide
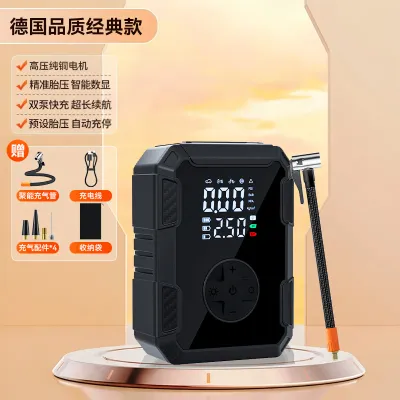
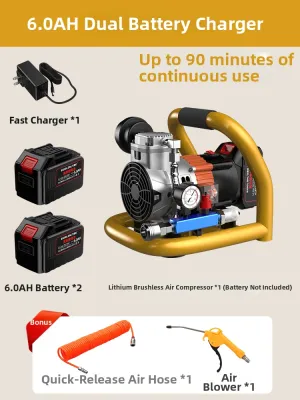
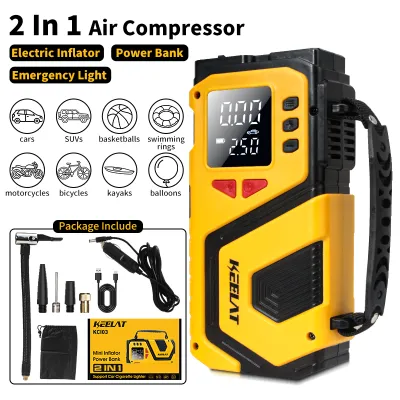
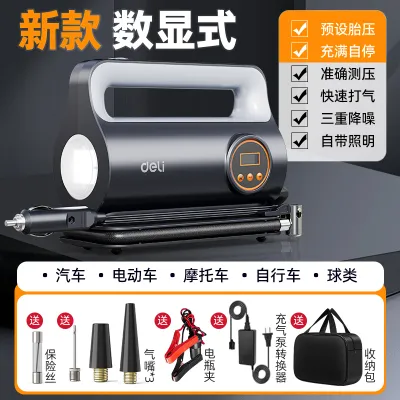
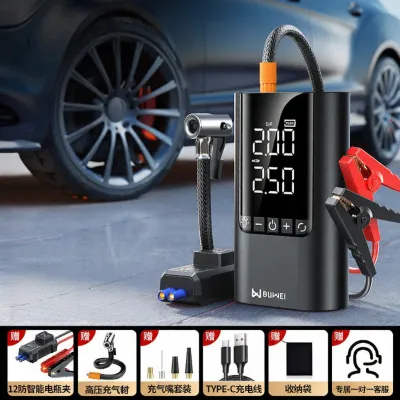

Prices are valid at publication and may change. Please refer to the product page for the latest price.
Conversely, over-inflation is equally problematic. When you overfill a tyre, it balloons slightly, causing the center of the tread to bulge. This reduces the size of the tyre’s contact patch with the road surface, leading to a harsher ride, uneven center wear, and compromised traction. Reduced grip is particularly dangerous during heavy afternoon monsoonal downpours, where a smaller contact patch increases the risk of aquaplaning—a dangerous phenomenon where the tyre loses contact with the road and glides on a thin film of water, leaving you with zero steering or braking control.
Regularly checking your tyre pressure ensures that your vehicle’s handling, braking, and cornering capabilities remain at their designed safety thresholds. Properly inflated tyres distribute the vehicle’s weight evenly across the tread pattern, allowing the tyre to grip the road effectively and channel water away through its grooves during wet weather. By investing a few minutes each month to verify and adjust your pressures, you protect your safety, improve fuel efficiency, and extend the lifespan of your tyres.
What You Need Before You Start
To properly manage your tyre maintenance, you should assemble a few basic tools. The centerpiece of your kit is a quality air compressor portable device, which typically comes in two configurations: a 12V DC model that plugs into your car’s accessory socket (cigarette lighter) or a cordless, rechargeable lithium-ion battery-operated unit. While many modern portable compressors feature built-in digital pressure gauges, it is highly recommended to keep a separate, high-quality standalone digital or dial tyre pressure gauge to verify readings. A simple tread depth gauge is also a useful addition to monitor overall tyre wear.

Before taking any measurements, you must ensure your tyres are “cold.” Tyre pressure specifications provided by car manufacturers are always calculated for cold tyres. In practical terms, this means the vehicle should have been parked for at least three hours, or driven for less than two kilometres at low speed. Driving generates friction and heat, which causes the air inside the tyres to expand, temporarily raising the pressure reading by 3 to 5 PSI. If you measure hot tyres, you will get an artificially high reading, which can lead to under-inflation once the tyres cool down.
Additionally, try to park your car in a shaded area, such as a multi-storey car park or under a shelter. Direct, intense sunlight hitting one side of the car can heat those specific tyres, leading to artificially elevated and uneven pressure readings on that side of the vehicle. Ensuring the car is parked on a flat, level surface is also important for safety and ease of access to all four wheels.
Step-by-Step Guide to Checking and Inflating Your Tyres
Step 1: Locate the Recommended Tyre Pressure
Before connecting any equipment, you must find the exact manufacturer-recommended tyre pressure for your vehicle. This specification is unique to your car’s make, model, weight distribution, and original tyre size. You can find this information on the tyre placard, which is typically a durable sticker located on the driver’s side B-pillar (visible when you open the driver’s door), inside the fuel filler flap, or detailed within the vehicle owner’s manual.
It is a common and dangerous mistake to read the pressure number printed on the tyre’s sidewall and use that as your target. The number on the sidewall—often labeled as “Max Press”—indicates the maximum cold inflation pressure the tyre is structurally designed to withstand at its maximum load capacity. It is not the correct operating pressure determined by your car’s manufacturer. Inflating your tyres to this maximum limit will result in a dangerously harsh ride, severely reduced grip, and accelerated suspension wear.
Additionally, pay close attention to the placard details. Many vehicles require different pressures for the front and rear tyres due to weight distribution differences, such as having a heavy engine up front. The placard may also list different recommended pressures based on passenger load or whether you plan to drive at sustained high speeds.
Step 2: Prepare the Portable Air Compressor
Once you know your target pressure, prepare your portable compressor. If you are using a 12V plug-in model, unravel the power cable and insert the plug firmly into your car’s 12V accessory socket. It is crucial to start your car’s engine before turning on the compressor. Portable air compressors draw a significant amount of electrical current; running one solely on battery power with the engine off can quickly drain your car’s 12V battery, leaving you stranded. If you are using a cordless, battery-powered compressor, ensure it has a full charge before starting, as inflating multiple tyres from a low state of charge requires substantial energy.
For digital compressors, turn the unit on and use the interface buttons to set your target pressure. Most digital units allow you to toggle between different units of measurement, such as PSI (pounds per square inch), kPa (kilopascals), or Bar; ensure you select the unit that matches your vehicle’s placard (PSI is most common in Singapore). Set the auto-shutoff feature to your exact target pressure.
If you are using an analog compressor, there will be no auto-shutoff. You will need to carefully study the dial gauge, identifying the small hash marks so you can manually switch off the compressor once the needle reaches the desired level. Ensure the compressor hose is completely uncoiled and free of kinks before proceeding.
Step 3: Attach the Chuck and Check Current Pressure
Park your vehicle on a flat, level surface and engage the electronic parking brake or handbrake. Locate the valve stem on your first tyre, unscrew the plastic or metal valve cap, and place it in a secure location, such as your pocket or the car’s cup holder, to prevent it from rolling away. Dirt and debris can easily enter an uncapped valve stem, leading to slow leaks later on.
Take the air chuck—the nozzle at the end of the compressor’s air hose—and press it firmly and straight onto the tyre’s valve stem. If your compressor uses a thumb-lock chuck, press it down and flip the lever to lock it in place; if it is a screw-on chuck, thread it clockwise until it is tight. You will likely hear a brief “hiss” of escaping air as you attach the chuck. This is completely normal, but the hissing must stop once the chuck is fully secured and sealed.
Once attached, look at the compressor’s display or your standalone gauge to read the current baseline pressure. This reading tells you exactly how much air needs to be added or released. If the reading matches your target pressure, you do not need to add air; simply remove the chuck and replace the valve cap.
Step 4: Inflate or Deflate to the Target Pressure
With the chuck securely attached and the engine running (for 12V models), turn on the compressor’s power switch. The unit will begin to vibrate and make a loud humming noise as it pumps air. If you are using a digital model with an auto-shutoff feature, the compressor will run until it detects that the target pressure has been reached, at which point it will stop automatically. Keep in mind that the pressure reading displayed while the compressor is actively running may appear slightly higher than the actual pressure due to the flow of air; a quality digital unit will briefly pause or compensate for this to ensure accuracy.
If you are operating an analog compressor, you must monitor the gauge constantly. Because the air flowing from the pump artificially inflates the gauge reading, you should periodically turn off the compressor for a few seconds to let the air pressure stabilize, allowing you to read the true static pressure on the dial. Continue this cycle of running and pausing until the needle rests exactly on your target PSI.
If you accidentally over-inflate the tyre, do not panic. Most portable compressors feature a small bleed valve button near the chuck; press this button to release excess air. Alternatively, you can use a small tool or the tip of a pen to gently depress the center pin (Schrader valve core) inside the valve stem to let air escape. Once the exact target pressure is reached, quickly unlock or unscrew the chuck to minimize air loss, and immediately screw the valve cap back on tightly. Repeat this process for the remaining three tyres.
Common Mistakes to Avoid When Using a Portable Compressor
Adjusting pressure on hot tyres is one of the most frequent errors drivers make. If you have just finished a long drive on the expressway, your tyres will be hot, and the air inside will have expanded. If you adjust the pressure to the placard’s cold specification while the tyres are hot, you will actually under-inflate them. Once the tyres cool down overnight, the pressure will drop below the safe recommended limit. Always wait for the tyres to cool, or add 3 to 4 PSI above the cold recommendation if you absolutely must adjust them while hot, and recheck them when cold.
Another common mistake is ignoring the duty cycle of your portable air compressor. Small portable units are not designed for continuous operation; they generate a massive amount of heat internally. Most consumer-grade compressors have a duty cycle of 10 to 15 minutes, meaning they need to rest and cool down for an equivalent period after running. If you are inflating multiple tyres from a very low pressure, or if the compressor body becomes too hot to touch, switch it off and let it cool down to prevent internal seals from melting and damaging the motor.
Additionally, do not rely solely on the auto-shutoff feature of your compressor without verifying the results. Built-in digital sensors can drift or lose calibration over time due to the vibrations of the pump. It is always wise to double-check the final pressure of each tyre using a dedicated, high-quality standalone pressure gauge. This extra step ensures that you do not drive on incorrectly inflated tyres due to an equipment error.
Finally, do not forget to check your spare tyre. If your vehicle is equipped with a spare tyre (either a full-sized spare or a temporary space-saver “donut”), it should be checked and inflated regularly. Temporary space-saver tyres typically require much higher pressures—often around 60 PSI—than standard tyres. A flat spare tyre is useless in an emergency, so make it a habit to check its pressure whenever you inspect your main tyres.
When to Stop and Seek Professional Help
While a portable air compressor is an excellent tool for regular maintenance and minor top-ups, there are situations where you must stop and seek professional automotive assistance. If you find that a tyre is losing pressure rapidly—for example, if you inflate it to the correct PSI and it drops significantly within a few hours or a day—there is likely a puncture, a faulty valve stem, or a leaking bead seal. Do not attempt to keep driving and repeatedly inflating the tyre; take it to a professional tyre workshop for a proper inspection and repair.
If a tyre has gone completely flat and you notice that the rubber bead has separated from the metal wheel rim, a portable compressor will not be able to help. Reseating a tyre bead requires a massive, rapid volume of air that only commercial-grade workshop compressors can provide. Attempting to inflate a tyre with an unseated bead using a small portable unit is futile and can damage the tyre sidewall or the compressor itself.
Lastly, always perform a visual inspection of your tyres while checking the pressure. If you spot any physical damage, such as bulges or bubbles in the sidewall (which indicate broken internal cords), deep cuts that expose the underlying fabric or steel belts, or uneven wear that exposes the tread wear indicators, do not attempt to inflate or drive on the tyre. These conditions represent severe structural compromises that can lead to catastrophic tyre failure. In such cases, replace the tyre with your spare or call a professional mobile tyre recovery service to assist you safely.
Frequently Asked Questions (FAQ)
Can I use a portable air compressor on a completely flat tyre?
If the tyre is flat but still properly seated on the wheel rim and has no structural damage, you can use a portable compressor to inflate it. However, if the tyre has completely de-beaded (separated from the metal rim), a portable unit lacks the high volume of air flow required to pop the bead back into place. Additionally, driving on a completely flat tyre even for a short distance can ruin the internal sidewall structure, making it unsafe to inflate. If you suspect the tyre was driven on while flat, have a professional inspect it internally before attempting inflation.
How often should I check my tyre pressure?
It is highly recommended to check your tyre pressure at least once a month, as well as before any long road trips (such as driving up north across the Causeway). Tyres naturally lose about 1 to 2 PSI of pressure per month through natural permeation of the rubber. Visual inspections are highly unreliable; a tyre can lose up to 10% to 15% of its pressure before it begins to look visibly low to the naked eye. Regular monthly checks with a reliable gauge are the only way to ensure optimal safety and efficiency.
Do I need to adjust tyre pressure for heavy loads or highway driving?
Yes, you often need to adjust your tyre pressure when carrying heavy loads or embarking on sustained high-speed highway driving. When a vehicle is fully loaded with passengers and luggage, the extra weight increases the load on the tyres, requiring higher inflation pressure to maintain the correct contact patch and prevent sidewall overheating. Always refer to your vehicle’s tyre placard or owner’s manual, which typically provides specific, higher PSI recommendations for fully loaded conditions or high-speed driving.

Community discussion
Share your experience or ask a question. Comments are reviewed before publication.