
Using a car polish machine is one of the most effective ways to restore the deep, glossy shine of your vehicle’s paintwork. By mechanically leveling the microscopic top layer of your clear coat, a machine polisher removes fine scratches, swirl marks, oxidation, and water spots that hand polishing cannot easily fix. However, operating a machine polisher requires a systematic approach, careful preparation, and the right techniques to avoid damaging the paint. Whether you are looking to refresh a daily driver or prepare a vehicle for a high-end sealant, following a structured, step-by-step process helps achieve professional-grade results while protecting your vehicle’s delicate clear coat.
Gather Your Polishing Tools and Materials
Before beginning any paint correction work, assembling the correct equipment and consumables is essential for a safe and effective process. The primary tool is the machine polisher itself. For enthusiasts and those new to paint correction, a dual-action (DA) polisher is highly recommended. Dual-action machines spin and oscillate simultaneously, which distributes heat evenly and significantly reduces the risk of burning through the clear coat. In contrast, rotary polishers spin on a single axis and cut paint very quickly, making them powerful tools that require professional training to avoid holograms, buffer trails, and paint damage.
Your choice of polishing pads and liquid compounds directly determines the aggressiveness of the correction. Polishing pads generally fall into three categories: cutting pads, polishing pads, and finishing pads. Cutting pads, often made of dense foam, microfiber, or wool, are designed to remove deeper scratches and heavy oxidation when paired with a high-abrasive cutting compound. Polishing pads feature medium-density foam and are paired with medium-cut polishes to eliminate light swirls and restore paint clarity. Finishing pads are made of very soft, open-cell foam and are used with ultra-fine finishing polishes or glazes to maximize gloss and depth.
Products mentioned in this guide
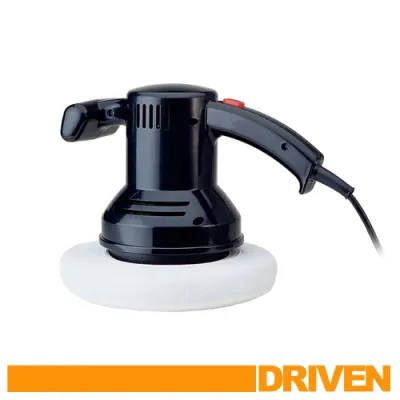
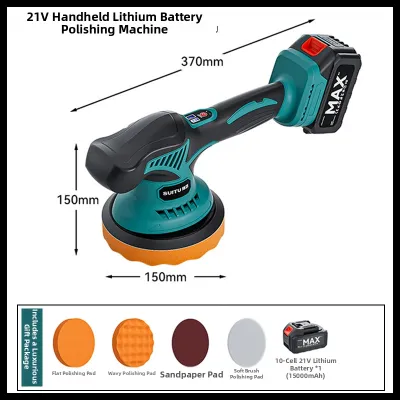
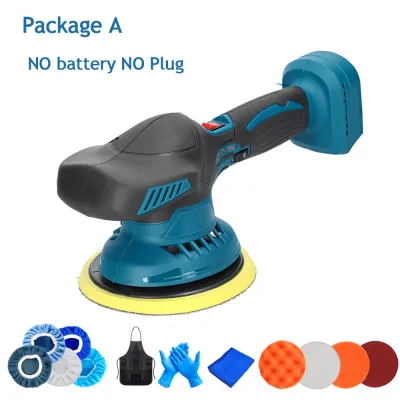
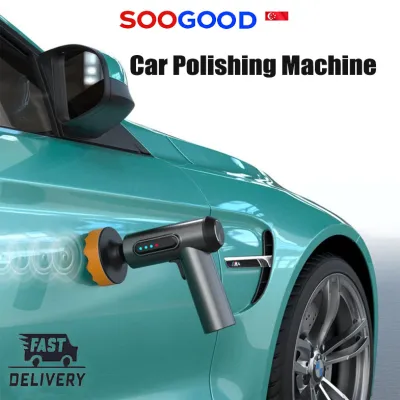
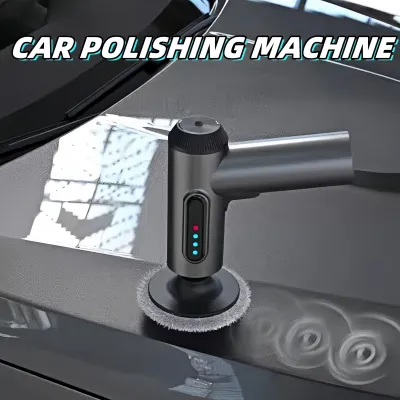

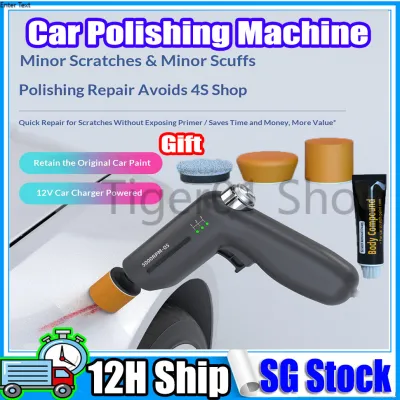
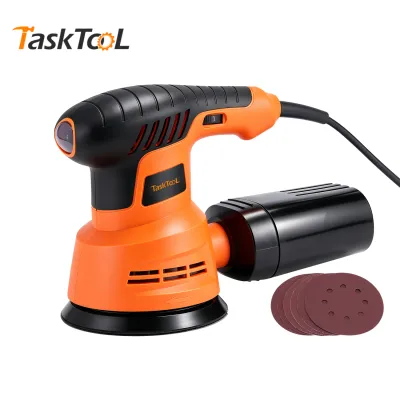
Prices are valid at publication and may change. Please refer to the product page for the latest price.
In addition to the machine and pads, you will need preparation and cleanup supplies to ensure a clean working environment. Gather a pH-neutral car wash soap, a clay bar or synthetic decontamination mitt, a dedicated clay lubricant, and a generous supply of clean, high-quality microfiber towels. Look for edgeless microfiber towels with a weight of at least 300 grams per square meter (GSM) to prevent scratching the freshly polished paint. Finally, obtain a roll of high-quality automotive masking tape to protect sensitive trim pieces and rubber seals from the spinning pad.
Prepare and Decontaminate the Paint Surface
The foundation of any successful paint correction is a thoroughly clean and decontaminated surface. Any dirt, dust, or road grit left on the paint will be picked up by the spinning polishing pad and dragged across the clear coat, inflicting deep, unsightly scratches. Begin by washing the vehicle thoroughly using the two-bucket method to minimize wash-induced swirls. Use a dedicated car wash soap that does not contain waxes or gloss enhancers, as these additives can leave a film that interferes with the polishing process. Once washed, dry the vehicle completely using a clean, plush microfiber drying towel or a dedicated automotive air blower, paying close attention to crevices where trapped water might drip out and dilute your polish.

After washing, the paint may still feel rough to the touch due to bonded contaminants like industrial fallout, brake dust, tree sap, and road tar. To remove these stubborn particles, perform a mechanical decontamination using a clay bar or a synthetic clay mitt. Spray a generous amount of dedicated clay lubricant onto a small section of a panel, then gently glide the clay back and forth over the lubricated area using light hand pressure. Periodically wipe the residue with a clean microfiber towel and feel the paint with your hand; it should feel smooth, like glass, before you move on to the next section.
The final preparation step is protecting the non-paint surfaces of your vehicle. Use automotive masking tape to cover all plastic trim, rubber window seals, chrome accents, washer nozzles, and unpainted panel edges. Polishing pads spinning at high speeds can easily burn or discolor textured plastics and melt rubber seals, leaving white stains or physical damage that is extremely difficult to restore. Taping these areas also prevents polishing dust and residue from getting trapped in tight crevices, saving you significant cleanup time later.
Choose the Correct Pad and Polish Combination
Selecting the right combination of pad and polish is a critical decision that depends entirely on your vehicle’s paint hardness and the severity of the defects. Because clear coat thickness and hardness vary widely between different vehicle manufacturers and models, there is no single combination that works for every car. To find the most effective and safest setup, you must perform a test spot on an inconspicuous, flat area of the vehicle, such as a lower door panel or the trunk lid, measuring approximately 40 by 40 centimeters.
Always follow the detailing rule of starting with the least aggressive combination first. For example, begin your test spot with a medium-density foam polishing pad and a fine finishing polish. Apply the product and complete a standard set of passes, then wipe away the residue to inspect the results under a bright detailing light. If this mild combination successfully removes the swirl marks and restores the desired level of gloss, you can proceed to use this setup across the entire vehicle, preserving as much of your clear coat as possible.
If the mild combination fails to remove the defects, you will need to adjust your approach. Step up to a slightly more aggressive setup, such as a firmer cutting pad with a medium-cut polish, and perform another test spot adjacent to the first one. If you must use a heavy cutting compound and a dense cutting pad to remove deep scratches, be prepared for the possibility that this aggressive step may leave a slight haze or micro-marring on the paint. In such cases, you will need to plan for a two-step correction process, following the heavy cut with a secondary finishing step using a soft foam pad and a fine polish to restore excellent clarity and depth.
Operate the Car Polish Machine Safely
Proper machine operation is key to achieving a high-gloss finish while ensuring the safety of your vehicle’s paint. Before turning on the machine, you must prime the polishing pad to ensure even product distribution and prevent dry buffing. For a fresh foam pad, apply four to five pea-sized drops of polish around the face of the pad. If you are using a microfiber pad, spread a thin, even layer of polish across the entire surface of the fibers to ensure complete coverage. Place the face of the pad flat against the paint surface before turning the power switch on; this simple step prevents the polish from slinging onto surrounding panels and your clothing.
Once the machine is running, adjust the speed dial according to the product label instructions. For most dual-action polishers, a moderate speed setting of 3 or 4 is ideal for polishing and finishing, while a speed of 5 is typically used for cutting and defect removal. Hold the machine firmly with both hands, keeping the pad perfectly flat against the paint surface. Move the machine slowly across the panel at a consistent arm speed of about two to five centimeters per second, applying only light, even downward pressure. Let the mechanical action of the machine and the abrasive qualities of the polish do the work; pressing down too hard can stall the rotation of a dual-action pad, rendering the correction ineffective.
Work in small, manageable sections of approximately 40 by 40 centimeters at a time. Guide the machine in an overlapping cross-hatch pattern, moving first horizontally from left to right, and then vertically from top to bottom. Ensure each pass overlaps the previous one by about fifty percent to guarantee uniform paint correction across the entire section. Complete four to six passes over the section, which is generally the time it takes for the polish to break down, become translucent, and do its job.
After completing the passes in a section, turn off the machine while the pad is still resting against the paint to prevent product sling. Lift the machine and immediately wipe away the remaining polish residue using a clean, dry microfiber towel. Use light pressure and a slow, sweeping motion to avoid scratching the freshly corrected paint. Inspect the section carefully using a dedicated detailing light or direct sunlight to verify that the defects have been corrected to your satisfaction before moving on to the adjacent section of the panel.
Wipe Down and Apply Paint Protection
Once the entire vehicle has been polished, the paint will look incredibly glossy, but the job is not yet complete. Polishing compounds contain oils, lubricants, and solvents that remain on the paint surface even after wiping with a microfiber towel. These residual oils can fill in minor remaining defects, giving a false impression of complete correction, and they will prevent protective coatings from bonding properly to the clear coat. To reveal the true state of the paint and prepare it for protection, spray a dedicated isopropyl alcohol (IPA) prep spray or a professional panel wipe onto the surface and gently wipe it clean with a fresh, high-quality microfiber towel.
With the paint completely bare and clean, you must apply a protective layer to seal the surface and preserve your hard work. Without protection, the exposed clear coat will quickly oxidize and become vulnerable to environmental damage from UV rays, bird droppings, acid rain, and road grime. You can choose from several types of paint protection depending on your desired durability, maintenance habits, and application environment. High-quality synthetic paint sealants offer excellent durability and ease of application, while ceramic spray coatings provide superior water beading, chemical resistance, and long-lasting protection.
Apply your chosen protection product strictly according to the manufacturer’s instructions on the label. For most synthetic sealants and ceramic sprays, this involves applying a small amount of product to a foam or microfiber applicator pad, spreading it evenly over a panel in a cross-hatch pattern, and waiting for the product to “flash” or form a light haze. Once the flashing time has elapsed—which can vary from a few seconds to several minutes depending on local temperature and humidity—buff the residue off with a clean, plush microfiber towel. Ensure the vehicle remains parked in a dry, dust-free environment out of direct sunlight for the recommended curing period to allow the protective layer to bond fully to the paint.
Avoid Common Mistakes and Recognize When to Stop
Machine polishing is a highly rewarding process, but it carries inherent risks if you push past the physical limits of your vehicle’s paint. One of the most common mistakes is failing to recognize the signs of clear coat failure. If you observe a dull, chalky appearance that does not improve with polishing, or if you see the clear coat beginning to peel or flake away, the paint has failed and cannot be corrected by machine polishing; such areas require professional repainting. Additionally, watch out for edge burn-through, which occurs when the clear coat is completely worn away, exposing the dull base coat underneath. This is a permanent mistake that can only be fixed by a professional body shop.
To prevent paint damage, exercise extreme caution around sharp body lines, raised panel edges, and deep crevices. Paint is naturally thinnest on these raised areas, and the concentrated friction and pressure from a spinning pad can burn through the clear coat in a matter of seconds. Keep the machine moving constantly, avoid lingering on edges, and consider polishing these delicate areas by hand or using a smaller, dedicated spot-polishing machine. Be equally cautious on panels that have been previously repainted, as aftermarket clear coats can vary significantly in hardness and thickness compared to the original factory finish.
Knowing when to stop is the hallmark of a safe and skilled detailer. Before attempting to remove a deep scratch, perform the fingernail test: gently run your fingernail across the scratch. If your nail catches in the groove, the scratch has penetrated through the clear coat and into the base coat or primer. Attempting to polish this scratch out completely will likely result in burning through the surrounding clear coat. In these situations, the safest approach is to accept a minor cosmetic compromise—polishing the area lightly to round off the sharp edges of the scratch and reduce its visibility—rather than risking permanent damage to the paint. If you are unsure about the safety of a correction, always stop and consult a qualified professional detailer.
Frequently Asked Questions (FAQ)
Can I use a car polish machine on matte or satin paint finishes?
No, you should never use an abrasive car polish machine or any abrasive compounds on matte or satin paint finishes. Matte and satin finishes achieve their unique, non-reflective look through a textured clear coat that scatters light. Using a machine polisher with abrasive polishes will level this textured surface, permanently flattening the finish and creating shiny, glossy spots that ruin the uniform appearance of the paint. To maintain matte or satin finishes, use only non-abrasive, dedicated matte cleaners, detail sprays, and specialty matte protectants designed to clean the surface without adding gloss.
How often should I machine polish my car?
Machine polishing should only be performed when visible paint defects, such as swirl marks, scratches, or heavy oxidation, require correction, rather than as a routine maintenance task. Every time you use an abrasive polish and a machine, you remove a microscopic layer of the vehicle’s clear coat. Because factory clear coats are extremely thin, excessive machine polishing over time can thin the clear coat to the point of failure, leaving the paint vulnerable to UV damage and peeling. For routine maintenance, focus on safe washing techniques and regular applications of non-abrasive waxes, sealants, or ceramic coatings to protect the paint without removing any clear coat material.

Community discussion
Share your experience or ask a question. Comments are reviewed before publication.