
Setting up your iPhone on a MagSafe car mount for navigation requires a careful combination of compatible hardware, secure physical installation, and proper software configuration. By aligning your device with a dedicated magnetic mount, you can achieve a stable, highly visible display that keeps your hands free and your eyes on the road. This guide walks you through verifying your equipment, choosing a legal mounting position, installing the hardware safely, and optimizing your iOS settings for a seamless driving experience.
Checking iPhone, Case, and Mount Compatibility
Before purchasing or installing a magnetic car mount, verify that your iPhone model natively supports MagSafe technology. Apple integrated this magnetic array into the iPhone 12 series and all subsequent models. If you are using an older iPhone model, you will need an external MagSafe-compatible ring adapter or a specialized case designed to mimic the magnetic alignment, though native support offers the most reliable connection.
Next, inspect your protective phone case. Standard plastic, leather, or silicone cases without built-in magnetic rings significantly weaken the magnetic pull, increasing the risk of your phone slipping off during sudden stops or sharp turns. Investing S$30 to S$60 in a certified MagSafe case is a practical way to ensure your phone remains secure on the road. Look for cases explicitly labeled as MagSafe-compatible, which feature an integrated magnetic ring that passes the magnetic force directly from the mount to the phone’s internal array.
Products mentioned in this guide

![[NEW] UGREEN Vacuum Magnetic Car Phone Holder 360° Rotation Super Strong Suction Magnets for iPhone 17 16 15 Pro Max Samsung 25 Ultra](https://img.lazcdn.com/g/p/a144f1587d9890f2cf2e5935003fa97e.jpg_400x400q80.jpg_.webp)
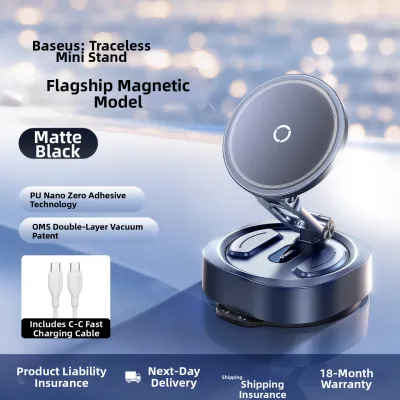
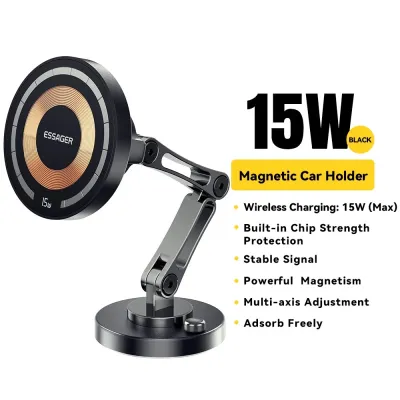


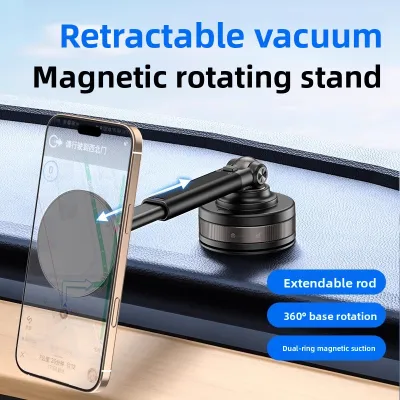
Prices are valid at publication and may change. Please refer to the product page for the latest price.
Finally, examine the specifications of your chosen car mount. Review the manufacturer’s packaging or user manual to confirm the maximum weight limit it can support. This is particularly important if you use larger, heavier phone models, such as the Pro Max series. Ensure the mount features a high-quality magnetic surface with alignment indicators that match the circular shape of your iPhone’s internal magnets.
Choosing a Safe and Legal Mounting Location
Selecting where to place your mount involves balancing driver visibility, physical accessibility, and local traffic regulations. Begin by evaluating your vehicle’s dashboard and windshield sightlines. The mounted phone must not obstruct your direct view of the road, side mirrors, or the vehicle’s primary instrument cluster.

Consult your vehicle owner’s manual and local traffic laws regarding device placement. In Singapore, the Land Transport Authority outlines strict guidelines regarding driver visibility; any device that blocks your direct view of the road can result in a fine. Additionally, identify the deployment zones for all cabin airbags, typically marked with “SRS Airbag” logos on the dashboard, steering wheel, and side pillars. Never place a mount or route a cable across these deployment paths, as a deploying airbag can turn a mounted phone into a dangerous projectile.
If you plan to use an air vent mount, assess the structural design of your vehicle’s vent louvers. Some vehicles feature delicate, circular, or deeply recessed vent blades that cannot safely support the weight of a mounted phone. Ensure your vent blades are sturdy, horizontal or vertical, and capable of clamping tightly without bending or cracking under pressure.
Installing the MagSafe Mount in Your Vehicle
The installation process varies depending on whether your mount uses a suction cup, an adhesive pad, or a vent clip. For suction cup or adhesive-based dashboard mounts, preparing the mounting surface is critical for long-term adhesion. Clean the target area thoroughly using a mild soap solution or a cleaning agent recommended by your vehicle’s manufacturer for dashboard plastics. Avoid harsh chemicals that could degrade the dashboard material or leave a slippery residue. Allow the surface to dry completely before proceeding.
When applying an adhesive mount, press the base firmly against the cleaned surface for the duration specified in the product manual. Most high-strength adhesives, such as those using acrylic foam tape, require a curing period of 24 hours to reach maximum bonding strength. Avoid attaching your phone or applying any weight to the mount during this curing window, as premature loading can cause the adhesive to fail.
For vent clip mounts, insert the clip gently onto a stable vent blade. Many modern vent mounts feature a tightening nut or a dual-stage lever to adjust the clamping force. Tighten the mechanism gradually until the mount is secure, but avoid over-tightening, which can warp or snap the plastic louvers. If the mount includes a stabilizing kickstand or hook, position it against the lower frame of the vent to distribute the weight of the phone more evenly.
Attaching Your iPhone and Configuring Navigation
Once the mount is securely installed, bring your iPhone close to the magnetic face of the mount. You should feel a distinct magnetic pull that automatically aligns the phone’s internal ring with the mount. Ensure the phone snaps flat against the mounting surface; any gap or misalignment will drastically reduce the holding power.
Adjust the mount’s ball joint or pivot mechanism to position the screen at an optimal viewing angle. Tilt the screen slightly away from direct sunlight to minimize glare, ensuring you can read the navigation map with a quick glance. Once you find the ideal angle, tighten the collar or locking ring on the ball joint to prevent the phone from drooping when driving over uneven surfaces.
Before setting off, configure your iPhone’s software settings to minimize visual and cognitive distractions. Enable the Driving Focus mode within your iOS settings, which can automatically silence incoming notifications and send auto-replies to contacts while you are driving. Open your preferred navigation application, such as Apple Maps or Google Maps, and configure the voice-guided prompts to play through your vehicle’s Bluetooth audio system or the phone’s internal speaker. This allows you to follow turn-by-turn directions without constantly looking down at the screen.
Verifying Stability and Making Safety Adjustments
Before driving on public roads, perform a physical stability check of your entire setup. Give the mounted iPhone a gentle tug to verify that both the magnetic connection and the mount’s base attachment are secure. If the mount wobbles or shifts, re-tighten the vent clip, suction lever, or ball joint before starting your journey.
Observe the screen from your normal driving position under different lighting conditions. If you notice severe reflections from the side windows or windshield, adjust the tilt of the mount slightly. It is safer to make these adjustments while parked rather than attempting to reposition the screen while navigating active traffic.
If you plan to charge your phone while navigating, route the charging cable carefully. Ensure the cable has enough slack to accommodate steering wheel movements and does not drape over the gear shifter, handbrake, or climate controls. Use adhesive cable clips along the dashboard trim to keep the wire tidy and prevent it from snagging on your hands or feet while operating the vehicle.
Troubleshooting Grip, Heat, and Charging Issues
If your iPhone slips or falls from the mount, the primary cause is usually an incompatible protective case or accumulated debris. Remove your phone case and test the magnetic grip directly against the bare phone. If the grip improves significantly, replace your case with a certified MagSafe-compatible alternative. Additionally, wipe down both the back of your phone case and the face of the mount with a dry microfiber cloth to remove dust, oils, or grit that can reduce friction.
Using GPS navigation while simultaneously charging your phone generates substantial heat, which can be exacerbated by direct sunlight hitting the dashboard. If your iPhone screen dims or navigation performance stutters, the device may be experiencing thermal throttling. To manage this, adjust your vehicle’s air conditioning vents to direct cool air toward the back of the phone, or temporarily unplug the charging cable until the device cools down.
Intermittent wireless charging is often caused by physical misalignment or excessive vehicle vibration. Ensure your phone is centered perfectly on the mount’s magnetic ring. If you are using a wireless charging mount, verify that your car’s USB power adapter provides the minimum wattage specified by the mount manufacturer—typically at least 15W to 20W—to maintain a stable power delivery.
Frequently Asked Questions (FAQ)
Can I use a standard silicone case with a MagSafe car mount?
Using a standard silicone case without an integrated magnetic ring is not recommended for car mounts. While the magnets may feel slightly attracted through a very thin case, the physical barrier significantly reduces the magnetic holding force. Road vibrations, speed bumps, and sudden braking can easily dislodge the phone, causing it to fall and create a dangerous distraction while driving. Always use a dedicated MagSafe case or mount the bare phone directly.
Will the MagSafe mount damage my car's air vents?
A properly installed vent mount should not damage your vehicle’s air vents, provided you follow the manufacturer’s instructions. However, risks arise if you over-tighten the clamping mechanism or use a heavy phone on fragile, thin plastic louvers. Before installation, inspect your vent blades to ensure they are rigid and do not show signs of wear. If your vents feel flimsy, consider using a dashboard adhesive or suction mount instead to protect your vehicle’s interior.

Community discussion
Share your experience or ask a question. Comments are reviewed before publication.