
Using a portable tire inflator is one of the most convenient ways to maintain optimal tire pressure, ensuring your vehicle remains safe, fuel-efficient, and responsive on the road. Among the various portable compressors available, Fanttik smart inflators have gained popularity for their compact designs, digital accuracy, and automated features. Properly operating these devices requires a clear understanding of your vehicle’s specifications, correct connection techniques, and safety protocols to prevent damage to your tires or the inflator itself.
Maintaining correct tire pressure is particularly critical when navigating diverse driving conditions, from daily urban commutes to high-speed expressway journeys. Under-inflated tires increase rolling resistance, which accelerates tread wear and increases fuel consumption. Conversely, over-inflated tires reduce the contact patch with the road surface, compromising traction and ride comfort. By mastering the use of your portable inflator, you can easily perform routine checks and top-ups at home or on the go, avoiding unnecessary trips to service stations.
Preparation and Safety Checks Before Inflation
Before connecting your Fanttik inflator to any tire, you must determine the correct inflation pressure specified for your vehicle. This recommended value is determined by the vehicle manufacturer and is typically located on a placard pasted inside the driver’s side door jamb, or detailed within the vehicle owner’s manual. Never use the “Max Press” (maximum pressure) rating molded onto the tire’s sidewall. This sidewall number represents the maximum pressure the tire can safely hold under maximum load, not the optimal operating pressure for your specific vehicle’s suspension, weight distribution, and handling characteristics.
Products mentioned in this guide

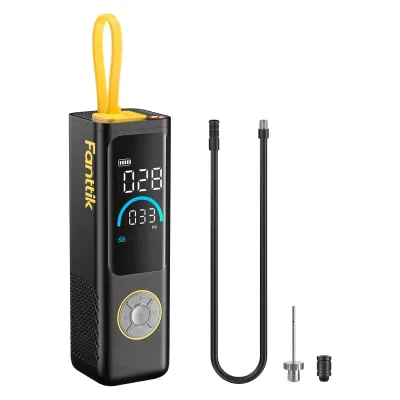




Prices are valid at publication and may change. Please refer to the product page for the latest price.
Equipment readiness is the next critical step in your preparation checklist. Ensure your portable inflator has sufficient battery charge before starting the process, especially if you are using a cordless model. If you are using a hybrid or corded model that relies on your vehicle’s power, locate the 12V auxiliary power outlet (cigarette lighter socket) and ensure the power cable is free of kinks or fraying. Running out of battery mid-inflation can leave you with an unbalanced tire, so keeping the unit charged above fifty percent is highly recommended for routine maintenance.
A thorough visual inspection of each tire is essential before you attempt to add air. Scan the tread and sidewalls for deep cuts, bulges, exposed cords, or embedded objects like nails and screws. If you identify any structural damage or suspect a puncture, do not attempt to inflate the tire. Adding pressurized air to a structurally compromised tire can cause a sudden failure or blowout. In such scenarios, consult a professional tire technician or arrange for a mobile recovery service to assess or patch the tire safely.
For the most accurate readings, always measure and adjust tire pressure when the tires are “cold.” Tires are considered cold when the vehicle has been parked for at least three hours, or if it has been driven for less than 1.6 kilometers (one mile) at moderate speeds. Driving generates friction, which heats the air inside the tires and causes it to expand, temporarily raising the internal pressure reading. If you adjust your tire pressure immediately after a long drive, you will likely get an artificially high reading, leading to under-inflation once the tires cool down to ambient temperatures.
Step-by-Step Guide to Checking and Topping Up Tire Pressure
Once you have completed your initial safety checks and confirmed your target pressure, you can begin the inflation process. Follow these sequential steps to ensure a secure connection, accurate readings, and safe operation.

- Step 1: Connect the Hose: Begin by unscrewing the dust cap from the tire's valve stem and placing it in a secure spot, such as your pocket or the car's cup holder, so it does not get lost. Take the air hose of your Fanttik inflator and connect it to the valve stem. Depending on the specific model you own, the hose will feature either a screw-on brass connector or a quick-release thumb-lock clamp. For screw-on connectors, turn the collar clockwise until it is snug; for clamp-on connectors, push the nozzle firmly onto the valve stem and flip the lever down to lock it in place. You may hear a brief hiss of escaping air as you make the connection, which is normal, but the sound should stop completely once the connector is fully secured.
- Step 2: Read Current Pressure: Press and hold the power button on your device to turn it on. The digital LCD or LED screen will boot up and display the real-time pressure of the connected tire. Take note of this initial reading and compare it with the manufacturer's recommended cold pressure you identified earlier. This step serves as your baseline diagnostic check, helping you track how much air your tires lose over time and allowing you to identify if one particular tire is losing pressure significantly faster than the others, which often indicates a slow puncture.
- Step 3: Set Target Pressure: Use the control interface on your device to set your desired target pressure. This is typically done by pressing the plus (+) or minus (-) buttons until the target value on the screen matches your vehicle's recommended specification. If your device is currently set to a preset mode, you may need to switch it to manual mode to input a custom value, especially if your vehicle requires specific front and rear tire pressures that differ from standard presets. Double-check that the unit of measurement displayed on the screen matches the unit you are targeting.
- Step 4: Start Inflation: With the target pressure set, press the power or start button once to initiate the compressor. The motor will begin running, and you will see the real-time pressure reading on the screen gradually rise. While Fanttik inflators are designed to operate automatically, you should always remain near the device during the inflation process to monitor its progress. Pay attention to the physical temperature of the hose, as air compression naturally generates heat. Avoid touching the brass connector or the lower portion of the hose during or immediately after operation, as these areas can become hot to the touch.
- Step 5: Disconnect and Seal: The inflator will automatically stop running once the real-time pressure matches your pre-programmed target value. Once the motor shuts off, quickly disconnect the hose from the valve stem to minimize any minor air loss. If you are using a screw-on connector, unscrew it swiftly; if using a quick-release clamp, flip the lever up and pull the nozzle away in one clean motion. Immediately thread the valve stem cap back onto the tire valve, tightening it finger-tight to keep road grime, water, and debris out of the valve core. Repeat this entire sequence for the remaining three tires, and do not forget to check your spare tire if your vehicle is equipped with one, as spare tires naturally lose pressure over time and are often overlooked.
Navigating Preset Modes and Manual Settings on Fanttik Inflators
Understanding the digital interface of your Fanttik inflator allows you to utilize its smart features safely and efficiently. Most models come equipped with multiple operating modes designed to simplify the inflation process for different types of inflatables, alongside manual customization options.
The primary operating modes typically include dedicated presets for cars, motorcycles, bicycles, and sports equipment like basketballs. Each preset mode comes with a pre-programmed default pressure value and a restricted adjustment range suitable for that specific application. For example, the car preset is optimized for standard passenger vehicle pressures, while the ball preset is limited to much lower pressures to prevent over-inflation. Manual mode, often represented by a custom user icon or no icon at all, removes these boundaries, allowing you to set any pressure within the device’s maximum operating limits.
The automatic shutoff function is one of the most valuable safety features integrated into these smart devices. When the internal sensor detects that the pressure inside the tire has reached the target value you programmed, it cuts power to the compressor motor instantly. This prevents the risk of over-inflation, which can weaken the tire’s internal structure or cause a dangerous rupture. However, this feature relies entirely on a clear, unobstructed connection between the hose and the valve stem, reinforcing the importance of ensuring a tight seal during setup.
Switching between different pressure units is straightforward but essential for matching your vehicle’s documentation. Most Fanttik models allow you to toggle between PSI, Bar, kPa, and kilograms per square centimeter (kg/cm²) by long-pressing or short-pressing a dedicated cycle button (often labeled with a circular arrow or “U” for unit). If your vehicle’s door jamb sticker lists the recommended pressure in Bar or kPa, switching the device to match those units eliminates the need for manual conversions, reducing the risk of mathematical errors.
Because interface layouts, button sequences, and screen icons vary across different product lines—such as the X8, X8 Apex, X9, and Cross series—always consult the user manual supplied with your specific model. Some models utilize a physical dial for pressure adjustments, while others rely entirely on tactile buttons. Familiarizing yourself with your specific device’s controls before you find yourself stranded on the side of the road ensures a stress-free experience when you need to use it in an emergency.
Post-Inflation Verification and Proper Storage
Once all tires have been topped up and sealed, performing a few post-inflation checks and storing your device correctly will ensure both your vehicle’s safety and the long-term reliability of your equipment.
While modern portable inflators feature highly accurate digital sensors, it is excellent practice to verify the final pressure using a separate, high-quality, calibrated manual tire pressure gauge. This double-check helps identify any potential calibration drift in your inflator’s internal sensor over time. If you notice a persistent discrepancy of more than 1.5 to 2 PSI between the two devices, it may be time to have your gauges checked or recalibrated to ensure you are not driving on incorrectly inflated tires.
After disconnecting the inflator hose, pay close attention to the valve stems. If you hear a faint, high-pitched hissing sound, it indicates that the valve core inside the stem may be sticking or failing to seal properly. You can verify this by applying a small amount of soapy water or saliva to the opening of the valve stem. If bubbles begin to form and expand, air is actively escaping. In this situation, you may need to use a valve core tool to tighten the core, or visit a professional tire shop to have the valve core replaced.
Proper maintenance of the inflator itself begins immediately after use. Allow the hose and brass connectors to cool down completely before handling them extensively. Once cool, wipe down the exterior of the unit, the hose, and the connectors with a clean, dry microfiber cloth to remove any accumulated road dust, sand, or moisture. Ensure that no debris enters the air inlet or outlet ports before placing the device back into its protective sleeve or carrying case.
Storage conditions play a massive role in preserving the life of the internal lithium-ion battery. Store your Fanttik inflator in a cool, dry place out of direct sunlight. While it is tempting to keep the device in your car’s glove compartment or trunk for constant availability, you must exercise caution in tropical climates like Singapore’s, where parked vehicles can experience extreme cabin temperatures. Prolonged exposure to temperatures exceeding 45 degrees Celsius can rapidly degrade lithium-ion batteries, reducing their capacity, shortening their overall lifespan, and in extreme cases, posing a safety hazard. If you must keep it in your vehicle, store it in the coolest possible spot, such as under a seat or inside a well-insulated roadside emergency kit.
To maintain battery health over long periods of inactivity, establish a regular maintenance schedule. Lithium-ion batteries naturally discharge slowly even when the device is powered off. Check the battery level indicator every three to six months and top up the charge to approximately eighty percent if it has dropped significantly. Keeping the battery partially charged during long-term storage prevents deep discharge states, which can permanently damage the battery cells and render the device unable to hold a charge when you need it most.
Troubleshooting Common Inflation Issues
Even with high-quality equipment, you may occasionally encounter minor operational challenges. Understanding how to troubleshoot these common issues can save you time and prevent unnecessary frustration.
- Issue: Inflator turns off prematurely before reaching target pressure: If your device shuts down suddenly while actively inflating, the most common culprit is the built-in thermal protection mechanism. Compressing air generates substantial heat, and to protect the internal motor and battery from permanent damage, the device will automatically shut off if it exceeds safe operating temperatures. If this occurs, disconnect the device from the tire, place it in a shaded area, and allow it to cool down completely for 10 to 15 minutes before attempting to resume inflation.
- Issue: Air leaking from the hose connection: If you hear air escaping rapidly from the connection point while inflating, turn off the device immediately. Disconnect the hose from the valve stem and inspect the connection threads or clamp mechanism. Ensure the hose is aligned straight with the valve stem; cross-threading a screw-on connector can prevent a proper seal and damage the threads. Additionally, peer inside the connector nozzle to verify that the small rubber O-ring is present, clean, and free of cracks. If the O-ring is missing or damaged, it must be replaced to restore an airtight seal.
- Issue: Device won't turn on: If your portable inflator fails to power on, first check the battery charge level by plugging it into a verified power source. If you are using a model powered by your vehicle's 12V DC outlet, ensure that your car's ignition is switched to the "accessory" or "on" position, as many vehicles cut power to auxiliary outlets when the engine is off. If the outlet has power but the device still fails to respond, inspect the inline fuse located inside the tip of the 12V charging adapter. If the fuse wire is broken or charred, replace it with a fuse of the exact same amperage rating as specified in your user manual.

Community discussion
Share your experience or ask a question. Comments are reviewed before publication.