
Keeping a motorcycle clean is not just about aesthetics; it is a fundamental part of preventative maintenance. Road grime, salt, brake dust, and chain fling can quickly degrade delicate finishes and mechanical components if left unchecked. To tackle these diverse surfaces safely, a single rag or a generic sponge is simply not enough. Every motorcycle owner needs a dedicated set of cleaning brushes tailored to the unique materials and tight clearances of a two-wheeled machine.
A complete motorcycle maintenance kit should feature four primary categories of brushes: specialized wheel brushes, heavy-duty drivetrain brushes, precision detailing brushes, and ultra-soft bodywork tools. Using the wrong brush on a delicate surface can cause permanent scratches, while using a paint-safe brush on a greasy chain will ruin the tool and cross-contaminate your bike’s bodywork. By understanding how to select and use these specialized tools, you can preserve your motorcycle’s appearance and ensure its mechanical longevity.
How to Evaluate and Choose Motorcycle Cleaning Brushes
Selecting the right motorcycle cleaning brush requires looking beyond the price tag and examining the physical characteristics of the tool. The first factor to assess is bristle stiffness and material compatibility. Soft, flagged nylon bristles are ideal for painted fairings and clear-coated surfaces because they lift dirt without scratching. Conversely, stiff, unflagged synthetic bristles are necessary for scrubbing away stubborn road tar, chain grease, and engine grime from metal components.
Products mentioned in this guide
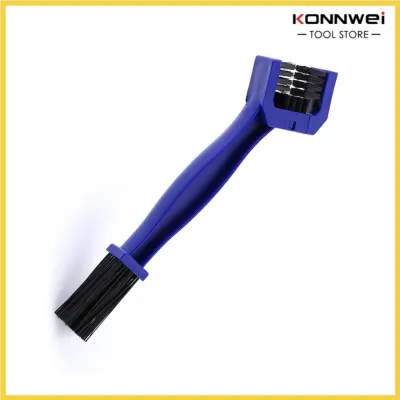
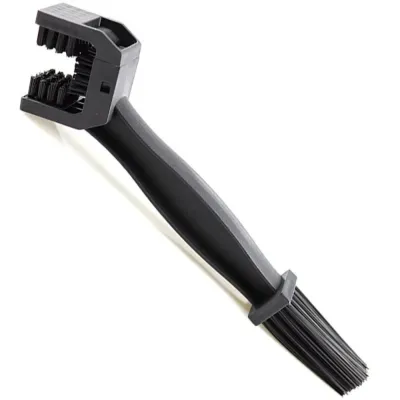
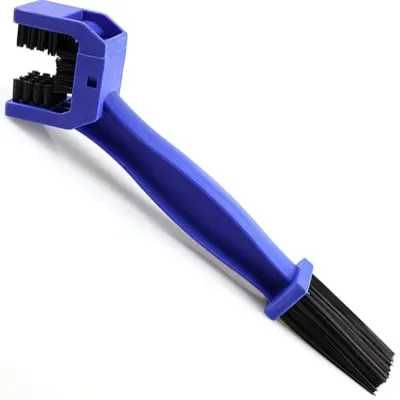
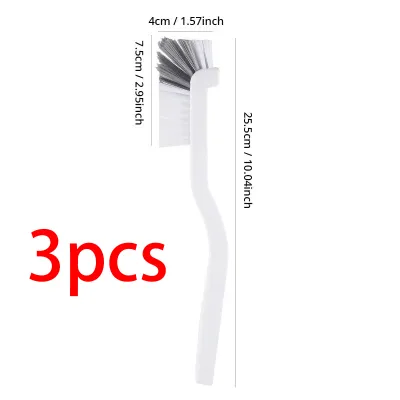
Prices are valid at publication and may change. Please refer to the product page for the latest price.
Handle ergonomics and grip quality are equally critical, especially when working in wet, soapy conditions. Look for brushes with rubberized, textured grips or ergonomic contours that prevent the tool from slipping out of your hands. A secure grip not only reduces hand fatigue during long cleaning sessions but also prevents accidental impacts where a hard plastic handle might strike and chip a painted surface.
Chemical resistance is another vital consideration for any maintenance tool. Motorcycle cleaning often involves aggressive degreasers, solvent-based chain cleaners, and acidic wheel cleaners. Ensure that both the brush handle and the bristles are rated to withstand these chemicals without softening, melting, or shedding bristles. High-density polyethylene (HDPE) or polypropylene handles generally offer excellent resistance to common garage solvents.
Finally, you must consider the physical size and profile of the brushes. Motorcycles are packed with intricate mechanical assemblies, tight clearances, and recessed areas. A brush that is too bulky will fail to reach the deep recesses of the engine or the inner barrel of the wheels, while a brush with exposed metal ferrules or hard plastic edges poses a constant scratching hazard to adjacent components.
Selecting Wheel, Spoke, and Brake Caliper Brushes
Wheels and braking systems accumulate some of the most stubborn contaminants on a motorcycle, including baked-on brake dust, road grime, and flung chain lube. Cleaning these areas requires brushes that can navigate complex geometries without damaging delicate finishes. Look for angled and tapered bristle designs, such as cone-shaped or cylindrical spoke brushes, which can easily slide between tight spoke patterns and behind brake rotors.

When evaluating bristle types for wheels, prioritize soft-tipped or flagged bristles. Many modern motorcycles feature alloy, painted, powder-coated, or highly polished wheel surfaces that scratch easily under stiff, abrasive bristles. Flagged bristles have split ends that create a softer contact patch, allowing them to safely agitate brake dust while holding onto soapy water to provide lubrication.
For sport, touring, or adventure motorcycles with wide rims and deep wheel barrels, long-handled barrel brushes are indispensable. These tools allow you to reach all the way across the wheel rim from one side, ensuring you do not have to squeeze your hands into tight, sharp spaces near the brake calipers or sprocket. A long, flexible shaft can also be bent slightly to clean around obstacles.
Before purchasing any wheel brush, verify its dimensions against your motorcycle’s specific clearances. Measure the gaps between your brake calipers and the wheel rim, as well as the spacing between your spokes. A brush that is too thick will get wedged in these gaps, potentially damaging the brake pad retaining clips or scratching the paint when you try to force it through.
Choosing Chain and Drivetrain Cleaning Brushes
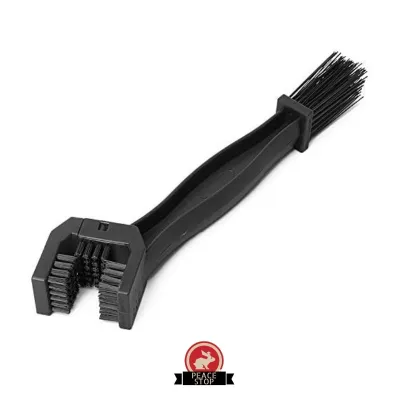
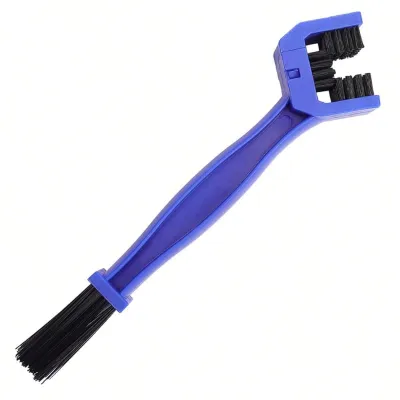
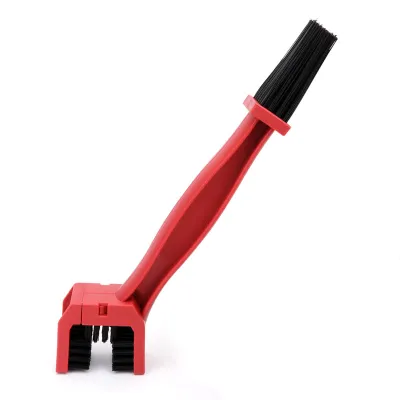
The motorcycle drivetrain is a magnet for heavy grease, road grit, and sticky chain wax. Cleaning this area requires specialized, heavy-duty brushes that can break down thick deposits without damaging the delicate sealing rings inside the chain. Look for three-sided or wrap-around brush designs, often referred to as multi-sided chain brushes, which allow you to scrub the top, bottom, and sides of the chain links simultaneously.
The bristles on a chain brush must be exceptionally stiff and durable to agitate stubborn road tar and dried chain lube. Nylon bristles with a high density are standard, as they provide the mechanical scrubbing power needed to clear out grit from between the inner and outer plates. However, ensure these bristles are not so abrasive that they tear or degrade the rubber O-rings, X-rings, or Z-rings that keep factory grease sealed inside the chain links.
Sprockets require a different approach than the chain itself. Select sprocket-specific brushes that feature narrow profiles and long, stiff bristles designed to clean deep between the teeth of both the rear and countershaft sprockets. Some chain brushes feature a multi-sided head on one end and a long, single-sided crescent brush on the other, making them highly versatile dual-purpose tools.
Always check the material compatibility of your drivetrain brushes if you plan to use aggressive, solvent-based chain cleaners. Some petroleum-based solvents can rapidly degrade cheap plastics, causing the brush handle to crack or the bristles to fall out during use. Look for brushes explicitly rated for use with heavy-duty degreasers and motorcycle-specific chain cleaning solvents.
Picking Detailing and Crevice Brushes for Tight Spaces
Motorcycles are defined by their intricate details, from exposed engine cooling fins and frame welds to delicate handlebar switchgear and instrument clusters. Standard wash mitts and large brushes cannot reach these areas, making precision detailing and crevice brushes essential. For delicate areas like instrument screens, switchgear, and air vents, choose small-headed brushes with ultra-soft synthetic or natural boar hair bristles.
For more robust mechanical areas, such as engine cooling fins, suspension linkages, and frame welds, you will need stiffer detailing brushes. These areas often collect road grime and salt that can cause corrosion if left untouched. A stiff-bristled detailing brush allows you to agitate dirt in deep recesses without having to disassemble components.
Flagged bristle tips play a crucial role in detailing brushes designed for dry dusting or light cleaning. The split ends of flagged bristles excel at trapping fine dust and pollen, lifting them away from the surface rather than pushing them deeper into mechanical crevices or electrical connections. This is particularly important around handlebar controls and ignition barrels where moisture and dirt intrusion can cause electrical faults.
Never use wire brushes, brass brushes, or overly abrasive household scrubbing brushes on exposed motorcycle components. Exposed aluminum engine cases, polished metal covers, and soft plastic fairings are easily gouged by metal bristles. Even a single pass with a brass brush can leave permanent scratch marks that require professional polishing or replacement to correct.
Identifying Bodywork and Paint-Safe Wash Tools
The painted fairings, fuel tank, and clear-coated surfaces of a motorcycle require the gentlest touch possible to prevent swirl marks and fine scratches. While brushes are excellent for mechanical parts, traditional stiff-bristled brushes should never be used on your bike’s primary bodywork. Instead, prioritize ultra-soft, long-bristle detailing brushes, high-quality microfiber wash mitts, or genuine lambswool wash pads.
If you prefer using a brush for bodywork, look for specialty paint-safe brushes featuring exceptionally soft, long, and densely packed flagged synthetic bristles. These designs are engineered to encapsulate dirt particles, lifting them off the paint and suspending them within the bristles rather than dragging them across the clear coat. The long bristles also allow the tool to conform to the complex curves and sharp angles of modern motorcycle bodywork.
To maximize the safety of your chosen wash tools, integrate proper washing techniques such as the two-bucket method. Use one bucket filled with soapy water and a second bucket filled with clean water for rinsing your brush or mitt. Every time you wipe a section of the bodywork, rinse the tool in the clean water bucket first to release trapped dirt before reloading it with fresh soapy water.
It is vital to recognize when a wash tool has trapped debris. If you accidentally drop your brush or mitt on the ground, or if you notice black grit embedded in the fibers, stop immediately. Thoroughly rinse the tool under running water or switch to a clean backup tool. Continuing to wash your bike with a contaminated brush will act like sandpaper on your paintwork.
Ensuring Material and Bristle Safety on Motorcycle Surfaces
Using the wrong brush or applying excessive pressure can cause severe cosmetic and structural damage to your motorcycle. Stiff nylon or wire brushes can quickly strip the clear coat off painted fairings, scratch anodized coatings on aluminum forks and swingarms, and cloud soft plastic windshields. Once an anodized layer or clear coat is compromised, the underlying metal or paint becomes highly vulnerable to corrosion and UV degradation.
Chemical compatibility is another critical safety boundary. Some heavy-duty wheel cleaners or degreasers can react with the plastic handles or synthetic bristles of cheap brushes, causing them to melt, become sticky, or shed bristles onto your bike. Always verify that your brushes are compatible with the specific cleaning agents you intend to use by checking the manufacturer’s labels and product specifications.
Regularly inspect your cleaning brushes for visual signs of wear and tear. Over time, bristles will become splayed, frayed, or permanently bent, while exposure to harsh chemicals can cause them to melt or become brittle. Splayed or damaged bristles lose their ability to lift dirt safely and instead present sharp, uneven edges that significantly increase the risk of scratching your motorcycle’s surfaces.
When dealing with specialty materials such as carbon fiber, matte paint finishes, or aftermarket vinyl wraps, stop and consult the manufacturer’s care instructions before choosing a brush. Matte finishes, for example, cannot be polished to remove scratches, meaning any damage caused by an inappropriate brush is permanent. For these sensitive surfaces, stick strictly to ultra-soft microfiber cloths and dedicated matte-safe cleaning solutions.
Organizing and Maintaining Your Motorcycle Cleaning Kit
To ensure your motorcycle cleaning brushes last for years and perform safely, you must establish a proper organization and maintenance routine. The most critical rule of motorcycle detailing is to prevent cross-contamination. Implement a strict color-coding or clear labeling strategy to separate your tools. For example, use red-handled brushes exclusively for greasy drivetrain components and blue-handled brushes only for painted bodywork.
After completing a wash, always follow a thorough post-wash cleaning protocol for your brushes. Rinse them thoroughly under warm running water to remove all traces of soap, degreaser, and trapped dirt. For drivetrain brushes, use a mild dish soap or a dedicated brush cleaner to strip away residual grease and chain wax, ensuring the bristles are clean and ready for the next use. Hang the brushes to air dry completely in a well-ventilated area out of direct sunlight.
Store your clean, dry brushes in a dedicated container, such as a plastic tote or a hanging pegboard, to protect the bristle shapes and prevent contamination from garage dust, sawdust, or chemical spills. Never store brushes resting on their bristles, as this will cause them to bend permanently and lose their effectiveness.
Finally, establish a condition-based replacement schedule for your kit. Do not rely on a fixed calendar date to replace your tools; instead, retire and replace brushes as soon as you notice splayed bristles, cracked handles, or chemical degradation. Investing in a new S$15 brush is a minor expense compared to the cost of repainting a scratched fairing or replacing a damaged chain.
Frequently Asked Questions (FAQ)
Can I use a regular household brush to clean my motorcycle chain?
While a household brush, such as an old toothbrush or a kitchen scrubbing brush, might seem like a convenient substitute, it is generally not recommended for regular motorcycle chain maintenance. Household brushes typically lack the structural stiffness required to break down heavy, dried-on chain wax and road grime. Furthermore, their bristles may not be chemically resistant to aggressive solvent-based chain cleaners, leading to melted bristles or plastic degradation during use. Most importantly, generic household brushes do not feature the specialized three-sided design of dedicated chain brushes, making it difficult to clean all sides of the links evenly and increasing the risk of accidentally damaging the delicate rubber O-rings or X-rings. A household brush should only be used as a temporary, emergency option with mild soap, while a dedicated motorcycle chain brush remains mandatory for safe and effective long-term care.
How often should I replace my motorcycle cleaning brushes?
There is no fixed calendar timeframe for replacing your motorcycle cleaning brushes; instead, replacement should be driven entirely by the physical condition of the tools. You should inspect your brushes before every wash for visual and tactile signs of wear, such as splayed, frayed, permanently bent, or chemically melted bristles. When bristles lose their original shape and stiffness, they can no longer lift dirt efficiently, requiring you to apply more physical pressure which increases the risk of scratching your bike’s surfaces. Additionally, cracked handles or loose bristle bundles pose a direct scratching hazard if the hard plastic or metal core of the brush makes contact with your motorcycle. Replace any compromised brush immediately to ensure your cleaning routine remains safe and effective.

Community discussion
Share your experience or ask a question. Comments are reviewed before publication.