
Mounting an On-Board Unit (OBU) in your vehicle requires a mounting solution that can withstand daily vibrations, cabin heat, and the physical dimensions of the device. The modular RAM Mount system offers a highly customizable, rugged solution for securing your OBU display screen to your dashboard or windscreen. To find the ideal setup, you must evaluate the specific components of the RAM system—including the base, socket arm, and device holder—against the physical specifications of your OBU and the layout of your car’s interior. Choosing the correct configuration ensures your display remains legible, secure, and compliant with local road safety guidelines.
Understanding OBU and RAM Mount Compatibility
The OBU display unit is a dedicated touchscreen device that is distinct from standard smartphones in terms of thickness, weight distribution, and mounting points. Before purchasing any mounting hardware, you must measure the exact width, height, depth, and weight of your specific OBU display. Because these units are typically thicker and heavier than modern slim smartphones, standard spring-loaded phone cradles may not offer sufficient depth or grip tension to hold them securely over uneven road surfaces.
RAM Mounts utilize a patented ball-and-socket system categorized by ball size, which dictates the maximum weight capacity of the mount. For most passenger car OBU displays, the 1-inch “B-size” rubber ball system is the standard choice. Manufacturer specifications state that B-size components are rated to support devices weighing up to 900 grams under normal conditions, or up to 450 grams in high-vibration environments. If your OBU setup involves heavy-duty aftermarket casings or additional accessories, you may need to step up to the 1.5-inch “C-size” ball system, which supports up to 1.8 kilograms. Always verify the weight of your fully assembled OBU display against these manufacturer load limits before finalizing your selection.
Products mentioned in this guide
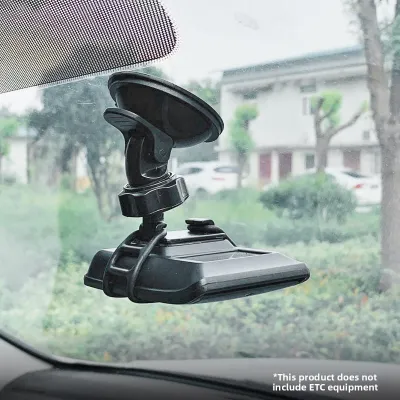
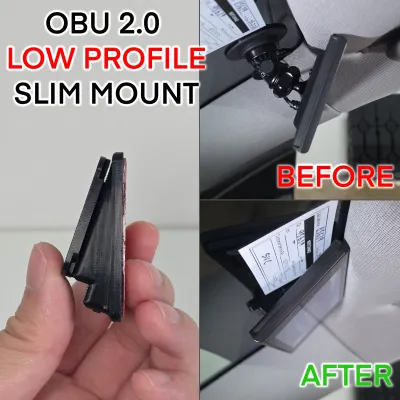
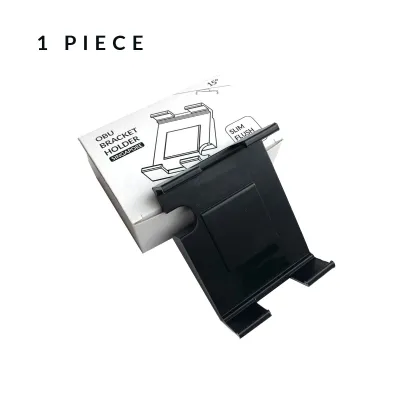
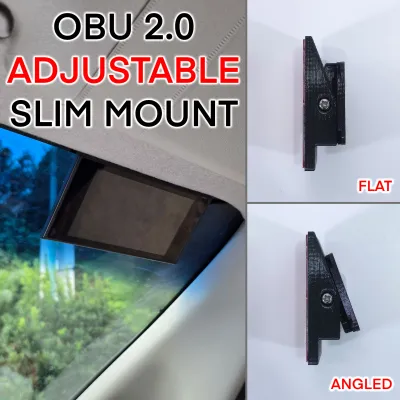

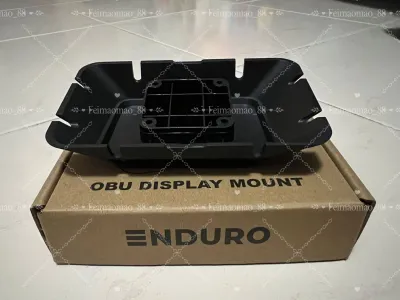
![[Readystock] OBU ERP2.0 Display Mount Casing (Case only)](https://img.lazcdn.com/g/ff/kf/S5a5fb223703d4dfaa6f798ab25e70453b.jpg_400x400q80.jpg_.webp)
Prices are valid at publication and may change. Please refer to the product page for the latest price.
Inspect the rear and sides of your OBU casing for existing mounting holes, flat surfaces, or structural lips. Some aftermarket OBU enclosures or official brackets feature pre-drilled holes matching industry-standard hole patterns, such as the AMPS hole pattern. If your OBU casing has these integrated threads, you can bolt a RAM diamond or round plate base directly to the back of the unit, creating a semi-permanent, highly secure connection that eliminates the need for a clamping cradle. If your unit lacks these mounting holes and relies on a flat, smooth back, you will need to select a universal clamping holder or a heavy-duty adhesive adapter plate that adheres to the casing.
Key RAM Mount Components for OBU Installation
The foundation of your mount determines how securely the system attaches to your vehicle. For temporary or windshield-mounted setups, a twist-lock suction cup base is highly effective when applied to clean, non-porous glass. If you prefer a dashboard installation but have a textured surface, an adhesive dash disk can provide the smooth surface necessary for a suction cup to seal. Alternatively, bolt-down bases or adhesive flex bases can be semi-permanently attached directly to flat plastic panels on the center console. Avoid mounting heavy OBU displays to flimsy air vent clips, as the weight and leverage can damage the vehicle’s vent louvers and cause excessive screen bounce while driving.

The double-socket arm connects the base to the device holder, allowing you to adjust the angle and height of the OBU. These arms are available in short (approximately 2 inches), medium (approximately 3 inches), and long (approximately 6 inches) configurations. For OBU installations, a short or medium arm is generally preferred. Shorter arms minimize the leverage exerted on the base, which significantly reduces screen vibration and lowers the risk of the mount detaching under stress. Ensure the arm material—whether high-strength composite or marine-grade aluminum—matches your durability expectations and cabin conditions.
The holder is the component that physically grips your OBU. The RAM X-Grip is a popular universal option, but you must select the correct size (standard versus large) to ensure the rubber-capped arms clamp securely around the OBU without pressing down on side buttons or blocking the power port. Alternatively, if your OBU is housed in a flat-backed casing, a form-fitted cradle or a magnetic mounting plate may be suitable. When evaluating any holder, verify that the grip depth accommodates the thickness of the OBU and that the clamping force is sufficient to prevent the device from sliding out during sudden braking or sharp turns.
Evaluating Mounting Locations in Your Vehicle
In Singapore, road safety regulations strictly govern driver visibility and windshield obstructions. When positioning your OBU mount, ensure that the device and its supporting hardware do not block your direct line of sight to the road ahead. The Land Transport Authority (LTA) and traffic police mandate that aftermarket accessories must not impair the driver’s forward view. Mounting the OBU too high on the windshield or directly in the center of your primary field of vision can result in compliance issues. A lower-corner windshield placement or a low-profile dashboard mount is typically recommended to keep your sightlines clear.
You must identify and completely avoid the deployment zones of your vehicle’s airbags. Consult your vehicle’s owner manual to locate all passenger, side, and curtain airbags. Placing a rigid metal or composite mount in the path of an inflating airbag can turn the mount and the OBU into dangerous projectiles during a collision. Additionally, ensure the mount does not interfere with the movement of the steering wheel, gear selector, or any built-in dashboard sensors, such as automatic headlight sensors or climate control temperature probes.
The tropical climate of Singapore subjects vehicle cabins to extreme heat buildup, with dashboard temperatures often exceeding 60 degrees Celsius when parked in direct sunlight. This intense heat can degrade the adhesive backing of dash disks, soften suction cup rubber, and cause the air inside a suction mount to expand, leading to sudden detachment. Furthermore, prolonged exposure to direct sunlight can cause the OBU electronics to overheat and malfunction. To mitigate this, position the mount in a location that benefits from air conditioning airflow, or use a sunshade when parked to protect both the mount and the OBU from direct thermal stress.
Step-by-Step Installation and Safety Checks
Proper surface preparation is critical for both suction and adhesive bases. Begin by cleaning the mounting surface thoroughly using a label-authorized cleaner, such as isopropyl alcohol, to remove all dust, oils, and dashboard protectants. Do not use household glass cleaners containing ammonia or silicone-based interior detailers, as they leave behind a residue that prevents proper adhesion. If you are using an adhesive base or a dash disk, apply firm pressure during installation and allow the adhesive to cure fully—typically 24 hours—before attaching the socket arm and OBU.
When assembling the double-socket arm onto the ball joints, tighten the adjustment knob until the arm firmly grips both balls and prevents any movement. Be careful not to over-torque the knob, as excessive force can strip the plastic threads or damage the internal spring mechanism. The mount should feel rigid and stable under hand pressure. If you notice any play or slipping at the joints, loosen the knob, reposition the balls to ensure they are seated correctly in the sockets, and retighten.
Establish a routine inspection schedule to check the integrity of your mount. Every few weeks, inspect the suction cup for signs of dry rotting, cracking, or loss of vacuum. Gently tug on the mount before driving to verify that the connection remains secure. Over time, vehicle vibrations can cause the adjustment knobs to back out slightly; a quick check and retightening of all hardware will prevent unexpected failures on the road.
If you observe deep cracks in the rubber balls, severe discoloration of the composite arms, or a suction cup that repeatedly fails to hold vacuum for more than a few days, stop using the mount immediately. Operating a vehicle with a loose or failing mount poses a safety hazard to you and your passengers. Replace any degraded components with original manufacturer parts, or consult a professional installer if you are unsure about the structural integrity of your mounting setup.
Frequently Asked Questions (FAQ)
Can I use a standard phone mount for my OBU?
Using a standard smartphone mount for an OBU is generally not recommended. OBU display units are typically thicker, heavier, and have a different center of gravity compared to modern slim smartphones. Standard phone mounts often lack the deep jaw capacity or the high spring tension required to grip a thicker OBU casing securely. Under the stress of road vibrations, speed bumps, or sudden stops, an OBU placed in an under-rated phone mount is highly susceptible to slipping out, which can distract the driver or damage the device.
Will the suction cup damage my dashboard or windshield?
A high-quality suction cup will not damage clean, undamaged automotive glass. However, applying a suction cup directly to a textured, vinyl, leather, or soft-touch dashboard can cause permanent cosmetic damage, including stretching, indentation rings, or discoloration. To mount on a dashboard safely, always use a smooth adhesive dash disk designed to distribute the load and protect the underlying material. When removing adhesive disks, use a gentle heat source like a hairdryer and an adhesive remover approved for automotive interiors to avoid peeling away dashboard coatings.
How do I prevent the mount from falling off in hot weather?
To prevent your mount from detaching in high temperatures, ensure the initial installation is performed on a completely clean, cool surface. Periodically release the suction cup, clean both the rubber pad and the glass with water, and re-apply the mount to restore the vacuum seal. Avoid leaving the vehicle parked in direct sunlight for extended periods without a sunshade, as extreme cabin heat softens the rubber and degrades adhesive bonds. If heat failure persists, consider transitioning to a mechanical, bolt-down base or a specialized high-temperature adhesive mount.

Community discussion
Share your experience or ask a question. Comments are reviewed before publication.