
A complete home car wash tool kit must go far beyond a basic bucket and a household sponge. To maintain a vehicle’s finish without causing micro-marring, swirl marks, or water spot etching, you need a systematic, multi-stage detailing setup. This setup requires specialized hardware and chemically compatible products, including a pressure washer, a dedicated snow foam cannon, high-lubricity pH-neutral shampoo, high-GSM microfiber drying towels, specialized wheel cleaners, and protective sealants.
Building a Dedicated Home Detailing Setup: The ArtdeShine Advantage
Establishing a dedicated home detailing setup is about shifting from basic cleaning to paint preservation. Standard car washing methods often rely on aggressive scrubbing and harsh chemicals, which strip protective layers and leave fine scratches that dull the paint over time. A professional-grade approach utilizes a sequence of non-contact and low-friction steps designed to lift, encapsulate, and rinse away dirt safely.
Aligning your setup with a specialized automotive care brand like ArtdeShine ensures chemical compatibility across every stage of the wash. ArtdeShine’s ecosystem is engineered so that pre-wash cleaners, contact shampoos, and protective sealants work synergistically. Using mismatched chemicals can lead to unexpected reactions, such as a pre-wash stripping a freshly applied sealant or a shampoo leaving behind residues that interfere with a ceramic coating’s hydrophobic properties.
Products mentioned in this guide
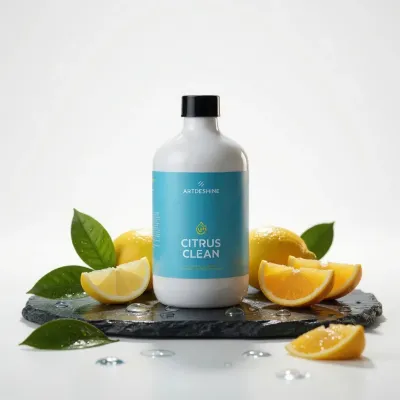

Prices are valid at publication and may change. Please refer to the product page for the latest price.
In Singapore’s tropical climate, characterized by intense UV radiation, high humidity, and frequent sudden rain showers, maintaining a vehicle’s finish requires a systematic approach to prevent water spot etching and clear coat oxidation. Whether operating in a landed property driveway or navigating the constraints of a public HDB wash bay, selecting the right tools and chemicals is essential. This guide outlines the precise tool categories and technical specifications required to assemble a professional-grade home wash kit.
Stage 1: Pre-Wash and Safe Contact Washing Essentials
Snow Foam Cannons and Pre-Wash Cleaners
The pre-wash phase is the most critical step in preventing wash-induced scratches. When a car sits parked or drives through Singapore’s roads, it accumulates abrasive road grime, brake dust, and environmental fallout. Touching the paint directly with a wash mitt at this stage drags these abrasive particles across the clear coat, creating micro-scratches. A high-quality snow foam cannon solves this by mixing water, air, and pre-wash shampoo into a thick, clinging foam. This foam dwells on the paint, encapsulating and lifting surface dirt so it can be safely rinsed away before any physical contact occurs.

When selecting a snow foam cannon, look for a unit with a heavy-duty brass manifold for durability and an adjustable nozzle that allows you to control the spray pattern and foam density. The cannon must feature a quick-connect fitting (typically a 1/4-inch quick-release) that matches your pressure washer wand. Check your pressure washer’s documentation to verify compatibility and flow rate requirements before purchase.
For the pre-wash chemical, distinguish between pH-neutral maintenance foams and stronger alkaline cleaners. For vehicles with existing ceramic coatings or high-quality waxes, a pH-neutral snow foam is ideal because it cleans safely without degrading the protective layer. For heavily soiled vehicles covered in traffic film or greasy road grime, an alkaline-based pre-wash or citrus-based cleaner provides the chemical strength needed to break down organic matter. Always check the chemical label to ensure it is safe for your specific paint type, anodized trim, and plastic seals, and follow the manufacturer’s dilution ratios precisely.
pH-Neutral Shampoos and Wash Mitts
Once the pre-wash has lifted the bulk of the heavy dirt, the contact wash stage can begin. This stage requires a high-lubricity, pH-neutral car shampoo, such as ArtdeShine Organic Shampoo. The primary role of a premium shampoo is not just cleaning, but providing a slick barrier of lubrication between the wash mitt and the paintwork. This lubrication allows the mitt to glide effortlessly, minimizing the risk of friction-induced swirl marks.
The choice of wash mitt is equally important. Avoid traditional sponges, which trap dirt on their flat surfaces and grind it into the paint. Instead, select a high-quality microfiber wash mitt or a natural lambswool mitt. Microfiber mitts featuring a deep, plush pile are highly recommended because their split-fiber loops pull dirt particles away from the surface and trap them deep within the pile. Lambswool mitts are incredibly soft and gentle but require meticulous hand-washing and air-drying, which can be challenging in humid climates.
To execute a safe contact wash, always employ the two-bucket method. Fill one bucket with clean water (the rinse bucket) and a second bucket with your pH-neutral shampoo solution (the wash bucket). After washing a single panel, dunk the dirty wash mitt into the rinse bucket first, rubbing it against a grit guard to dislodge trapped dirt, before dipping it back into the soapy wash bucket. This simple mechanical separation ensures that abrasive particles are not transferred back onto the vehicle’s delicate clear coat.
Stage 2: Scratch-Free Drying and Water Spot Prevention
High-GSM Microfiber Drying Towels
Drying is another high-risk phase where improper tools can quickly ruin a flawless wash. Dragging a standard cotton towel or a low-quality chamois across the paint creates immense friction, leading to fine scratches and marring. Modern detailing relies on specialized microfiber drying towels designed to absorb water quickly with minimal physical contact.
Twisted-loop microfiber towels are the industry standard for safe drying. Unlike standard plush microfiber or waffle-weave towels, twisted-loop towels feature fibers woven into tight, elongated loops. This structure dramatically increases the surface area and creates a powerful capillary action that pulls water off the paint and traps it within the towel’s core. Waffle-weave towels remain excellent for glass, but twisted-loop designs offer far superior cushioning and absorption for painted panels.
When evaluating drying towels, pay close attention to the GSM (grams per square meter) rating. A towel with a GSM of 800 or higher provides a thick, plush cushion that minimizes friction and holds several liters of water without becoming saturated. Additionally, verify that the towel features an edgeless design or soft silk-banded edges. Hard polyester stitching along the borders of cheap towels is a common cause of paint marring along sharp body lines and panel gaps.
Drying Aids and Quick Detailers
To further reduce the risk of scratching during the drying phase, incorporate a drying aid into your routine. A drying aid is a spray lubricant applied directly to the wet panels of the vehicle before wiping. This creates an ultra-slick barrier that allows the microfiber drying towel to glide effortlessly across the surface, neutralizing any remaining friction.
While basic quick detailers are designed to clean light dust and minor fingerprints, advanced ceramic drying aids or spray sealants (such as ArtdeShine Graphene Detailer) offer dual-action benefits. As you dry the vehicle, these active polymers bond to the clear coat, leaving behind a durable, hydrophobic layer that repels water and boosts paint gloss. This simple step extends the life of your base protection and makes future washes significantly easier.
To apply, lightly mist the drying aid onto a wet panel immediately after the final rinse. Avoid over-applying, as excess product can lead to streaking, particularly on dark paint under humid conditions. Gently drag your high-GSM twisted-loop towel across the panel using light hand pressure, or use a pat-drying technique to lift the water safely.
Stage 3: Specialized Wheel, Tire, and Trim Care
Wheel Cleaners and Detailing Brushes
Wheels and tires are subjected to the harshest conditions on the vehicle, accumulating baked-on brake dust, road grime, and metallic iron particles from the braking system. Because these contaminants are highly abrasive and corrosive, they must be cleaned using dedicated tools and chemicals that are kept strictly separate from your paintwork care tools.
For routine maintenance, a pH-balanced wheel cleaner is highly effective and safe for most wheel finishes. However, for deep cleaning or heavy brake dust build-up, use an iron-decontaminating wheel cleaner. These specialized formulas contain active ingredients that chemically bond with ferrous iron particles, dissolving them and turning a distinctive deep purple color. This chemical reaction allows you to rinse away stubborn metallic debris with minimal scrubbing.
To clean complex alloy wheel designs, assemble a selection of soft-bristled detailing brushes. A long, flexible barrel brush is essential for reaching deep into the wheel barrels behind the spokes. For the wheel face, lug nut pockets, and brake calipers, use soft boar’s hair or synthetic detailing brushes. These soft fibers agitate dirt without scratching painted, clear-coated, or polished finishes.
Never use stiff-bristled utility brushes or highly acidic/alkaline cleaners on bare, uncoated, or polished alloy wheels, as they can cause permanent etching, staining, or corrosion. Always consult your wheel manufacturer’s care instructions and test any new chemical cleaner on a small, hidden area of the wheel before full application.
Tire Dressings and Applicators
Achieving a clean, uniform tire finish is the perfect finishing touch to any car wash. Tire dressings not only enhance the appearance of the rubber but also protect it from UV degradation and ozone cracking, which are accelerated by Singapore’s intense, year-round sunlight.
When choosing a tire dressing, compare water-based and solvent-based options. Water-based dressings are highly recommended for routine use; they penetrate the rubber to deliver a natural, matte-to-satin finish that does not dry out or damage the tire over time. Solvent-based dressings offer a high-gloss, wet look and are highly water-resistant, but they carry a higher risk of slinging onto the vehicle’s paintwork if applied too thickly, and they can degrade rubber over long-term use.
To apply the dressing evenly, use a dedicated foam or microfiber applicator pad shaped to match the curve of the tire sidewall. This ensures precise application and prevents the product from getting onto the tread face, which can compromise traction.
Before applying any tire dressing, the rubber must be thoroughly cleaned and completely dry. During the wash phase, scrub the tire sidewalls using a stiff brush and an all-purpose cleaner to strip away old dressings, road grime, and brown oxidation. If the rubber is wet or dirty, the new dressing will fail to bond properly, leading to uneven coverage and immediate product sling once you drive.
Stage 4: Paint Decontamination and Protection Upgrades
Iron Removers and Clay Bars
Over time, microscopic contaminants like industrial fallout, rail dust, tree sap, and overspray become embedded in the clear coat. These particles cannot be removed by regular washing and leave the paint feeling rough to the touch, reducing gloss and preventing protection products from bonding effectively.
To determine if your vehicle requires decontamination, perform the plastic bag test. Wash and dry the car thoroughly, then place your hand inside a thin plastic sandwich bag and gently slide it over the paintwork. The plastic film magnifies surface imperfections, allowing you to easily feel tiny, rough bumps embedded in the clear coat that are otherwise invisible.
Decontamination is a two-step process: chemical and physical. First, perform chemical decontamination by spraying an iron remover over the clean paint. This product dissolves embedded iron particles, turning purple as it works, and allowing them to be rinsed away safely without physical contact.
Next, perform physical decontamination using a detailing clay bar or a synthetic clay mitt. It is absolutely mandatory to use a dedicated clay lubricant during this process. The lubricant provides a slick barrier that allows the clay to glide smoothly over the surface, shearing off embedded contaminants like tree sap or overspray. Never use plain water or diluted dish soap, as this will cause the clay to grab and drag across the paint, resulting in severe scratching and marring.
Spray Waxes and Ceramic Sealants
Once the paint is completely clean and free of embedded contaminants, you must apply a protective layer to shield the clear coat from UV rays, acid rain, and bird droppings. Applying protection to a fully decontaminated surface ensures maximum bonding and durability.
Traditional spray waxes formulated with natural carnauba wax offer a warm, deep gloss and excellent water beading, but they typically last only a few weeks and offer limited resistance to heat and chemicals. Modern SiO2 ceramic spray sealants and graphene-infused sealants (such as ArtdeShine Bio Nano or Graphene Sealant) utilize advanced synthetic polymers. These formulas chemically bond to the clear coat, providing extreme hydrophobic properties, high chemical resistance, and robust UV protection that can last for several months.
When applying these advanced protection products, environmental conditions are critical. Always work in a cool, shaded area—such as a garage, carport, or during the early morning or evening hours. Applying sealants to hot paint or under direct sunlight causes the product to flash and dry too quickly, leading to stubborn streaks and uneven coverage that can be difficult to remove.
Ensure the paint is completely dry and free of any residual oils before application. Mist the product onto a microfiber towel or directly onto a small section of the paint, spread it evenly, and immediately buff it to a high gloss using a clean, dry, plush microfiber towel.
The Hardware: Buckets, Pressure Washers, and Wash Station Gear
Wash Buckets and Grit Guards
The physical hardware of your wash station is just as important as the chemicals you use. A safe car wash relies on physical dirt separation to keep abrasive particles away from your wash mitts and paintwork.
To achieve this, set up a three-bucket system. This includes a dedicated wash bucket (filled with soapy water), a rinse bucket (filled with clean water), and a completely separate wheel bucket used exclusively for cleaning wheels, tires, and wheel arches. Keeping the wheel cleaning tools and water separate ensures that highly abrasive brake dust never contaminates the mitts used on your vehicle’s delicate paint.
Within both the wash and rinse buckets, place a grit guard at the bottom. A grit guard is a plastic grate with radial fins that sits slightly above the bottom of the bucket. It allows heavy dirt particles to settle at the bottom while preventing the water from swirling and pulling those abrasive particles back up into your clean wash mitt.
Select heavy-duty buckets with a capacity of 15 to 20 liters. This large volume provides ample water to dilute suspended dirt and ensures that the grit guard remains submerged with plenty of clean water above it to accommodate large, plush wash mitts.
Pressure Washers and Hose Management
A high-quality pressure washer is a highly efficient addition to any home detailing setup, drastically reducing water consumption while providing the pressure needed to rinse away heavy dirt and generate thick pre-wash foam.
When selecting a pressure washer for automotive use, look for a unit that delivers between 100 and 150 bar of pressure. This range provides excellent cleaning power without posing a risk to healthy clear coat. Ensure the unit is compatible with standard quick-connect fittings and includes or supports a high-quality foam cannon adapter.
Safety is paramount when operating a pressure washer. Never use a narrow-angle, high-pressure nozzle (such as a 0-degree red nozzle) on automotive surfaces, as this can easily strip paint, cut through rubber seals, or damage delicate emblems. Opt for a wider 25-degree or 40-degree fan nozzle, and always maintain a safe working distance of at least 30 centimeters from the vehicle’s surface.
Hose management is another critical factor, particularly when working in restricted spaces like Singaporean landed driveways or HDB wash bays. Use a high-quality hose reel or a flexible, kink-resistant hose to prevent tripping hazards. Keep the hose organized and ensure it does not drag across dirty ground and rub against the corners of your vehicle’s bumpers, which can cause deep friction scratches.
Frequently Asked Questions (FAQ)
Can I use household dish soap instead of dedicated car shampoo?
No, you should never use household dish soap to wash your vehicle. Dish soaps are specifically formulated with aggressive degreasing agents designed to strip away heavy grease and food oils. When applied to automotive paint, these harsh surfactants will quickly strip away protective waxes, sealants, and even degrade ceramic coatings over time. Furthermore, prolonged use of dish soap dries out unpainted plastic trim, rubber weatherstripping, and window seals, leading to premature fading, cracking, and dry rot. Dedicated pH-neutral car shampoos are engineered with gentle surfactants and high-lubricity agents that safely lift dirt while preserving your vehicle’s protective coatings and delicate trim materials.
Do I need a pressure washer to use a snow foam cannon?
Yes, a traditional snow foam cannon requires the high water pressure (typically 100 bar or more) and specific flow rate of a pressure washer to properly draw, mix, and aerate the shampoo solution into a thick, shaving-cream-like foam. While there are foam guns designed to attach directly to standard garden hoses, these operate at much lower water pressures and produce a very thin, runny soapy mixture. This thin foam lacks the dwell time and density required to effectively cling to the paint, encapsulate dirt, and provide a true pre-wash cleaning action. Before purchasing a snow foam cannon, always verify the quick-connect thread sizes and adapter types to ensure a secure, leak-free fit with your specific pressure washer wand.
How should I clean and store my microfiber towels after washing?
To maintain the performance and paint-safety of your microfiber towels, they must be cleaned and stored with care. Always wash microfiber towels separately from cotton towels, clothes, and regular laundry to prevent cotton lint from embedding in the microfiber strands. Use a dedicated microfiber wash detergent or a gentle, dye-free liquid detergent. Strictly avoid using fabric softeners or bleach; softeners leave a chemical coating that clogs the microscopic polyester and polyamide fibers, destroying their absorbency and static properties, while bleach degrades the fibers. Air dry the towels in a clean, dust-free indoor area, or tumble dry them on a no-heat or low-heat setting. Once dry, store them in a clean, dust-free, sealed plastic container to prevent environmental contamination before their next use.
Community discussion
Share your experience or ask a question. Comments are reviewed before publication.