
Choosing the right motorcycle battery is no longer a simple matter of matching a part number from an owner’s manual. With the emergence of sodium ion technology alongside established lead-acid and lithium-ion options, riders must evaluate how each chemistry interacts with their motorcycle’s electrical system. Selecting the correct battery requires a systematic approach that balances your riding habits, budget, and the physical and electrical specifications of your machine.
Quick Answer: Which Motorcycle Battery Should You Choose?
Selecting the right motorcycle battery depends on matching your vehicle’s electrical architecture and your specific riding conditions with the battery manufacturer’s verified specifications. There is no single option that suits every motorcycle, making it essential to evaluate your bike’s original equipment manufacturer (OEM) guidelines before making a purchase.
- Choose Lead-Acid if: Your primary focus is upfront cost, your motorcycle utilizes a standard, unmodified charging system, and the OEM specifications dictate a traditional flooded, AGM, or gel battery.
- Choose Lithium-Ion if: Significant weight reduction and high cranking power are your main priorities, and you have verified that your motorcycle's charging system outputs a stable voltage within the battery manufacturer's specified limits.
- Choose Sodium Ion if: You are looking for an alternative chemistry that performs across wide temperature ranges, the manufacturer's specifications align with your motorcycle's charging system, and you have verified the physical mounting requirements.
- Verify first if: Your motorcycle features a modified electrical system, aftermarket electronic accessories, or specific OEM charging profiles that may conflict with alternative battery chemistries.
Understanding the Three Battery Technologies
To make an informed decision, you must understand what to look for on product labels and manufacturer specification sheets rather than assuming performance based on material names alone. Each technology relies on distinct chemical processes that dictate how they store and release electrical energy.
Products mentioned in this guide
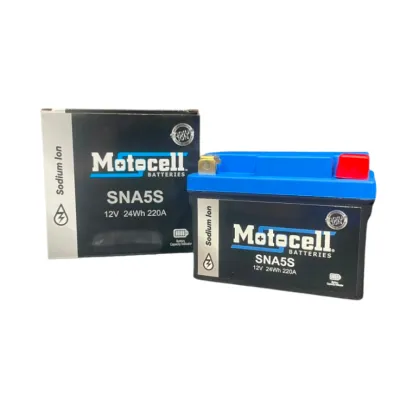
Prices are valid at publication and may change. Please refer to the product page for the latest price.

Lead-Acid (AGM and Gel)
Traditional lead-acid batteries remain the industry standard for most production motorcycles. When reviewing these batteries, check the label to determine if they are conventional flooded cells, Absorbent Glass Mat (AGM), or Gel designs. AGM and Gel variants are sealed and maintenance-free, meaning they do not require periodic water top-ups and are highly resistant to leaks. However, they are inherently heavy, and their cycle life is generally shorter than modern alternative chemistries.
Lithium-Ion (LiFePO4)
Lithium iron phosphate (LiFePO4) is the dominant lithium chemistry used in powersports. When evaluating a lithium-ion battery, look for an integrated Battery Management System (BMS) on the specification sheet. A BMS is critical because it monitors cell voltage, balances the cells during charging, and protects against overcharging or deep discharging. Additionally, verify the manufacturer’s specific charging voltage limits and cold-weather cranking ratings, as lithium batteries can experience reduced performance in near-freezing conditions.
Sodium Ion
As an emerging technology in the motorcycle market, sodium ion batteries utilize sodium ions as charge carriers instead of lithium or lead. Before purchasing, review the manufacturer’s documentation regarding temperature operating ranges, cycle life labels, and required charging profiles. Sodium ion batteries generally offer a middle ground in weight between lead-acid and lithium, while maintaining stable performance in both hot and cold environments. However, because the technology is newer, compatibility with standard motorcycle charging systems must be verified on a case-by-case basis.
Critical Specifications to Verify Before Buying
Before purchasing any battery from an online marketplace or local parts dealer, you must perform several physical and electrical checks to ensure compatibility with your motorcycle.
Physical Dimensions and Terminal Layout
Never assume a battery will fit based solely on a compatibility list. Use a tape measure to record the length, width, and height of your motorcycle’s battery box. Compare these measurements against the physical dimensions listed on the battery’s specification sheet. Equally important is the terminal layout. Check whether the positive (+) and negative (-) terminals are on the left or right side. Installing a battery with reversed terminals can lead to short circuits, blown main fuses, or severe damage to your motorcycle’s electronic control unit (ECU).
Cold Cranking Amps (CCA) and Amp-Hours (Ah)
Compare the battery’s label against the requirements outlined in your motorcycle owner’s manual. Cold Cranking Amps (CCA) indicate the battery’s ability to start the engine in cold conditions, which is a key indicator of starting power. Amp-Hours (Ah) measure the battery’s capacity to deliver a specific current over time. While alternative chemistries like lithium often list a “lead-acid equivalent” (PbEq) rating, you should look for the actual, verified Ah rating on the specification sheet to understand the true reserve capacity of the battery.
Vibration Resistance and Mounting
Motorcycles subject batteries to intense vibrations and varied mounting angles. Check the manufacturer’s installation guide to see if the battery is rated for multi-angle mounting. Traditional flooded lead-acid batteries must remain upright to prevent acid leaks, whereas AGM, gel, lithium, and sodium ion batteries can typically be mounted in various orientations. Because lithium and sodium ion batteries are often physically smaller than the lead-acid units they replace, verify if the battery package includes foam spacers or padding to ensure a secure fit inside the battery tray.
Charging System and Electrical Compatibility
Your motorcycle’s charging system must be compatible with the specific battery chemistry you choose. Failing to verify this can lead to premature battery failure or damage to your motorcycle’s stator and regulator/rectifier.
Voltage Regulator Limits
Verify if your motorcycle’s stock regulator/rectifier outputs voltage within the safe range specified by the alternative battery manufacturer. Most standard motorcycle charging systems output between 13.8V and 14.4V while the engine is running. Lithium-ion batteries typically require a stable charging voltage that does not exceed 14.6V. If your regulator is older or faulty and spikes above this limit, it can damage the battery’s internal cells. Always consult your motorcycle’s service manual and use a multimeter to test your charging system’s output before installing a new battery chemistry.
Trickle Charging and Maintenance
Identify which smart chargers are explicitly rated for your chosen battery chemistry. Traditional lead-acid trickle chargers often feature an automatic desulfation mode that uses high-voltage pulses. If applied to a lithium-ion or sodium ion battery, these pulses can destroy the internal circuitry or trigger the BMS to shut down. Only use chargers that state compatibility with your specific battery type on their product label.
Parasitic Draw Considerations
Assess how your chosen battery type handles continuous drain from aftermarket accessories such as alarms, GPS trackers, or USB ports when the motorcycle is parked. While lithium and sodium ion batteries have very low self-discharge rates when disconnected, their actual capacity (Ah) is often lower than a comparable lead-acid battery. Consequently, a constant parasitic draw can drain a lightweight battery faster than a high-capacity lead-acid battery, requiring more frequent connection to a compatible maintenance charger during idle periods.
Decision Framework: Matching Battery to Riding Habits
To choose the right battery, align your typical usage patterns and local environmental conditions with the practical characteristics of each battery type.
Daily Commuting vs. Weekend Riding
If you use your motorcycle for daily commuting, your battery experiences frequent starting cycles and consistent charging. A standard lead-acid or sodium ion battery is well-suited for this routine. For weekend riders or those who store their motorcycles for extended periods, the low self-discharge rate of lithium-ion and sodium ion batteries is highly advantageous. However, if you leave your bike idle for weeks without a maintenance charger, ensure all parasitic draws are disconnected to prevent deep discharge.
Climate and Storage Conditions
Your local climate plays a significant role in battery health. In tropical regions with high ambient temperatures, such as Singapore, heat can accelerate the chemical degradation of lead-acid batteries. Sodium ion and lithium-ion batteries generally tolerate higher operating temperatures well, but you must check the manufacturer’s maximum operating temperature limits. If you ride in extremely cold climates, verify the cold-start performance of lithium batteries, which may require “warming up” by turning on the headlights for a minute before cranking the engine.
Accessory Load
Determine if your added electronics exceed the battery’s reserve capacity. If your motorcycle is equipped with high-draw accessories like auxiliary lights, heated grips, or communication systems, a traditional high-capacity AGM lead-acid battery or a high-capacity sodium ion battery may provide a more stable voltage reserve than a lightweight lithium battery with a low nominal Amp-Hour rating.
Safe Installation and When to Seek Professional Help
Working with motorcycle electrical systems requires strict adherence to safety protocols to prevent personal injury or damage to the vehicle.
Pre-installation Checks
Before installing a new battery, turn off the ignition and remove the key. Inspect the battery tray, hold-down clamps, and cable terminals. Look for signs of corrosion, white powdery deposits, or structural damage. Clean the cable terminals using a wire brush and an authorized terminal cleaning solution to ensure a metal-to-metal connection.
Connection Sequence
To prevent accidental short circuits, always follow the standard connection sequence:
- When removing the old battery: Disconnect the negative (black/minus) cable first, followed by the positive (red/plus) cable.
- When installing the new battery: Connect the positive (red/plus) cable first, followed by the negative (black/minus) cable.
This sequence ensures that if your wrench accidentally touches the motorcycle’s metal frame while tightening the positive terminal, it will not create an electrical short circuit.
Stop and Consult
Halt the installation immediately and consult a qualified professional mechanic if you encounter any of the following situations:
- The new battery does not fit into the tray without forcing or modifying the battery compartment.
- The terminal posts do not align with the motorcycle's terminal cables, or the cables must be stretched to reach.
- The motorcycle's dashboard displays error codes, warning lights, or unusual electrical behavior immediately after connection.
- Your multimeter readings indicate that your motorcycle's charging system output is outside the battery manufacturer's specified voltage limits.
Frequently Asked Questions (FAQ)
Can I directly replace a lead-acid battery with a sodium ion or lithium-ion battery?
Physical fitment does not guarantee electrical compatibility. While many manufacturers design lithium-ion and sodium ion batteries to fit standard lead-acid battery trays, you must verify that your motorcycle’s charging system regulator outputs a stable voltage within the limits specified on the new battery’s label. If your motorcycle’s charging system outputs excessive voltage or lacks stable regulation, you cannot safely perform a direct replacement without upgrading or repairing the charging system.
How do I know if my motorcycle battery needs replacing or just recharging?
If your motorcycle exhibits symptoms like slow engine cranking, dimming headlights when idling, or a clicking sound when pressing the starter button, the battery is depleted. Use a multimeter to check the resting voltage across the terminals after the bike has been off for at least an hour. For a standard 12-volt lead-acid battery, a reading below 12.4V indicates a need for recharging. Attempt to recharge the battery using a compatible smart charger. If the battery fails to hold a charge after a full charging cycle, or if the voltage drops rapidly under starter load, take the battery to a qualified professional for a proper load test to determine if it has reached the end of its service life.
Community discussion
Share your experience or ask a question. Comments are reviewed before publication.