
Motowolf riding jackets have become a common sight on Singapore’s roads, offering riders an accessible entry point into protective motorcycle gear. When choosing a jacket, understanding what protection levels it actually provides is crucial for your safety on the road. The protective capability of these jackets depends on two key elements: the abrasion resistance of the outer fabric and the impact absorption of the internal armor inserts.
Reading these armor ratings involves decoding European safety standards (CE ratings) that are often printed on the care labels or stamped directly onto the protective pads. Navigating hot, humid weather while riding along the PIE or through downtown stop-and-go traffic requires balancing ventilation with safety, making a clear understanding of these ratings essential before you purchase.
Decoding CE Safety Standards for Riding Jackets
To evaluate any motorcycle jacket, you must first understand the European safety standards, commonly referred to as CE (Conformité Européenne) certifications. These standards are the global benchmark for motorcycle personal protective equipment (PPE). The overall garment is tested under a different standard than the individual impact protectors housed inside the pockets.
Products mentioned in this guide
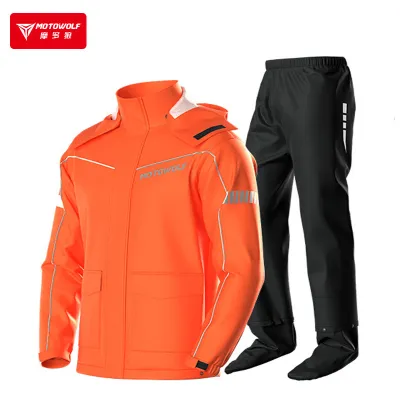
Prices are valid at publication and may change. Please refer to the product page for the latest price.
The standard for the entire riding garment is EN 17092. This test subjects the fabric, seams, and construction to rigorous abrasion, tear, and seam-strength tests. It classifies jackets into five distinct categories: Class AAA, AA, A, B, and C. Class AAA represents the highest level of protection, typically reserved for professional racing leather suits. Class AA is the standard recommendation for general road riding and touring, offering a balance of protection and everyday usability. Class A jackets provide light protection, making them popular for urban commuting where speeds are lower and comfort is a priority. Class B garments offer only abrasion protection without armor, while Class C garments are designed solely to hold armor in place underneath other clothing.
In contrast, the individual armor pieces inside the elbows, shoulders, back, and chest are certified under the EN 1621 series. EN 1621-1 covers limb protectors (shoulders and elbows), while EN 1621-2 covers back protectors. These standards measure the amount of kinetic energy transmitted through the protector to the rider’s body during an impact.
Within the EN 1621 standards, armor is rated as either Level 1 or Level 2. Level 1 protectors allow more force to pass through, offering a basic level of safety that is thinner and more flexible. Level 2 protectors absorb significantly more impact energy, transmitting less force to your bones and joints, though they are often thicker and slightly heavier.
It is a common misconception that thicker or stiffer padding automatically translates to better safety. Modern protective gear relies on advanced viscoelastic materials that remain soft and pliable during normal wear but instantly harden upon impact to disperse energy. Therefore, you should always rely on certified energy absorption ratings rather than visual thickness or physical stiffness when judging a jacket’s protective capability.
How to Read Protection Labels on Your Motowolf Jacket
Locating and reading the safety labels on your Motowolf jacket is the most reliable way to verify its protective capabilities. Manufacturers who seek official certification must sew a permanent information tag into the garment. This label is typically found stitched into the inner lining, near the lower waist hem, or inside the internal pocket where the back protector sits.

When you locate the tag, you will see a specific set of standardized pictograms. The most prominent is the classic motorcycle rider icon, which indicates the garment is certified for motorcycle use. Directly next to or below this icon, you should find the specific standard number—such as EN 17092-4:2020—along with the corresponding class letter, such as Class A or Class AA, which tells you the overall abrasion resistance rating of the shell.
To check the impact protectors, you must look at the labels printed or molded directly onto the armor inserts themselves. You will need to open the velcro compartments at the elbows, shoulders, and back to slide the armor out for inspection. Each certified protector must display a grid pictogram showing which part of the body it is designed for, such as “S” for shoulder, “E” for elbow, or “B” for back.
The armor label will also indicate the performance level (1 or 2) and the coverage type (Type A or Type B). Type A refers to smaller, standard-sized protectors, while Type B offers wider coverage across the joint. Additionally, look for the standard version code, such as EN 1621-1:2012, which confirms the armor was tested under current, valid safety protocols.
Be cautious of generic marketing terms like “CE approved” or “CE level protection” written on retail listings. A genuine certification requires these physical, molded labels on the armor and the sewn-in tags on the jacket. If a jacket lacks these physical markers, or if the labels contain spelling errors or missing standard numbers, the gear may not have undergone official laboratory testing.
Assessing Armor Placement and Impact Coverage
Even the highest-rated armor cannot protect you if it shifts away from your joints during a fall. Evaluating how the armor sits on your body is a critical step before riding. When you try on a Motowolf jacket, pay close attention to the positioning of the shoulder and elbow inserts.
To assess the fit of shoulder and elbow armor, do not stand straight in front of a mirror. Instead, sit on your motorcycle or mimic your natural, forward-leaning riding posture with your hands on the handlebars. In this active position, the elbow armor should cup your elbow joint perfectly, and the shoulder armor should wrap cleanly over the crown of your shoulder. If the inserts ride up toward your upper arm or slide down your forearm, they will fail to protect the joint during an impact.
The back protector requires careful inspection, as many entry-level riding jackets ship with a simple, non-certified foam spacer rather than a true impact-absorbing protector. Check the back pocket of your jacket to see if the insert is made of thin, lightweight EVA foam or a dense, certified viscoelastic material. If it is a basic foam pad, it provides virtually no impact protection and should be upgraded to a certified CE Level 2 back insert before you ride on fast-moving expressways.
Chest protection is another area to consider, especially for riders who commute daily through heavy traffic. While chest armor is rarely included with standard commuter jackets, some models feature internal mesh pockets designed to accommodate optional chest inserts. Check your jacket’s interior to see if these pockets are present and verify if they are compatible with aftermarket chest protectors.
Ultimately, armor effectiveness is entirely dependent on a snug, secure fit. If the jacket is too loose, the fabric will twist during a slide, allowing the shoulder and elbow pads to rotate away from your joints. Ensure the sleeve adjusters and waist straps are tightened sufficiently to keep the armor firmly in place without restricting your circulation or range of motion.
Matching Protection Levels to Your Riding Needs
Selecting the right protection level requires analyzing your typical riding environment, especially when navigating the unique climate of Singapore. The tropical heat and high humidity present a constant challenge, as wearing a heavy, non-breathable jacket can lead to heat fatigue, slowing your reaction times and increasing accident risks.
For daily urban commuting—such as navigating stop-and-go traffic in the Central Business District or short trips along arterial roads—highly ventilated mesh jackets are highly practical. These jackets often carry a Class A or Class B rating, prioritizing airflow to keep you cool. However, you should ensure that these lightweight models are still equipped with certified Level 1 or Level 2 armor at the shoulders and elbows to safeguard against low-speed drops and joint impacts.
If your daily route involves high-speed expressways like the PIE, AYE, or TPE, or if you frequently ride across the border into Malaysia, your safety needs change significantly. Higher speeds require much greater abrasion resistance to protect your skin from friction burns during a slide. For these scenarios, look for jackets with a Class AA rating, constructed from high-denier polyester or reinforced textiles, and ensure you are using a dedicated CE Level 2 back protector.
When balancing comfort and safety, remember that a compromise is always involved. Lightweight mesh panels offer excellent cooling but lower abrasion resistance, while heavy-duty textiles offer superior slide protection but trap heat. A practical decision framework is to prioritize high-quality Level 2 impact armor in all key zones, even in highly ventilated jackets, to maintain robust impact protection while utilizing mesh panels to manage the tropical heat. Always follow the manufacturer’s care label instructions when washing or treating the textile fabric to avoid damaging its protective coatings.
Frequently Asked Questions (FAQ)
Do I need to replace the armor in my Motowolf jacket over time?
Yes, motorcycle armor does not last indefinitely and must be replaced periodically to maintain safety. Viscoelastic materials, polyurethane, and foam inserts naturally degrade over time when exposed to sweat, body oils, UV radiation, and extreme temperature fluctuations. You should inspect your armor regularly for physical signs of aging, such as permanent creasing, cracking, hardening, or crumbling. If the protector feels brittle, fails to return to its original shape after being compressed, or has been involved in a significant crash, it has compromised structural integrity and must be replaced immediately.
Can I use aftermarket back protectors in a Motowolf jacket?
In most cases, you can upgrade your Motowolf jacket with an aftermarket back protector if the jacket features a dedicated, accessible back pocket. To ensure a safe and comfortable fit, you must first measure the height, width, and depth of the jacket’s internal pocket. Compare these measurements with the physical dimensions of the aftermarket insert you plan to purchase, as a protector that is too large will bunch up and create uncomfortable pressure points, while one that is too small will slide around and fail to cover your spine. Always make sure the replacement insert is certified to EN 1621-2 Level 2 to maximize your spinal protection.
Community discussion
Share your experience or ask a question. Comments are reviewed before publication.