
To achieve a complete exterior upgrade with an MN series body kit, you need to select a balanced combination of a front lip or splitter, side skirts, a rear diffuser, and fender flares. The exact components you require depend on your vehicle’s existing lines, your aesthetic goals (such as a track-ready look or a rugged off-road stance), and your daily driving environment. Rather than purchasing every available accessory indiscriminately, a successful upgrade relies on verifying compatibility with your specific chassis code, understanding material characteristics, and ensuring compliance with local road regulations.
Planning an exterior transformation requires looking at the vehicle as a cohesive unit. A common mistake is installing an aggressive front splitter without matching side skirts or a rear diffuser, which disrupts the vehicle’s visual flow and aerodynamic balance. By taking a systematic approach to selecting and installing these components, you can ensure that your upgrades not only look professional but also remain secure and durable over years of daily driving.
Understanding Core MN Series Body Kit Components
Every individual component of an MN series body kit serves a distinct visual and functional purpose. The front lip or splitter is the most prominent piece, positioned at the lowest edge of the front bumper. Visually, it draws the eyes downward, giving the vehicle a lower, more aggressive stance even at standard ride heights. Functionally, a front splitter manages the high-pressure air at the front of the car, directing it over and around the body while reducing the volume of air flowing underneath, which helps minimize aerodynamic lift and improves high-speed stability.
Products mentioned in this guide
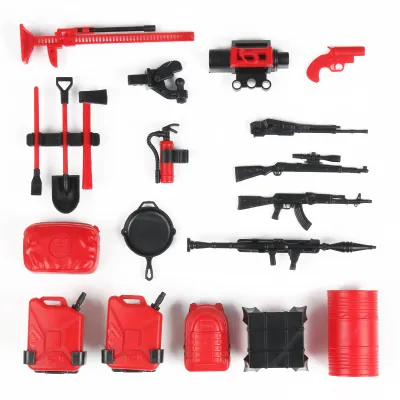
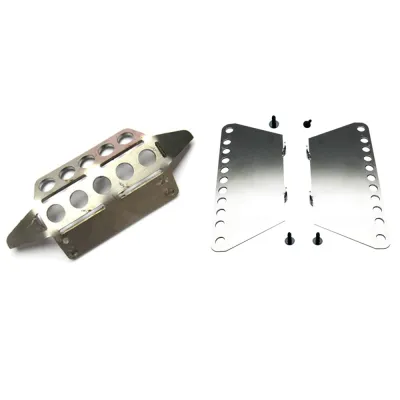
Prices are valid at publication and may change. Please refer to the product page for the latest price.
Side skirts bridge the visual and physical gap between the front and rear wheels. Without them, a car fitted with a front lip and rear diffuser can appear “high-waisted” or unfinished in the center profile. Side skirts continue the low-profile line along the rocker panels, smoothing out the transition between the wheels. They also help control lateral airflow, preventing high-pressure air from spilling under the chassis from the sides, which complements the aerodynamic work of the front splitter.
At the rear, the diffuser and bumper extensions complete the lower perimeter of the vehicle. The rear diffuser features vertical fins designed to accelerate the airflow under the car, allowing it to transition smoothly back into the ambient air behind the vehicle. This reduction in underbody turbulence helps minimize drag. Visually, the diffuser frames the exhaust tips and adds a muscular, performance-oriented finish to the rear fascia, balancing the aggressive styling of the front end.
Fender flares extend the wheel arches outward, providing a wider, more muscular stance. They are essential if you plan to install wider wheels or wheel spacers, as they ensure the tires remain covered by the bodywork. Fender flares protect the vehicle’s side panels from road debris kicked up by wider tires and are highly popular in both wide-body track builds and rugged, off-road-inspired designs.
Aligning Component Choices with Your Style and Budget
Before purchasing any components, define the overall styling theme you want to achieve. A track-inspired aerodynamic theme relies heavily on sharp, pronounced front splitters, deep side skirts, and a highly visible rear diffuser. An off-road or rugged theme, on the other hand, prioritizes durable, textured fender flares and high-clearance bumper guards. If you prefer a subtle, clean look, an “OEM+” theme is ideal, focusing on modest front lips and integrated side skirts that mimic factory upgrade options without drawing excessive attention.

Your budget strategy will dictate whether you purchase a full bundled kit or upgrade in phased stages. Bundled kits are generally more cost-effective, offering a lower price per component and ensuring a perfect match in design language, texture, and material. However, if you prefer to spread the cost in S$ over time, a phased approach allows you to prioritize high-impact areas first. Starting with a front lip and side skirts provides the most immediate visual transformation, allowing you to add the rear diffuser and fender flares later.
Material selection plays a critical role in both the upfront cost and the long-term durability of your body kit. Polyurethane (PU) is highly flexible and resilient, making it excellent for daily-driven vehicles because it can bend and absorb minor impacts from speed bumps or driveway ramps without cracking. ABS plastic is more rigid than polyurethane but offers exceptional impact resistance and highly precise fitment due to injection molding. Fiberglass (FRP) is lightweight and rigid, making it popular for custom or low-volume kits, but it is brittle and prone to cracking upon impact, often requiring more professional prep work before painting.
When selecting aggressive front lips or side skirts, you must weigh the trade-off between show-car aesthetics and daily-drivable ground clearance. Extremely low components look striking but can make navigating steep multi-story car park ramps, speed bumps, and driveway inclines highly challenging. If your daily routes involve uneven roads or steep inclines, opting for a moderate front lip with slightly higher clearance will save you from constant scraping and costly repairs.
Verifying Fitment, Safety, and Singapore Road Legality
Precise fitment is the foundation of a safe and visually appealing body kit installation. You must verify your vehicle’s exact chassis code, manufacturing year, and facelift status before purchasing any MN series components. Manufacturers often introduce subtle design changes to bumpers, headlights, and fenders during mid-cycle facelifts, meaning a kit designed for a pre-facelift model will not align properly with a facelifted version. Never rely solely on a generic model name; always cross-reference the product specifications with your vehicle’s documentation.
In Singapore, vehicle modifications are strictly regulated by the Land Transport Authority (LTA). When planning your exterior upgrade, you must ensure all components comply with local guidelines to avoid fines or inspection failures. Under LTA regulations, body kits and aerodynamic parts must not have sharp protruding edges that could pose a hazard to pedestrians. Furthermore, the overall width of the vehicle must remain within legal limits, and any installed fender flares must not allow the wheels or tires to protrude beyond the outermost edge of the fender arches.
Ground clearance is another critical legal and practical consideration. Your modified vehicle must maintain sufficient clearance to navigate public roads safely without damaging road infrastructure or losing control over speed humps. Additionally, any aftermarket front bumper, lip, or rear diffuser must not obscure the vehicle’s lighting systems, indicators, or license plates. Ensuring your components meet these standards before purchase prevents costly compliance issues later.
At highway speeds, aerodynamic components are subjected to significant downward and rearward forces. Relying solely on double-sided tape or weak adhesives to secure front splitters or side skirts is a severe safety hazard. These parts must be secured using robust mechanical fasteners, such as bolts, lock nuts, washers, and dedicated mounting brackets anchored to structural points of the bumper or chassis. If the installation requires extensive drilling or structural modifications, consult a certified workshop or the kit manufacturer to ensure the vehicle’s structural integrity is not compromised.
Evaluating Build Quality and Material Specifications
When shopping for aftermarket body kits, evaluating build quality before installation is essential to avoid poor fitment and unsightly panel gaps. If possible, inspect the unpainted components in person or request detailed photos of the physical parts. Look for mold precision, ensuring that the mounting tabs are sturdy and the edges are clean and uniform. Wavy surfaces, uneven thicknesses, or warped panels are signs of poor manufacturing and will require extensive, expensive bodywork to correct before painting.
Review the manufacturer’s material specifications to ensure the components can withstand environmental exposure. In tropical climates with high heat, humidity, and intense sunlight, materials must have high thermal expansion tolerance to prevent warping or sagging. If you are purchasing carbon fiber or unpainted plastic components, verify that they feature built-in UV-resistant coatings to prevent yellowing, fading, or chalking over time.
A high-quality body kit should arrive as a complete package. Check whether the kit includes all necessary installation brackets, corrosion-resistant hardware, and comprehensive fitting instructions. Kits that lack proper hardware often force installers to improvise, which can lead to insecure mounting and safety risks on the road.
Be cautious of purchasing body kits based entirely on digital 3D renderings or computer-generated images. These digital models often depict perfect fitment that may not translate to the physical product. Look for real-world photos of the kit installed on actual customer vehicles, and read fitment reviews to gauge how much adjustment, sanding, or trimming is typically required to achieve a seamless finish.
Planning Professional Installation and Long-Term Care
While some minor accessories can be installed at home, a complete MN series body kit upgrade is best handled by a professional body shop. Choose a workshop that specializes in aftermarket body kit alignment and custom painting. Painting flexible materials like polyurethane or ABS plastic requires specialized techniques, including the addition of flex agents to the paint mixture. Without these additives, the paint will crack and flake off the moment the component flexes or vibrates during driving.
Once your new body kit is painted and installed, taking protective measures will preserve your investment. Newly painted front lips and side skirts are highly vulnerable to stone chips, road debris, and minor scrapes. Applying a high-quality paint protection film (PPF) to these high-impact areas provides a durable barrier against physical damage. Alternatively, a ceramic coating can make the surfaces easier to clean, protecting the paint from road grime, bird droppings, and UV degradation.
Maintaining your body kit requires a regular inspection routine. During your weekly car wash, take a moment to inspect the underside of the front lip and side skirts for any signs of loose fasteners or cracking. Road vibrations can gradually loosen mounting bolts, so checking and retightening them periodically prevents components from sagging or detaching. Ensure you clean thoroughly behind fender flares and underneath side skirts, as these areas tend to trap moisture, dirt, and road salt, which can lead to corrosion on the vehicle’s metal panels.
Knowing when to seek professional help for repairs is crucial for road safety. While minor surface scratches in the paint or clear coat can be polished out at home, structural damage requires immediate professional attention. If you notice deep cracks, torn mounting tabs, or loose panels, do not attempt temporary DIY fixes with tape or household adhesives. A compromised body kit component can detach at high speeds, posing a severe hazard to you and other motorists. Always have a qualified technician assess and repair structural damage.
Frequently Asked Questions (FAQ)
Can I install a full MN series body kit myself?
While experienced DIY enthusiasts can install simple bolt-on accessories like minor trunk spoilers, a full body kit upgrade is highly complex and generally requires professional installation. The process often involves removing the front and rear bumpers, precise drilling into factory panels, aligning large components to ensure consistent panel gaps, and applying specialized paint. Without professional alignment jigs, specialized tools, and safe vehicle lifting equipment, attempting a DIY installation risks damaging the new components, scratching your vehicle’s original paintwork, or mounting parts insecurely.
Will adding fender flares and side skirts affect my car insurance?
Yes, adding aftermarket body kit components like fender flares and side skirts typically constitutes a modification to your vehicle’s original specifications and dimensions. You must declare these modifications to your motor insurance provider. Failing to report exterior modifications can void your policy, leading to rejected claims in the event of an accident. Before carrying out any installations, contact your insurance provider to understand how these modifications will affect your premium and coverage limits.
How do I repair minor cracks or scratches on fiberglass body kits?
Minor cosmetic blemishes and superficial scratches on fiberglass (FRP) body kits can be repaired using standard automotive sanding, body filler, and repainting techniques. However, if the fiberglass has suffered deep structural cracks, fractures, or torn mounting holes, simple cosmetic repairs will not restore its strength. Structural damage compromises the integrity of the panel and can cause it to fail under aerodynamic load. These deep cracks require professional fiberglass reconstruction or complete replacement of the damaged component to ensure safety on the road.
Community discussion
Share your experience or ask a question. Comments are reviewed before publication.