
Achieving a professional-grade finish at home requires a systematic approach, especially when using specialized Japanese car care formulations like those from Soft99. Whether you are washing your vehicle at a dedicated multi-storey car park wash bay or in a private driveway, the key to a swirl-free, high-gloss finish lies in the sequence of your steps. By properly preparing the surface, removing embedded contaminants, and applying protective coatings according to manufacturer specifications, you can safeguard your vehicle’s paintwork against harsh tropical UV rays and heavy downpours.
Preparation and Soft99 Product Selection
Before wetting your vehicle, assemble the necessary hardware and select the correct chemical formulations. A successful home detailing setup separates basic washing tools from application and finishing gear. For the initial wash, you will need two dedicated buckets equipped with grit guards, a high-quality microfiber wash mitt, and a soft wheel brush. For the protection and finishing stages, prepare several clean, high-density microfiber towels and foam applicator pads. Mixing up these tools can introduce abrasive particles to your paint, leading to fine scratches and swirl marks.
Soft99 offers a diverse range of shampoos, cleaners, and protectants tailored to specific paint types and conditions. It is crucial to inspect your vehicle’s paint finish before purchasing products. For instance, some formulations are specifically optimized for dark-colored vehicles to enhance depth, while others are designed for light-colored cars to maximize brightness and remove stubborn yellowing. Additionally, check if your vehicle has an existing ceramic coating, as some high-pH or abrasive shampoos can degrade protective layers. Always match the product to your paint type by reading the compatibility charts on the packaging.
Products mentioned in this guide
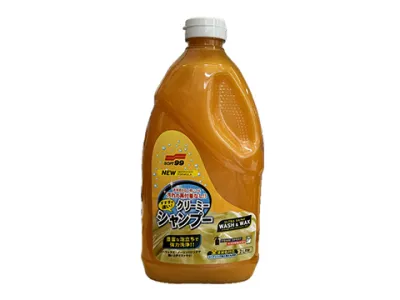
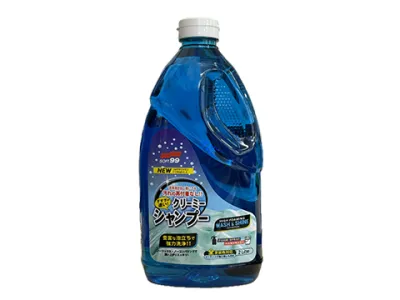
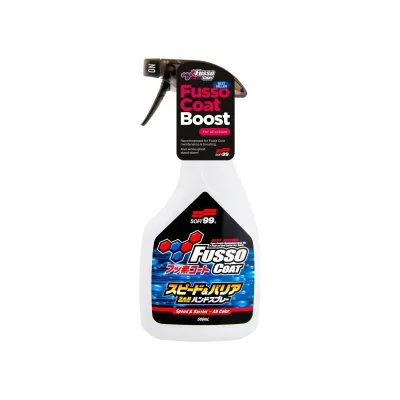
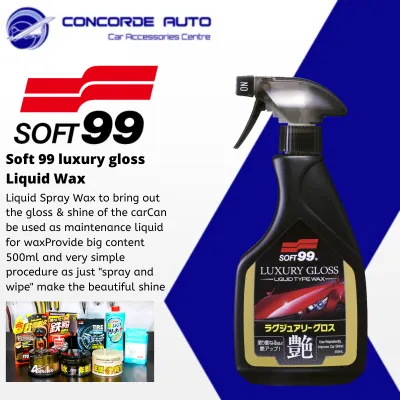
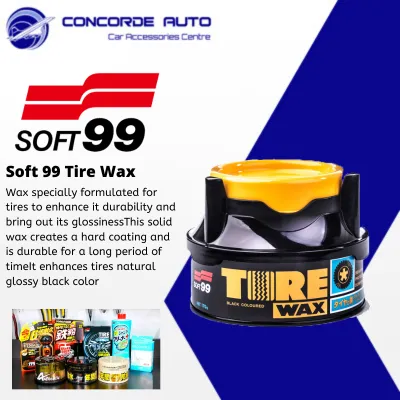
Prices are valid at publication and may change. Please refer to the product page for the latest price.
Before starting any chemical application, read the manufacturer’s instructions on the back of each bottle. Pay close attention to the recommended dilution ratios, as using too much concentrate can leave a sticky residue that attracts dust, while using too little will reduce lubrication and cleaning power. Verify that the product is safe for all exterior surfaces, including plastic trim, rubber seals, and glass, to prevent accidental staining or chemical degradation.
Step 1: Pre-Rinsing and Contact Washing
The first physical step of any car wash is a thorough pre-rinse to remove loose dirt, dust, and road grime before you touch the paint with a wash mitt. Direct a steady stream of water from a hose or a pressure washer starting from the roof and working downward. This initial rinse flushes away larger abrasive particles that would otherwise be dragged across the clear coat during the contact wash, causing micro-scratches. Pay special attention to wheel arches, rocker panels, and lower door sections where road debris accumulates heavily.

Once the loose debris is cleared, prepare your wash buckets using the two-bucket method. Fill one bucket with clean water for rinsing your mitt, and fill the second bucket with water mixed with your chosen Soft99 shampoo according to the label’s dilution instructions. Dip your microfiber wash mitt into the soapy solution, then gently glide it over the vehicle’s surface. Do not apply heavy downward pressure; let the lubricated fibers of the mitt lift the dirt naturally. After cleaning a single panel, rinse the dirty mitt thoroughly in the clean-water bucket, rubbing it against the grit guard to release trapped dirt, before reloading it with fresh soapy water.
Always wash the vehicle from top to bottom, starting with the roof, hood, and trunk before moving down to the doors and bumpers. This sequence ensures that dirty water does not run down onto already cleaned sections. In warm and humid climates, work in small sections and rinse the soap off frequently. Never allow the shampoo to dry on the paintwork, as this can leave unsightly soap spots and mineral deposits that are difficult to remove. Once the entire vehicle is washed, perform a final, comprehensive rinse to ensure all soap residue is completely flushed away.
Step 2: Paint Decontamination and Surface Preparation
Even after a thorough contact wash, your paint may still feel rough due to embedded contaminants like industrial fallout, iron particles, brake dust, and tree sap. To safely remove these bonded impurities, start with a chemical decontamination step using an iron remover. Spray the product onto cool panels and wheels, allowing it to react with iron particles, which typically turn purple as they dissolve. Rinse the surface thoroughly with clean water once the reaction is complete, ensuring the chemical does not dry on the paint.
For physical contaminants that remain, a mechanical decontamination step using a clay bar is necessary. Before using a clay bar, you must apply a dedicated clay lubricant or a highly lubricated shampoo solution as specified by the product instructions. Never rub a clay bar on dry paint, as this will cause severe marring. Gently glide the clay bar back and forth over the lubricated surface using light hand pressure. Regularly fold the clay to expose a clean, fresh surface, and discard the clay bar immediately if you drop it on the ground, as it will pick up abrasive dirt that cannot be washed off.
To determine if your paint requires mechanical clay decontamination, perform the plastic bag test. Place your hand inside a clean plastic sandwich bag and gently slide your fingertips over the freshly washed paint. The plastic bag amplifies your sense of touch, allowing you to feel tiny bumps and rough spots that indicate embedded contaminants. If the surface feels rough like fine sandpaper, it is time to clay. However, establish clear stop conditions: do not use a clay bar on hot panels or in direct sunlight, and stop immediately if you notice heavy marring or dulling, which indicates insufficient lubrication or a paint surface that requires professional machine polishing rather than DIY claying.
Step 3: Applying Soft99 Wax or Coating Protection
Once the paint is clean, smooth, and completely dry, you can apply a protective layer to seal the finish and provide water-beading properties. Soft99 offers several types of protectants, including traditional paste waxes, liquid sealants, and modern spray coatings. Paste waxes generally offer deep gloss and long-lasting protection but require careful, thin application and manual buffing. Liquid sealants provide a balance of durability and ease of use, while spray coatings offer the fastest application times and are ideal for quick maintenance. Always consult the specific product label to understand the unique curing times and application requirements of your chosen formula.
When applying a paste wax or liquid sealant, use a clean foam applicator pad. Apply a small amount of product to the pad—thin, even coverage is key to a successful application, as applying too much wax makes removal extremely difficult and wastes product. Work in small, manageable sections, such as half a hood or a single door panel. Use a cross-hatch pattern or light circular motions as recommended by the product instructions to ensure complete, uniform coverage. Allow the product to cure according to the label directions; you can verify readiness by performing a “swipe test” with a clean finger. If the swiped area is clear and free of smears, the wax is ready to be buffed off.
Buff the cured residue using a clean, dry, high-quality microfiber towel. Fold the towel into quarters and use light, circular motions to reveal the gloss, flipping to a clean side frequently to avoid loading the cloth with excess wax. To prevent uneven curing, staining, or hazing, never apply waxes or sealants in direct sunlight or on panels that are hot to the touch. If you are working in a warm environment, reduce your work area size and buff off the product sooner to prevent it from baking onto the clear coat.
Verifying Results and Routine Maintenance
After completing the application and buffing steps, inspect your work to verify the quality of the finish. Walk around the vehicle under bright, indirect light or use a detailing inspection light to check for any remaining wax residue, hazing, or uneven spots. Run the back of your hand gently over the paint to confirm a slick, smooth texture. You can also test the hydrophobic properties by misting a small amount of water onto a panel; high-quality protection will cause the water to bead up into tight, round droplets and sheet off the surface rapidly.
To maintain this protective layer, establish a regular maintenance wash routine. Wash your vehicle every one to two weeks using a pH-neutral car shampoo that does not strip waxes or sealants. Avoid automatic drive-through car washes that use harsh chemicals or abrasive brushes, as these will quickly degrade your protective coating and introduce swirl marks. Reapply your chosen Soft99 wax or sealant based on observable degradation—such as when water stops beading cleanly or when the paint loses its slickness—rather than relying on a strict calendar schedule.
While home detailing can yield impressive results, recognize when a vehicle requires professional intervention. Deep scratches that penetrate the clear coat down to the primer, severe paint oxidation, heavy water spot etching, or failed clear coat adhesion cannot be resolved with hand-applied waxes or clay bars. Attempting to fix these issues at home without professional rotary polishers and paint depth gauges can lead to permanent paint damage. In these cases, consult a qualified detailing professional to assess and restore the paintwork safely.
Frequently Asked Questions (FAQ)
Can I mix different Soft99 shampoos and waxes in the same wash?
As a general rule, you should avoid mixing different car shampoos in the same wash bucket, as combining different chemical formulations can alter their pH levels, reduce lubrication, or neutralize active cleaning agents. Similarly, do not mix different paste waxes together during application. However, you can layer compatible products sequentially if authorized by the product instructions. For example, you can apply a quick-detailing spray coating over a fully cured paste wax to boost gloss and extend the lifespan of the base protective layer. Always check the individual product labels to confirm compatibility before layering.
How do I remove dried Soft99 wax residue from plastic trim?
If you accidentally get wax on unpainted plastic or rubber trim, it can dry into an unsightly white residue. To remove it safely, act as soon as possible using a clean microfiber towel and a dedicated exterior trim cleaner or a mild all-purpose cleaner diluted according to the manufacturer’s instructions. Gently agitate the area with a soft-bristled detailing brush or a clean microfiber cloth to lift the wax from the textured plastic pores, then wipe the area clean with a damp towel. Avoid using abrasive scrubbing pads, harsh household solvents, or stiff wire brushes, as these can permanently scratch, discolor, or degrade the plastic trim.
Community discussion
Share your experience or ask a question. Comments are reviewed before publication.