
Cleaning alloy or painted rims without scratching requires a systematic approach: choosing a soft microfiber or natural boar’s hair car wheel rim brush, applying a pH-neutral cleaner to dissolve brake dust, and using a multi-bucket rinse system to prevent abrasive grit from dragging across the surface. By prioritizing chemical lubrication over physical force, you can safely remove stubborn road grime and restore your wheels’ pristine finish.
Understanding the Vulnerability of Alloy and Painted Finishes
Modern alloy wheels are highly sophisticated components, often finished with a delicate clear coat, paint, or high-polish lacquer. Unlike rugged, bare steel wheels of the past, these contemporary finishes are remarkably sensitive. The clear coat applied to your rims is chemically similar to the paint on your car’s body panels, meaning it is equally susceptible to micro-scratches, swirl marks, and chemical etching.
Brake dust is not ordinary road dirt; it is a highly destructive, abrasive compound. It consists of microscopic metallic shards from brake rotors, carbon fibers from brake pads, and polymer adhesives, all fused together under extreme heat during braking. When these jagged particles settle on your rims, they bond tightly to the surface. Grinding a dry brush against this layer acts exactly like sandpaper, cutting tiny grooves into the clear coat and permanently dulling the finish.
Products mentioned in this guide
![[SG STOCK] Microfiber Wheel Brush Long Reach Rim Cleaning Brush | Scratch Safe Wheel Barrel Cleaner](https://img.lazcdn.com/g/p/f6ac70448454d1f1bdd7d2bb31ec0995.png_400x400q80.png_.webp)
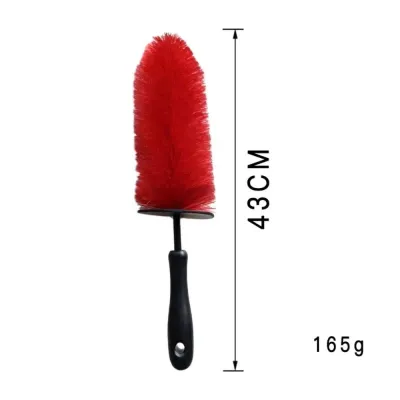
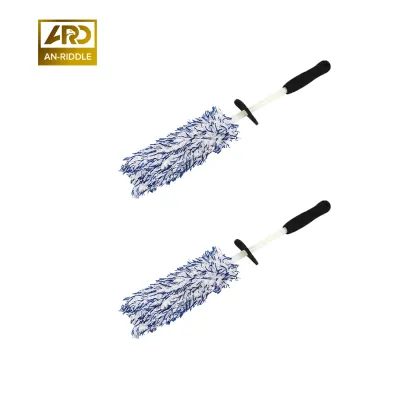
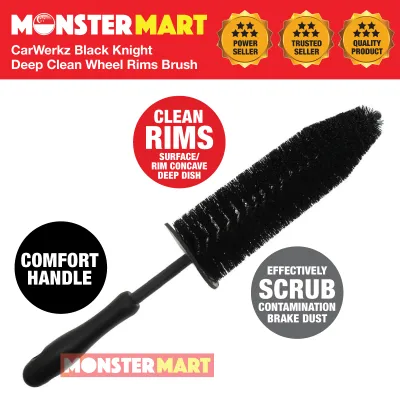
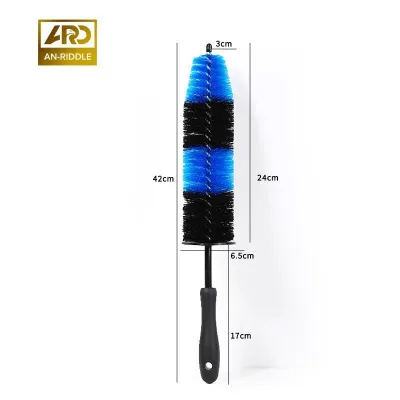
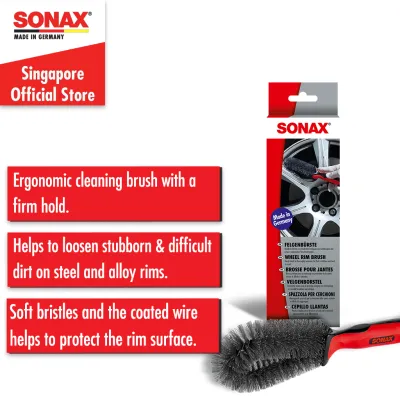
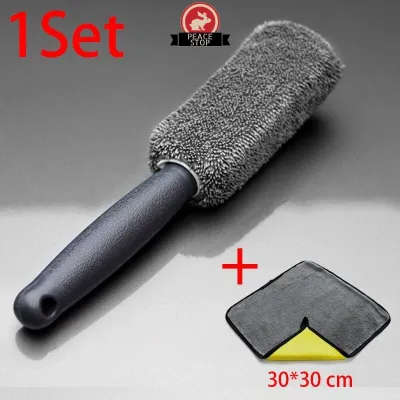
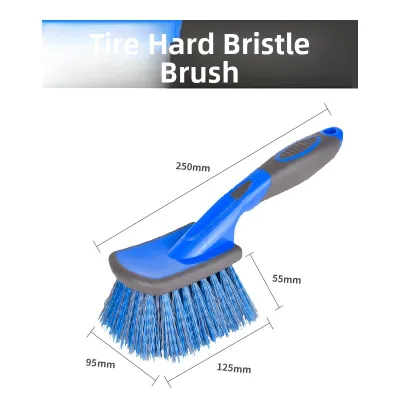
Prices are valid at publication and may change. Please refer to the product page for the latest price.
To preserve the aesthetic value of your wheels, you must adopt a strict cleaning philosophy: lift contaminants chemically and flush them away, rather than relying on mechanical friction. Your primary goal is to dissolve the bond between the brake dust and the rim surface, using a specialized brush only to gently agitate the pre-softened residue so it can be safely rinsed away.
Selecting Safe Brushes and Cleaners for Delicate Finishes
Choosing the right tools before you begin is the most critical step in preventing wheel damage. A safe car wheel rim brush must be constructed from materials that yield under pressure rather than resisting it. Look for brushes featuring soft, flagged synthetic bristles, plush microfiber sleeves, or natural boar’s hair. Avoid stiff nylon household brushes, wire-bristled utility brushes, or kitchen scouring pads, which will immediately scratch painted or polished finishes.

Beyond the bristles, inspect the physical construction of the brush. Ensure the tool features a rubberized or plastic-coated core and a soft rubber bumper tip. If the metal spine of a cheap brush is exposed, it can easily scrape against the wheel spokes or inner barrel during use, leaving deep, permanent gouges. High-quality, scratch-free wheel brushes typically range from S$15 to S$40 in Singapore, representing a minor investment compared to the high cost of professional wheel refinishing.
Your choice of chemical cleaner is just as vital as your brush. For delicate alloy, painted, or anodized finishes, always opt for a pH-neutral or specifically formulated alloy wheel cleaner. Avoid harsh, highly acidic cleaners or highly alkaline industrial degreasers unless they are explicitly approved by your wheel or vehicle manufacturer. Acidic and alkaline chemicals can quickly cloud polished aluminum, stain anodized finishes, and degrade the protective clear coat over time.
Before applying any chemical cleaner, check your vehicle manufacturer’s guidelines and the wheel manufacturer’s care instructions. A general material category like “alloy” does not guarantee compatibility with all cleaners. Always verify that the chemical is label-authorized for your specific finish—whether painted, clear-coated, polished, or anodized—to avoid damaging delicate clear coats, plastic center caps, or tire rubber.
Step-by-Step Guide to Washing Rims Without Causing Damage
Safely cleaning your wheels requires a structured, step-by-step process that prioritizes surface lubrication and minimizes physical friction. By establishing a systematic workflow, you can thoroughly clean the wheel face, spokes, and inner barrels without introducing unsightly swirl marks.
Step 1: Cool Down and Pre-Rinse
Never wash wheels when they are hot from driving. In Singapore’s warm tropical climate, brake components and wheel rims can reach high temperatures rapidly. Applying cold water or chemical cleaners to hot wheels causes rapid evaporation, which leads to stubborn water spots and chemical etching from concentrated soap residues. Let the wheels cool completely to the touch before starting.
Once the wheels are cool, perform a thorough pre-rinse using a steady stream of water from a garden hose or a pressure washer. Aim to flush away the loose top layers of road grime, sand, and heavy brake dust. Removing these loose, highly abrasive particles before your brush touches the wheel reduces the risk of dragging them across the clear-coated surface.
Step 2: Apply Cleaner and Agitate Gently
Spray your chosen pH-neutral wheel cleaner evenly across the wheel face, spokes, and inner barrel. Allow the chemical to dwell according to the exact wait times specified on the product label—typically between two to five minutes. This dwell time allows the active ingredients to break down and lift the stubborn metallic particles. Do not allow the cleaner to dry completely on the surface, as this can leave permanent stains.
When agitating, use incredibly light pressure. Let the soft bristles or microfiber cover of your car wheel rim brush do the work. Work systematically in small, manageable sections, such as cleaning one spoke at a time, moving from the top of the wheel downward. Avoid scrubbing back and forth aggressively; instead, use gentle, linear strokes or light circular motions depending on the contours of the wheel design.
Step 3: Deep Clean the Barrels and Lug Holes
The inner barrel of the wheel, situated behind the spokes, accumulates the heaviest concentration of brake dust and road grime. To clean this area safely, use a long, flexible barrel brush with a protective rubber tip. Gently slide the brush between the spokes to reach the deep recesses of the barrel and the areas surrounding the brake calipers.
When cleaning around the brake calipers and suspension components, avoid forcing the brush into tight clearances where it might dislodge wheel weights, damage brake wear sensors, or scrape sensitive brake lines. If you are unsure about clearances or component safety, consult your vehicle’s service manual or seek professional detailing advice.
For the smaller, intricate areas like the lug nut recesses and the center cap, switch to a dedicated detailing brush made of soft boar’s hair or ultra-soft synthetic bristles. These areas are prone to collecting dirt that standard brushes cannot reach. Gently agitate the recesses in a circular motion to loosen the trapped grime.
Maintain a strict rinsing routine throughout this process. Prepare a dedicated rinse bucket filled with clean water. Frequently dip your brushes into this bucket, agitating them against a grit guard if available, to release the trapped metallic dust before returning the brush to the wheel. This prevents you from dragging abrasive particles back onto the delicate painted surfaces.
Essential Brushing Techniques to Prevent Swirl Marks
Dry friction is the primary cause of swirl marks on painted and alloy rims. A wheel brush should never make contact with a dry or semi-dry wheel surface. If you notice the cleaning foam or soapy water starting to dissipate or dry out during agitation, immediately reapply water or spray more wheel cleaner to restore a slick, lubricated barrier.
Many car owners instinctively press harder on the brush when encountering stubborn, baked-on brake dust spots. This is a critical mistake. Excessive physical pressure forces the abrasive dust particles directly into the clear coat, creating deep scratches. If a spot does not come clean with gentle agitation, rinse the area, reapply your chemical cleaner, and allow it to dwell for another minute to chemically soften the deposit before trying again.
Treat your wheel brushes with the same care you would use for your car’s paint wash mitt. After cleaning a single spoke or a small section of the barrel, rinse the brush thoroughly in your rinse bucket. Visually inspect the bristles or microfiber sleeve to ensure no large particles of grit or metal shavings are trapped within the fibers.
Accidents happen, especially during a wet car wash. If your wheel brush slips out of your hand and touches the ground, establish a strict, non-negotiable rule: do not put it back on the wheel. Even a brief contact with the driveway or garage floor can cause the brush to pick up tiny pieces of gravel, sand, or concrete dust. Rinse the brush thoroughly under running water, shake it out, and inspect it closely to ensure it is completely clean before continuing your work.
Drying and Protecting the Rims Post-Wash
Once you have thoroughly rinsed all soap and suspended brake dust from the wheels, do not leave them to air dry. Leaving water to evaporate naturally, especially in Singapore’s humid climate, will result in unsightly mineral deposits or hard water spots. Dry the rims immediately using a clean, plush microfiber towel. Dedicate this towel strictly to wheel drying; never use your paintwork drying towels on wheels, as microscopic metallic particles can remain trapped in the fibers even after washing.
To make future maintenance significantly easier, apply a high-quality wheel sealant, wheel wax, or ceramic coating to the clean, dry rims. Always follow the specific manufacturer’s instructions for application and curing times. These protective products create a slick, hydrophobic barrier that prevents brake dust from bonding tightly to the clear coat. Consequently, during your next wash, the dust will rinse away much more easily, reducing the need for intensive brushing and minimizing the risk of scratching.
Frequently Asked Questions (FAQ)
Can I use a regular household scrub brush on my car rims?
No, you should never use a regular household scrub brush on your car rims. Household brushes are typically designed with stiff nylon bristles meant for cleaning hard surfaces like tile grout, concrete, or plastic tubs. These stiff bristles do not yield under pressure and will easily cut through the delicate clear coat, paint, or polished finish of your alloy wheels, leaving behind a dense network of micro-scratches and swirl marks. Always invest in a dedicated car wheel rim brush designed specifically for automotive finishes.
How often should I clean my alloy wheels to prevent brake dust buildup?
Ideally, you should clean your alloy wheels during every regular car wash, which is typically once every one to two weeks. Frequent washing prevents highly corrosive brake dust from baking onto the clear coat under the heat generated by braking. If left untreated for extended periods, the metallic particles can permanently pit and etch the finish, requiring aggressive polishing or professional refinishing to repair. Consistent, gentle maintenance is the most effective way to keep your rims looking pristine without risking scratches.
Community discussion
Share your experience or ask a question. Comments are reviewed before publication.