
Using a specialized tyre stone remover is the safest and most effective way to clear debris from your tire treads without causing structural damage. The core technique involves inserting the tool’s blunt hook at a shallow, horizontal angle alongside the embedded stone, then applying gentle upward leverage to pop it out. Stabbing directly downward or using sharp, improvised household tools can easily slice the rubber, puncture the inner liner, or damage the underlying steel belts, leading to catastrophic tire failure.
Why Removing Embedded Stones Matters for Tire Health
Tire tread patterns are meticulously engineered to channel water, provide traction, and ensure vehicle stability. When small stones, gravel, or debris become wedged within these grooves, they compromise the tire’s ability to perform these critical safety functions. In Singapore, where sudden, heavy tropical downpours are common, maintaining clear tread grooves is essential. Deep grooves act as channels to evacuate water from beneath the tire footprint. If these channels are blocked by embedded stones, the tire’s water-clearing capacity is reduced, which significantly increases the risk of hydroplaning on wet expressways.
Beyond wet-weather performance, trapped stones present a progressive structural threat known as “stone drilling.” As the tire rotates, the weight of the vehicle repeatedly forces the trapped stone against the bottom of the tread groove. Over time, this localized, high-pressure contact acts like a chisel, slowly driving the stone deeper into the rubber compound. If left unchecked, the stone can eventually penetrate the tread base and reach the internal steel belts and fabric plies. Once moisture penetrates these internal layers, it initiates corrosion in the steel belts, leading to belt separation, rapid air loss, and potentially a catastrophic blowout at high speeds.
Products mentioned in this guide
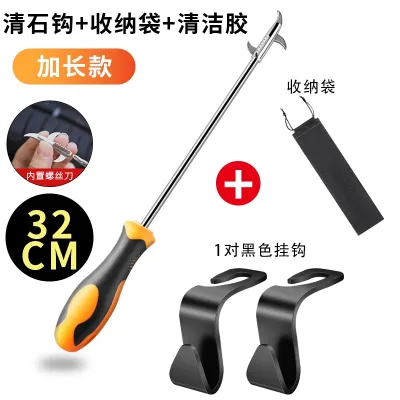
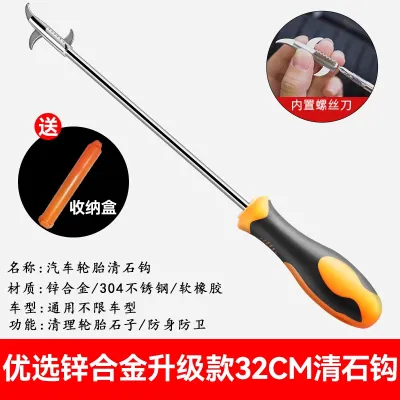
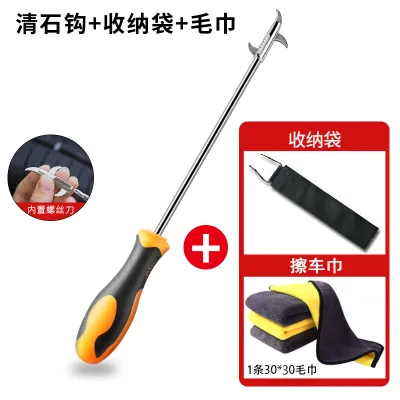
Prices are valid at publication and may change. Please refer to the product page for the latest price.
Additionally, embedded stones can cause noticeable ride quality issues. A stone wedged in the tread alters the uniform contact patch of the tire, generating a persistent, rhythmic clicking sound that increases with vehicle speed. This localized stiffness also causes minor vibrations that can be felt through the steering wheel. Over thousands of kilometers, these minor disturbances lead to uneven tread wear, reducing the overall lifespan of your tires and requiring premature replacement.
Tools and Preparation for Safe Stone Removal
Before attempting any tire maintenance, refer to your vehicle’s owner’s manual and the tire manufacturer’s specific care guidelines. If you are unsure of your tire’s condition or if instructions conflict, stop immediately and consult a qualified tire professional.

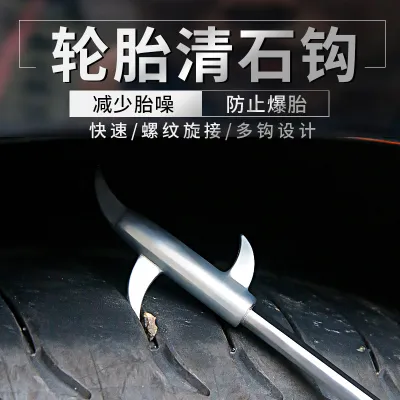
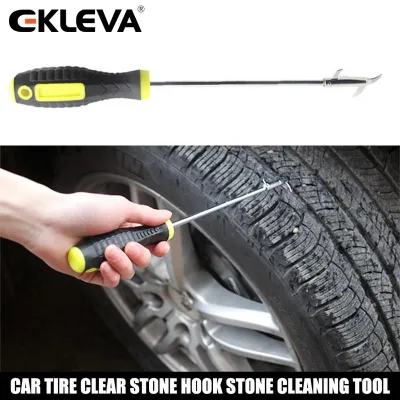
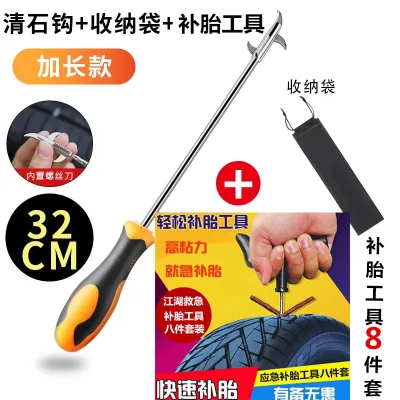
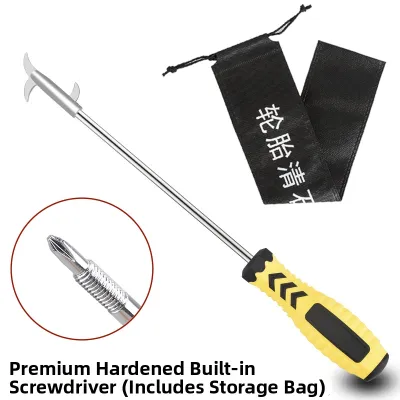
Using the correct tool is vital to prevent accidental damage to the rubber compound. A dedicated tyre stone remover is specifically designed for this task. These tools typically feature a robust metal shaft with a blunt, curved hook or a specialized angled pick, paired with an ergonomic, non-slip handle. Unlike sharp household implements, the tip of a professional stone remover is rounded to minimize the risk of slicing the rubber. These tools are readily available on major online marketplaces and at automotive accessory retailers in Singapore, generally ranging in price from S$5 to S$15.
To perform the job effectively, gather a few supplementary items:
- A bright LED flashlight: Essential for illuminating the deep recesses of the tread grooves.
- A stiff-bristled utility brush: Useful for clearing away loose dirt, sand, and surface road debris before using the hook.
- A reliable tire pressure gauge: To verify tire inflation levels after the stones have been extracted.
Proper vehicle preparation is crucial for personal safety and tire integrity. Park your vehicle on a flat, level, and stable concrete or asphalt surface. Engage the parking brake firmly and place the transmission in Park (or first gear for manual vehicles) to prevent any accidental rolling. Never attempt to remove stones immediately after driving; allow the tires to cool completely. High road temperatures in Singapore can soften the tire rubber, making it highly susceptible to accidental gouging. Furthermore, working near hot brake discs and suspension components poses a significant burn hazard.
Step-by-Step Guide to Using a Tyre Stone Remover
Positioning and Inspecting the Tire
To gain clear access to the front tire treads without raising the vehicle, start the engine and turn the steering wheel fully to one side. Once the tread face is exposed, switch off the engine, remove the key, and ensure the parking brake is fully engaged. For the rear tires, you will need to inspect the visible portions of the tread, then carefully roll the vehicle forward or backward by a half-turn of the wheel to access the remaining sections.
Position yourself comfortably next to the tire and shine your LED flashlight at a shallow, oblique angle across the tread pattern. This angled light casts distinct shadows, highlighting any embedded stones that are flush with the tread surface. Use your stiff-bristled brush to sweep away loose surface debris, leaves, and dried mud. This allows you to clearly distinguish between harmless surface dirt and firmly wedged stones that require mechanical extraction.
Extracting the Stones Correctly
Hold the tyre stone remover firmly in your dominant hand. Position the tool so that the curved hook enters the tread groove at a shallow, horizontal angle—nearly parallel to the tire’s surface. Avoid pointing the sharpest part of the tool directly downward into the base of the groove, as a sudden slip could puncture the thin rubber layer.
Slide the blunt hook underneath or alongside the embedded stone. Using the adjacent tread block as a gentle pivot point, apply steady upward leverage to pop the stone out of the groove. Do not use sudden, violent jerking motions or excessive downward force. If a stone is stubborn, work the tool around its perimeter, loosening it gradually from different angles rather than forcing it out from a single position. Work systematically across the tire, starting from the outer shoulder and moving across the center ribs to the inner shoulder, ensuring no grooves are missed.
Checking for Punctures or Tread Damage
Once a stone has been successfully extracted, perform a thorough post-removal inspection of the empty groove. Direct your flashlight into the cavity and look closely for any signs of structural damage. Check for exposed white fabric cords, metallic glints indicating steel belts, or deep tears in the rubber.
Listen carefully for any faint, continuous hissing sounds, which indicate that the stone had already punctured the inner liner and its removal has opened up a slow leak. To verify the tire’s integrity, spray a mixture of mild dish soap and water directly into the empty groove. If you observe growing bubbles, it confirms an active air leak. Finally, take this opportunity to inspect the nearby tread wear indicators (TWI)—the small raised bars molded into the bottom of the tread grooves. If the tread is worn down flush with these indicators, the tire has reached its legal wear limit and must be replaced.
Common Mistakes That Can Damage Your Tire Tread
The most frequent mistake made during DIY stone removal is using inappropriate, sharp household tools. Screwdrivers, pocket knives, metal awls, or nails have sharp points and edges that can easily slice through the rubber compound. If the tool slips under pressure, it can gouge the tread blocks, slice the delicate sidewall, or puncture the tire’s inner liner, turning a simple maintenance task into an expensive replacement.
Another common error is applying excessive brute force. When faced with a deeply wedged or oddly shaped stone, some drivers attempt to pry it out with extreme leverage. This aggressive prying can tear chunks of rubber directly out of the tread blocks, permanently weakening the tire’s structural integrity and compromising its grip.
Additionally, avoid digging aggressively into the rubber at the base of the tread grooves. The rubber layer at the bottom of a groove is significantly thinner than the surrounding tread blocks. Digging into this base layer with a tool can compromise the tire’s waterproof barrier, allowing moisture to seep directly into the underlying steel belts, initiating internal rust and belt separation.
Finally, do not focus solely on stone removal while ignoring the overall condition of the tire. Always check for other signs of wear, such as dry rot cracking, uneven shoulder wear, or embedded nails and screws, which require professional attention rather than simple stone extraction.
When to Stop and Seek Professional Tire Inspection
Knowing when to step back and seek professional assistance is a critical aspect of safe vehicle maintenance. If a stone is so tightly wedged that gentle leverage with a proper tyre stone remover cannot dislodge it, do not attempt to force it. The stone may have already punctured the tire completely, and removing it could cause immediate deflation. Drive the vehicle to a certified tire service center where technicians can safely remove the object and inspect the tire from the inside.
You must seek immediate professional help if you observe any of the following after removing a stone:
- Exposed internal structures: Any visible steel wires, fabric plies, or cords inside the tread groove.
- Active air leaks: Confirmed by a hissing sound or bubbling soapy water.
- Structural anomalies: Sidewall bulges, blisters, or wavy distortions on the tire surface, which indicate internal belt separation.
Never attempt to patch or plug a tire puncture yourself using external DIY plug kits as a permanent solution. These kits are designed solely for temporary emergency use to get the vehicle to a workshop. A professional technician must demount the tire from the wheel rim, inspect the inner liner for hidden damage, and apply a proper combination patch-plug from the inside to ensure the tire remains safe for highway speeds.
Frequently Asked Questions (FAQ)
How often should I check my tires for embedded stones?
It is highly recommended to perform a visual inspection of your tires at least once a month, ideally when you check your tire inflation pressures. If you frequently drive on unpaved surfaces, gravel driveways, or through construction zones, increase this frequency to a weekly check. Additionally, always inspect your tires before embarking on long-distance highway trips to ensure optimal safety and performance.
Can driving with stones in the tread cause a blowout?
Yes, prolonged driving with stones wedged in the tread can eventually cause a blowout through the process of stone drilling. The continuous flexing of the tire against the road forces the stone to act like a wedge, slowly cutting through the tread rubber. Once the stone penetrates the tread base and reaches the steel belts, moisture enters and corrodes the steel, weakening the tire’s internal structure and leading to sudden tread separation or a high-speed blowout.
Community discussion
Share your experience or ask a question. Comments are reviewed before publication.