
A sudden tyre puncture on a busy road can turn a routine drive into a highly stressful situation. Knowing how to use a tyre repair kit allows you to temporarily seal a minor puncture and safely drive your vehicle to a professional workshop. This step-by-step guide explains how to safely assess tyre damage, use the tools in a standard repair kit, and execute a reliable temporary plug on the roadside.
Assess the Damage: Is Your Puncture Safe to Plug?
Pulling over safely is your absolute priority when you suspect a puncture. On busy Singapore expressways such as the PIE, AYE, or CTE, finding a secure spot can be challenging. If you are on an expressway, attempt to take the nearest exit or pull into a designated EMAS emergency bay. If you must stop on the shoulder, turn on your hazard lights immediately, apply the parking brake firmly, and place your reflective warning triangle at least 50 to 100 metres behind your vehicle to alert oncoming traffic. Ensure all passengers exit the vehicle and wait safely behind the roadside guardrail.
Once the vehicle is secured, inspect the tyre to determine if it is safe to repair. A tyre repair kit is designed exclusively for small punctures located strictly within the central tread area of the tyre. This region is reinforced by steel belts, allowing a temporary plug to hold securely under pressure. The puncture must be relatively straight and caused by a small object, such as a nail or a screw.
Products mentioned in this guide
![[SG 🚚] Bike Bicycle Flat Tire Repair Kit Tool Set Kit Patch Rubber Portable Fetal Best Quality Cycling](https://img.lazcdn.com/g/p/cf71f1d7769ba0f8a7ebbb40f96314b5.jpg_400x400q80.jpg_.webp)
Prices are valid at publication and may change. Please refer to the product page for the latest price.
You must stop and call for professional roadside assistance if the damage occurs on the tyre’s sidewall or shoulder. The sidewall experiences continuous flexing and extreme structural stress during driving; attempting to plug a sidewall puncture can lead to a sudden, catastrophic tyre blowout. Additionally, do not attempt to use a repair kit if the puncture is larger than 6mm, if the tyre has completely deflated and been driven on (which ruins the internal sidewall integrity), or if the tyre bead has unseated from the wheel rim. In these scenarios, the tyre is structurally compromised and must be towed. Always consult your vehicle’s owner manual for any specific warnings or warranty limitations regarding temporary roadside repairs before proceeding.
Know Your Tools: What Is Inside a Standard Tyre Repair Kit?
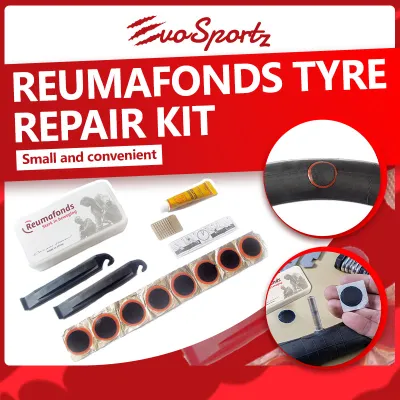
Familiarizing yourself with the contents of your tyre repair kit before an emergency occurs ensures you can act quickly and confidently on the roadside. A standard kit, which typically costs between S$15 and S$40 at local automotive accessory shops or online marketplaces, contains several specialized tools designed for manual puncture repair.

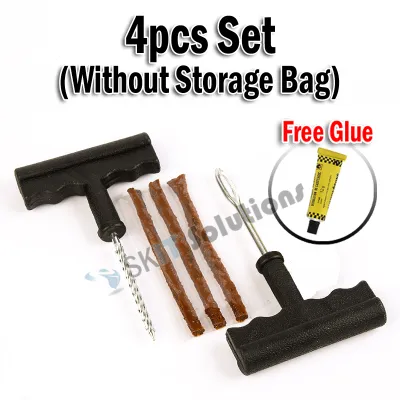
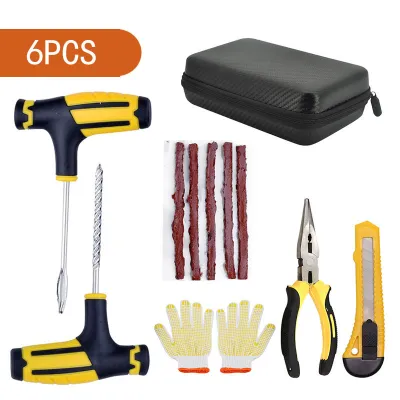
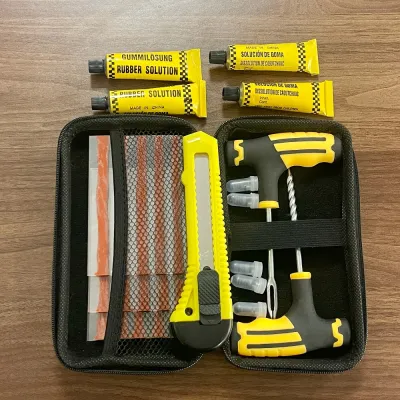
The core tools in a standard kit include the T-handle reamer tool, which features a spiral-grooved shaft designed to clean, roughen, and shape the puncture hole. The T-handle insertion tool has a split-eye needle at its tip to hold and force the repair plug into the tyre. The repair plugs, often referred to as vulcanizing strips or bacon strips, are sticky, uncured rubber cords that seal the puncture channel. A small trimming knife is also included to cut away excess plug material, and some kits provide a tube of rubber cement to lubricate the tool and enhance the chemical bond.
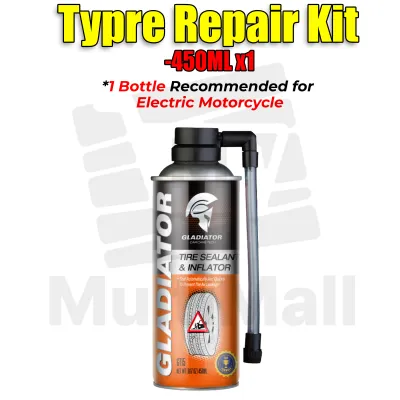
To reinflate the tyre after plugging, kits rely on either CO2 cartridges or a 12V portable air compressor. CO2 cartridges offer rapid, instantaneous inflation but are strictly single-use and do not allow you to adjust or monitor pressure easily. A 12V portable air compressor plugs directly into your vehicle’s accessory socket, taking a few minutes to inflate the tyre while allowing you to monitor the exact pressure using an integrated gauge. Remember to perform a pre-trip check periodically: the rubber plugs can dry out and lose their stickiness over time, especially in Singapore’s hot and humid climate. Check the expiration date of your kit and test your compressor regularly to ensure it functions when needed.
Step-by-Step Guide: Plugging a Tyre on the Roadside
Step 1: Locate the Leak and Remove the Debris
To begin the repair, you must first locate the exact source of the leak. Park the vehicle so the suspected area of the tyre is fully accessible, turning the steering wheel if necessary to expose the front tyres. Inspect the tread carefully for any embedded nails, screws, or sharp road debris. If you cannot see the object but hear a faint hissing sound, you can locate the leak by applying a mixture of soapy water to the tread; escaping air will create distinct, growing bubbles over the puncture site.
Once you identify the puncturing object, use a pair of pliers to grip it firmly. Pull the nail or screw straight out at the same angle it entered to avoid tearing the surrounding rubber. Be aware that removing the object will cause the remaining air to escape rapidly. You must proceed to the next step immediately to prevent the tyre from deflating completely and unseating from the wheel rim.
Step 2: Ream the Puncture and Load the Plug
Take the T-handle reamer tool and push it directly into the puncture hole. Twist the tool in a clockwise direction as you push it in, then pull it back out. Repeat this plunging motion three to four times to clean out any dirt, rust, or loose steel wire fragments from the tyre’s belts. This process also roughens the inner rubber walls of the puncture, which is critical for ensuring the sticky repair plug adheres properly. Leave the reamer tool inserted in the hole temporarily to block escaping air while you prepare the next step.
Next, prepare the insertion tool. Peel a single sticky repair strip from its backing paper and thread it through the eye of the T-handle insertion tool until the strip is perfectly centered, with equal lengths hanging down on both sides. If your specific kit instructions require the use of rubber cement, apply a thin, even layer of the adhesive to the center of the plug and the tip of the insertion tool now to act as both a lubricant and a sealant.
Step 3: Insert the Plug and Trim the Excess
Pull the reamer tool out of the puncture hole. Immediately align the loaded insertion tool with the hole at the same angle the puncture occurred. Using steady, firm downward pressure, push the insertion tool into the tyre. Continue pushing until approximately half an inch (about 1.27 cm) of the repair strip remains visible above the tread surface. Do not push the plug entirely into the tyre cavity, as it will fall inside and fail to seal the hole.
To release the plug, pull the T-handle insertion tool straight out of the tyre in one swift, smooth motion. Do not twist the tool as you pull, as twisting can dislodge the plug or tear the rubber strip. The split eye of the needle will slide off the rubber strip, leaving the folded plug firmly wedged inside the puncture channel to block the airflow.
Use the trimming knife or a sharp blade to cut away the excess protruding ends of the plug. Trim the rubber flush with the tyre tread blocks to prevent the plug from catching on the road surface and pulling out when the vehicle is in motion. Do not pull upward on the plug while cutting, as this can break the internal seal you just created.
Step 4: Reinflate the Tyre and Verify the Seal
Connect your 12V portable air compressor or CO2 inflation device to the tyre’s valve stem. Turn on the compressor and monitor the pressure gauge closely as the tyre inflates. Fill the tyre to the manufacturer’s recommended cold inflation pressure, which is typically found on the tyre placard on the driver’s side door jamb or in the vehicle owner’s manual. Do not inflate the tyre to the maximum pressure listed on the tyre sidewall itself, as this does not reflect your vehicle’s specific requirements.
Once the tyre reaches the correct pressure, perform a final safety check to verify the seal. Apply soapy water or pour a small amount of clean water directly over the trimmed plug. Watch the area closely for several minutes; if you see bubbles forming or hear a hissing sound, the seal is incomplete. If the leak persists, do not attempt to drive on the tyre. Stop immediately and call for a professional tow truck to transport your vehicle to a tyre service center.
Post-Repair Safety: Driving Limits and Getting a Permanent Fix
It is vital to understand that a roadside plug is strictly a temporary emergency measure. A plug inserted from the outside only seals the tread puncture; it does not seal the tyre’s inner liner, nor does it address any internal structural damage caused by the puncturing object or the period of low-pressure driving. Over time, moisture can seep past a temporary plug, causing the internal steel belts to rust and degrade, which can lead to sudden tyre failure at higher speeds.
When driving on a temporarily plugged tyre, modify your driving style immediately. Avoid high speeds, sudden acceleration, hard braking, and sharp cornering. Adhere strictly to the speed and distance limitations specified in your tyre repair kit’s documentation. As a general safety rule, do not exceed 80 km/h, and limit your driving distance to the nearest professional tyre workshop, ideally keeping the trip under 80 kilometres.
Drive directly to a professional tyre shop in Singapore to have the tyre properly inspected and repaired. A qualified technician must demount the tyre from the wheel rim to inspect the inner liner for hidden structural damage. If the tyre is deemed repairable, the technician will apply a permanent patch-plug combination (often called a mushroom plug), which seals both the puncture channel and the inner liner. If the internal structure is compromised, or if the puncture does not meet safety standards, you must replace the tyre entirely to ensure your vehicle remains roadworthy and safe.
Frequently Asked Questions (FAQ)
Can I use a tyre repair kit on a run-flat tyre?
Most vehicle and tyre manufacturers strongly advise against using a temporary roadside repair kit on run-flat tyres. Run-flat tyres are engineered with reinforced sidewalls that support the vehicle’s weight when air pressure is lost. If you drive on a run-flat tyre while it is deflated, the internal sidewall structure undergoes extreme stress and heat, which can cause invisible structural degradation. To ensure your safety, consult your specific tyre manufacturer’s guidelines. In most cases, a run-flat tyre that has been driven under-inflated must be professionally inspected and replaced rather than plugged.
Is a plugged tyre safe for long-distance driving?
No, a tyre temporarily repaired with a roadside plug is not safe for long-distance trips or sustained high-speed highway driving. The sticky plug material is susceptible to heat buildup and centrifugal forces, which can cause it to loosen or fail during extended journeys. Furthermore, because a plug does not hermetically seal the inner liner, moisture can gradually penetrate the tyre carcass, corroding the internal steel belts and compromising the tyre’s structural integrity. Before embarking on any long-distance travel, ensure the tyre has been evaluated and permanently repaired with an internal patch-plug by a professional technician.
Community discussion
Share your experience or ask a question. Comments are reviewed before publication.