
Changing a motorcycle tire at home can save time and money, but using improper techniques or harsh metal tools often leads to unsightly scratches, gouges, or structural damage to expensive rims. The tyre glider has emerged as a popular alternative to traditional tire spoons, offering a low-friction plastic barrier designed to slide along the rim flange. However, even with a protective tool, improper technique can still result in bent flanges, torn tire beads, or marred finishes. Achieving a flawless, damage-free tire change requires a systematic approach that combines meticulous wheel preparation, precise tool positioning, and an understanding of physical resistance limits.
Before attempting any tire maintenance, it is vital to establish the safety boundaries of this task. Tires are critical safety components that directly affect your motorcycle’s traction, handling, and overall stability. Always consult your vehicle’s original owner’s manual and the tire manufacturer’s technical documentation to verify compatibility, correct tire dimensions, directional rotation, and recommended inflation pressures. Because improper installation can lead to sudden tire deflation or loss of vehicle control, any DIY tire mounting must be performed with extreme care. If you are unsure of your technical skills or lack the proper equipment, always seek the services of a qualified professional motorcycle workshop.
Preparing the Wheel and Tools for a Safe Tire Change
A successful tire change begins long before the tool touches the rim. The first step is to thoroughly clean the entire wheel assembly, focusing specifically on the rim flange, the bead seat, and the tire bead itself. Road grime, brake dust, and old rubber residue can act as abrasive compounds when trapped under the high pressure of a tire tool. Use a dedicated wheel cleaner that is explicitly authorized by its manufacturer for your specific rim material—whether painted, anodized, chrome, or bare polished aluminum. Never assume a general cleaner is safe, as harsh chemicals can permanently stain or degrade protective wheel coatings and rubber seals.
Products mentioned in this guide
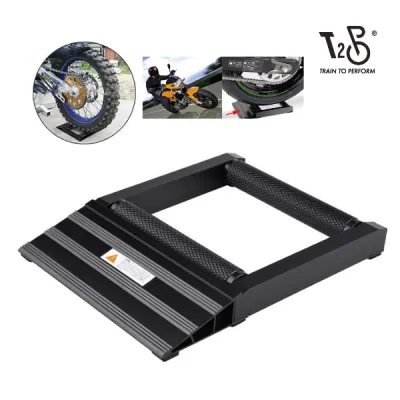
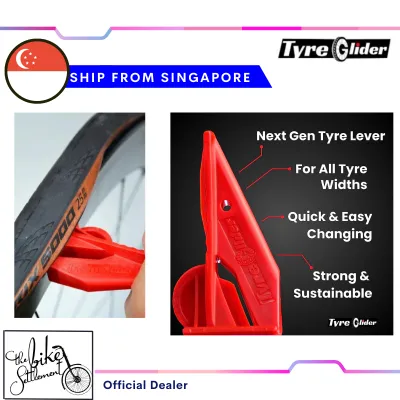
Prices are valid at publication and may change. Please refer to the product page for the latest price.
Once the wheel is clean, inspect your tyre glider. Because this tool relies on sliding contact with the rim, any embedded grit, metal shavings from previous jobs, or sharp plastic burrs on the tool’s contact surfaces can easily scratch your wheel. Run your fingers along the guide channels and contact edges of the glider. If you detect any rough spots or trapped debris, clean the tool thoroughly or use fine-grit sandpaper to gently smooth out any plastic imperfections. Using a damaged or dirty tool defeats its protective purpose.
The final preparation step is applying a suitable tire mounting lubricant. Proper lubrication is essential to reduce friction between the rubber bead, the rim, and the tyre glider. Only use lubricants specifically formulated for tire mounting, such as tire paste, liquid tire lube, or approved vegetable-oil-based soap solutions. Never use petroleum-based products, WD-40, engine oil, or household dish soaps. Petroleum products will chemically degrade the tire rubber and can cause the tire to slip on the rim under heavy braking or acceleration, while household soaps often contain corrosive salts that can pit aluminum rims over time. Apply the lubricant generously to both the inner and outer tire beads and the entire circumference of the rim flange.
Demounting the Tire: Guiding the Bead Over the Rim Edge
To demount the tire safely, you must first ensure the tire is completely deflated by removing the valve core. Next, break the tire bead on both sides of the wheel. The bead must be pushed entirely off the rim seat and into the drop center—the deeper, narrower middle section of the rim well. Failing to keep the opposite side of the tire bead in the drop center is the most common reason for excessive tension, which leads to broken tools, bent rims, and torn beads.

Once the bead is fully broken, position the tyre glider. Insert a standard, plastic-coated tire lever or a dedicated bead starter tool to lift a small section of the tire bead over the rim edge. Slide the tyre glider’s protective channel onto the exposed rim flange right next to this lifted section. The glider must sit securely on the rim lip, acting as a physical shield that prevents the tire bead from snapping back down and keeps any metal tools from scraping the rim face.
With the glider in place, apply smooth, progressive lateral pressure. Avoid sudden, jerky movements or excessive force. The tyre glider is designed to slide along the rim circumference, lifting the bead up and over the edge as it moves. If the tool binds, do not force it. Instead, check that the opposite side of the tire bead is still resting deep within the rim’s drop center. Work your way around the wheel in small, controlled increments rather than trying to force large sections of the tire off at once. This gradual approach distributes the physical stress evenly and prevents the tool from slipping and marring the wheel.
Mounting the Tire: Seating the Bead Without Rim Contact
Mounting a tire presents a different set of challenges, particularly during the final stage when the tire bead is under maximum tension. Start by pushing the first (lower) bead over the rim flange. This can usually be accomplished by hand or with minimal tool assistance, provided the bead is kept in the drop center. For the second (upper) bead, begin opposite the valve stem to ensure the valve assembly does not interfere with the bead seating in the drop center.
As you work the second bead over the rim, the tension will increase significantly. This is where the tyre glider becomes invaluable. Hook the glider’s guide channel onto the rim flange at the point where the tire bead starts to resist hand pressure. Position the tool so that its guiding ramp faces the unmounted section of the tire. By sliding the glider forward along the rim, you will guide the tightest section of the tire bead smoothly over the rim edge without allowing any metal-on-metal contact.
Maintain a precise tool angle throughout this process. Do not tilt or pry the glider outward at an extreme angle, as this can cause the tool to slip off the rim flange. A sudden slip under high tension can cause the tool to strike the visible face of the wheel, resulting in deep scratches, or it can pinch your fingers against the brake discs or sprocket. Keep the glider aligned parallel to the rim’s edge, using your hand to guide its path while keeping your body weight positioned to maintain steady downward pressure.
If you are working on a wheel with an inner tube, take extra precautions. Before mounting the second bead, slightly inflate the tube so it holds its natural round shape, which helps prevent it from twisting or falling into the path of the tyre glider. Carefully tuck the tube entirely within the tire carcass. As you slide the glider along the rim, constantly verify that the tube is not being pinched between the tire bead, the glider, and the rim flange. A pinched tube will rupture instantly upon inflation, requiring you to disassemble the entire wheel and start over.
Recognizing Binding, Pinching, and When to Stop Forcing
One of the most critical skills in DIY motorcycle maintenance is knowing when to stop. A tyre glider is a highly effective tool, but it cannot overcome improper technique or physical limitations. If you experience extreme resistance where the glider refuses to slide, or if you notice the plastic tool beginning to flex or discolor from stress, stop immediately. Forcing the tool past this point will likely result in a broken glider, a bent rim flange, or a torn tire bead.
High resistance is almost always an indication of an underlying issue. The most common cause is that the tire bead has slipped out of the rim’s drop center and is resting on the wider bead seat. When this happens, there is simply not enough physical slack in the tire carcass to allow the bead to stretch over the rim edge. Stop, push the already-mounted sections of the bead back down into the drop center, re-apply tire mounting lubricant to the stubborn area, and try again.
Additionally, check for any signs of tube trapping or tool misalignment. If the glider is not seated perfectly square on the rim flange, it can bind against the metal edge. If you have verified all these factors and the tire still refuses to mount—which can happen with exceptionally stiff-sidewall tires, cold ambient temperatures, or specific wheel-and-tire combinations—do not risk damaging your expensive motorcycle components. Acknowledge the safety boundary and transport the wheel to a professional motorcycle workshop. Professional technicians have specialized tire-changing machines and bead-holding clamps that can safely mount difficult tires without risking structural damage.
Post-Change Inspection and Tyre Glider Maintenance
After successfully mounting the tire, perform a thorough post-change inspection before inflating the tire to its final operating pressure. Visually inspect the entire circumference of the rim flange on both sides to ensure no accidental marks, scratches, or deformations occurred during the process. Slowly inflate the tire until the beads pop into place on the bead seats. Always stay clear of the tire during this process, and never exceed the maximum seating pressure specified on the tire sidewall.
Once the beads have popped, inspect the molded bead seat indicator line on the tire sidewall. This thin rubber line runs parallel to the rim edge and must be perfectly concentric and evenly spaced around the entire wheel. If the line dips below the rim edge in any section, the bead is not fully seated. Deflate the tire, apply more lubricant to that specific area, and re-inflate. Never ride on a motorcycle tire that is not perfectly seated, as it can cause severe vibrations, uneven wear, or a catastrophic tire failure.
Finally, maintain your tyre glider to ensure it remains safe for future use. Wash the tool with warm, soapy water to remove all traces of tire lubricant, dirt, and rubber residue. Many tire lubricants contain chemical compounds that, if left on the tool, can slowly degrade the composite plastic, making it brittle and prone to cracking during its next use. After drying, store the glider in a cool, dry place away from direct sunlight, UV exposure, and extreme heat, which can warp the plastic and compromise its structural integrity.
Frequently Asked Questions (FAQ)
Can I use a tyre glider on both alloy and spoked motorcycle rims?
While tyre gliders are designed to protect finished surfaces, motorcycle wheels come in various designs, including cast alloy, forged aluminum, and traditional spoked configurations. You must verify tool compatibility with your specific rim type by checking the tool manufacturer’s instructions and labels. Spoked rims often have different flange profiles and may feature spoke nipples or rim bands that can interfere with the glider’s path. Ensure the glider can seat securely on the rim flange without putting lateral pressure on the spokes or catching on any rim components.
Do I still need tire lubricant if I am using a tyre glider?
Yes, proper lubrication is absolutely mandatory when using a tyre glider. While the glider acts as a protective barrier to prevent direct metal-on-metal scraping, it does not eliminate the high friction generated between the tight rubber tire bead and the wheel. Applying a dedicated tire mounting lubricant reduces this friction, allowing the rubber to slide smoothly over the glider’s ramp and pop onto the rim seat. Skipping lubricant increases the physical force required, which can tear the tire bead, scratch the rim, or break the tool.
Community discussion
Share your experience or ask a question. Comments are reviewed before publication.