
Checking your tire tread depth with a dedicated gauge is a straightforward process that involves placing the tool’s probe into the tire’s main grooves, pressing the base flat against the surrounding tread blocks, and reading the measurement. Performing this check at multiple points across each tire ensures you obtain an accurate picture of your tread wear. In tropical climates like Singapore, where sudden, heavy downpours are common, maintaining sufficient tread depth is essential for keeping your vehicle stable on wet roads. By mastering this simple maintenance task, you can identify wear patterns early, maximize the lifespan of your tires, and ensure your vehicle remains safe and roadworthy.
Understanding the Importance of Tread Depth Checks
Your tires are the only point of contact between your vehicle and the road, making their condition central to your safety. The tread pattern on a tire is engineered to channel water away from the contact patch, allowing the rubber to maintain direct contact with the road surface. As tires wear down, the depth of these channels decreases, which significantly reduces their ability to displace water. This reduction in water evacuation capacity increases the risk of hydroplaning, a dangerous phenomenon where the tire loses contact with the road and glides on a thin film of water, leaving you without steering or braking control.
Beyond wet-weather safety, tread depth directly influences your vehicle’s stopping distance. Tires with worn tread require significantly more distance to come to a complete stop, especially on wet or slippery surfaces. Regular checks also help you monitor the overall health of your tires, allowing you to spot alignment or suspension issues before they cause irreversible damage. From a legal standpoint, driving on tires that fall below the statutory minimum tread depth can result in fines, vehicle inspection failures, and potentially compromised insurance coverage in the event of an accident.
Products mentioned in this guide

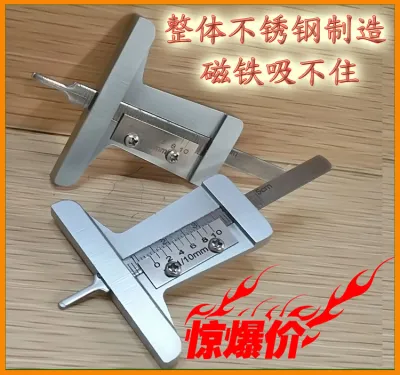
![[SG 🚚] Depth Color Car Tire Tool Measures Gauge Motors Tester Imperial Gage Tyre](https://img.lazcdn.com/g/p/10c9000d599f3d965113a863ec86805f.jpg_400x400q80.jpg_.webp)

Prices are valid at publication and may change. Please refer to the product page for the latest price.
Choosing the Right Tire Tread Depth Gauge
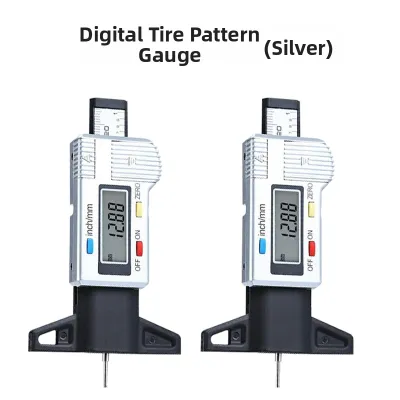
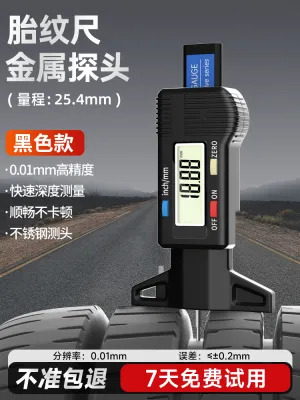
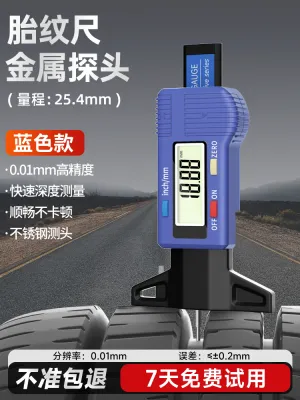
Selecting the right tool is the first step toward accurate tire maintenance. Tire tread depth gauges generally fall into three categories: digital, analog, and pocket-style. Digital gauges feature an electronic screen that displays precise numerical readings, often allowing you to switch between millimeters and inches at the touch of a button. These are highly favored for their readability and precision, making them excellent for quick, unambiguous results.

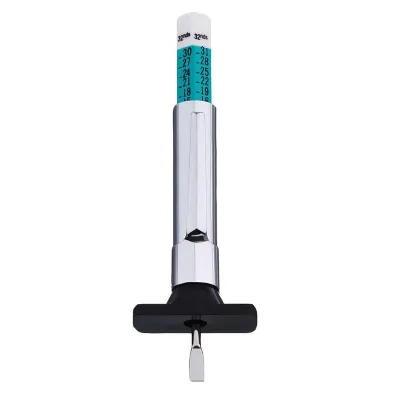
Analog gauges, resembling a sliding ruler, rely on a mechanical plunger that extends into the tread groove. As you press the base against the tire, the plunger pushes a calibrated scale out of the top of the gauge. These mechanical tools are highly durable, require no batteries, and are virtually impervious to minor drops. Pocket-style or card-style gauges are flat, compact tools with marked depth increments, offering a highly portable but slightly less precise option.
When choosing a gauge, prioritize durability, clear markings, and ease of use. If you opt for a digital model, ensure it has a robust housing and a reliable auto-off feature. For analog models, look for engraved or high-contrast markings that will not wear off over time. Regardless of the style you choose, regular calibration checks are essential. You can easily verify your gauge’s accuracy by pressing the base flat against a completely level, hard surface; the reading should register exactly zero. Store your gauge in a clean, dry place to protect the probe from bending or accumulating debris.
Step-by-Step Guide to Measuring Tread Depth
Measuring your tire tread depth is a quick process, but it requires a systematic approach to yield reliable data. Before you begin, ensure your vehicle is parked in a safe, well-lit location with a flat, level surface. Engage the parking brake fully and turn off the engine to prevent any accidental movement while you are working around the wheels.
Consistency is the foundation of accurate tire monitoring. You must treat each tire with the same level of care, checking multiple spots to ensure you do not miss localized wear. By following a structured sequence, you can easily compare readings over time and identify subtle changes in your vehicle’s alignment or tire inflation.
Preparing the Tire and the Gauge
Start by ensuring your tires are cool to the touch. While hot tires do not significantly alter tread depth measurements, working near hot brake components or exhaust pipes poses a safety hazard. Once the vehicle is safely parked, inspect the tread grooves of the tire you plan to measure. Tires frequently pick up small stones, gravel, mud, and other road debris that can lodge deep within the tread channels.
If the probe of your gauge lands on a piece of debris instead of the actual bottom of the groove, you will get an inaccurate, shallow reading. Use a small, non-damaging tool like a flathead screwdriver or a stiff brush to gently clear any obstructions from the grooves you intend to measure. After cleaning the tire, inspect your depth gauge. Ensure the probe moves smoothly without sticking, and wipe away any dirt or oil from the base. Zero the gauge by pressing it firmly against a flat, hard surface to confirm it is calibrated and ready for use.
Taking Measurements at Multiple Points
To get a comprehensive understanding of your tire’s condition, you must measure the tread depth across the width of the tire. Insert the gauge’s probe into the main longitudinal grooves, taking care to measure the inner, middle, and outer sections of the tread. Tires rarely wear down uniformly across their width, and relying on a single measurement can lead to a false sense of security.
In addition to measuring across the width, you should take readings at multiple points around the circumference of the tire. This requires checking at least three different locations on each tire, spaced roughly equal distances apart. For the front tires, you can turn the steering wheel fully to one side to expose the inner and outer tread edges, making them much easier to access. When inserting the probe, hold the gauge perpendicular to the tire surface. Press the base of the gauge firmly and flatly against the surrounding tread blocks, ensuring the probe extends straight down into the groove without bending or angling.
Reading and Recording the Results
Once the gauge is firmly in place, read the measurement carefully. If you are using a digital gauge, wait a moment for the numbers on the screen to stabilize before noting the value. For analog gauges, look directly at the scale at eye level to avoid parallax errors, which can make the reading appear slightly higher or lower than it actually is.
Record the measurements for each tire on a notepad or a digital device, keeping track of the inner, middle, and outer readings for the front-left, front-right, rear-left, and rear-right positions. When evaluating the safety of a tire, always use the lowest reading obtained as your primary metric. A tire is only as safe as its most worn section; if one groove is dangerously thin, the entire tire’s performance is compromised. Compare the recorded figures across all four tires to identify any significant discrepancies that could indicate mechanical issues.
Evaluating Tire Condition Based on Your Readings
In Singapore, the legal minimum tread depth for passenger car tires is 1.6 millimeters. Driving on tires with tread below this limit is illegal and highly dangerous, especially during heavy tropical downpours. However, waiting until your tires reach the absolute legal limit is not recommended. Most safety experts and tire manufacturers advise planning for tire replacement when the tread depth reaches 3 millimeters, as wet-weather traction and braking performance begin to degrade rapidly beyond this point.
Analyzing the pattern of your recorded measurements can reveal valuable information about your vehicle’s mechanical health. If you notice that the inner or outer edges of a tire are significantly more worn than the center, your vehicle’s wheel alignment may be out of specification. This uneven wear, often caused by incorrect camber or toe settings, can rapidly destroy a tire if left unaddressed. If the center of the tread is worn down more than the shoulders, the tire has likely been consistently over-inflated, causing the center to bulge and bear the brunt of the vehicle’s weight.
Conversely, if both outer edges are worn while the center remains relatively deep, the tire is likely under-inflated, causing the shoulders to support the load. If you detect any of these uneven wear patterns, or if your measurements fall near or below the 3-millimeter safety threshold, you should seek a professional inspection. A qualified technician can perform a wheel alignment, check your suspension components, and help you decide whether it is time to replace your tires to ensure continued safety on the road.
Common Measurement Mistakes and How to Avoid Them
Even with a high-quality gauge, simple user errors can lead to inaccurate readings and incorrect conclusions about your tire’s safety. One of the most common mistakes is placing the gauge’s probe directly on top of a tread wear indicator (TWI) bar. These raised rubber bars are molded into the bottom of the main tread grooves at a height of exactly 1.6 millimeters. If you accidentally place the probe on a TWI bar, your gauge will show a much shallower reading than the actual depth of the surrounding groove. Always look closely into the groove and position your probe away from these indicators.
Another frequent error is failing to hold the gauge perpendicular to the tire surface. If you press the gauge at an angle, the probe will travel diagonally through the groove, resulting in an artificially deep reading. To avoid this, ensure the flat base of the gauge is pressed completely flush against the surrounding tread blocks before taking your reading. Additionally, many drivers make the mistake of ignoring the inner grooves of the tires, particularly on the rear axle. Because these areas are harder to see without crawling under the vehicle, wear can go unnoticed until the tire is dangerously bald on the inside edge.
Frequently Asked Questions (FAQ)
How often should I check my tire tread depth?
You should establish a routine of checking your tire tread depth at least once a month. This regular schedule allows you to monitor wear rates over time and catch alignment or inflation issues before they cause severe damage. Additionally, always perform a thorough check before embarking on long road trips or driving in challenging weather conditions to ensure your vehicle is prepared for the journey.
Can I use a coin instead of a dedicated tread depth gauge?
While using a coin is a common quick-check method, it lacks the precision and reliability of a dedicated tread depth gauge. Coins do not provide exact numerical measurements, making it difficult to track subtle wear patterns or identify early alignment issues. To make safe, informed decisions about your tires and vehicle maintenance, always rely on a calibrated digital or analog tread depth gauge.
Community discussion
Share your experience or ask a question. Comments are reviewed before publication.