
Using a handheld blower to dry your car is an exceptionally effective way to prevent swirl marks, but it requires the correct technique, nozzle distance, and angle to avoid damaging the paint or trim. Traditional drying towels, even high-quality microfibers, can trap tiny dirt particles against the paint, creating micro-scratches or swirl marks as they are dragged across the surface. A handheld blower uses high-velocity air to sheet water off the vehicle without physical contact, preserving the integrity of your clear coat.
However, improper use—such as holding the nozzle too close, using excessive heat, or blowing debris onto the wet surface—can lead to accidental damage. By understanding how to prepare your equipment, manage your angles, and navigate delicate trim pieces, you can achieve a spotless, professional-grade finish right in your driveway. This guide outlines the essential techniques to safely and efficiently blow-dry your vehicle.
Preparing Your Car and Blower for Safe Drying
Before turning on your handheld blower, you must ensure both the vehicle surface and your equipment are fully prepared. The drying process is only as safe as your preparation. If either the car or the blower is carrying abrasive particles, you risk blasting debris directly onto your delicate clear coat.
Products mentioned in this guide
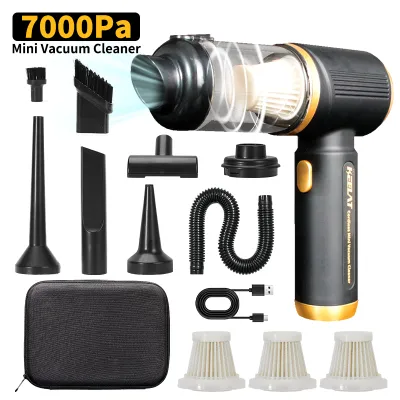
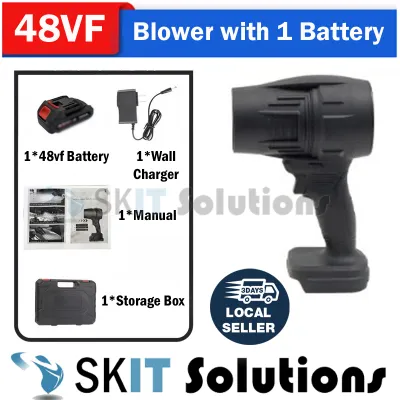

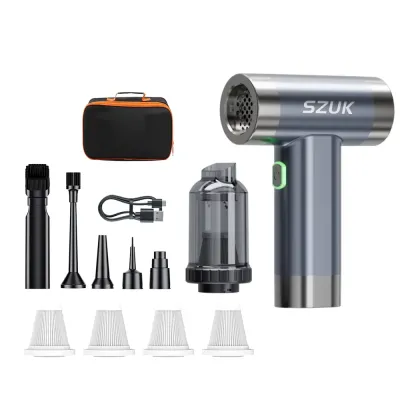

Prices are valid at publication and may change. Please refer to the product page for the latest price.
Begin by inspecting the handheld blower itself. Check the nozzle, attachments, and intake filter for any trapped debris, dust, or sand. If the intake filter is clogged, the blower can suck in fine particles and project them at high speeds onto your wet paint, acting like sandpaper. Clean or wash the filter according to the manufacturer’s instructions before you begin.
Next, verify that the car has been properly washed and thoroughly rinsed. A blower should never be used on a vehicle that has only been partially cleaned or has sat in the dust. Any leftover road grime, grit, or loose dirt will be pushed across the paint by the high-velocity air, causing immediate scratching. Ensure you have used a clean wash mitt and rinsed the vehicle from top to bottom to remove all loose abrasives.
Finally, check the blower’s power settings and select the appropriate airflow level. Refer to the manufacturer’s instructions to see if there are specific recommendations for automotive use. If your blower features adjustable speed settings, start on a lower level to test the airflow and control before increasing the speed to match the size of the panel you are drying.
Step-by-Step Technique for Blow-Drying Automotive Paint
To dry your vehicle efficiently without damaging the clear coat, you must master the physical mechanics of air drying. This involves maintaining a safe distance, using the correct nozzle angle, and following a systematic path across the vehicle’s body panels.

Always maintain a safe distance of at least 15 to 30 centimeters between the blower nozzle and the paint surface. Holding the nozzle too close can concentrate high pressure and heat on a single spot, which can stress the clear coat or lift loose edges of paint protection film (PPF). Never allow the hard plastic tip of the nozzle to make physical contact with the vehicle.
Position the nozzle at a shallow angle of approximately 30 to 45 degrees relative to the panel. This angle allows the air to get under the water droplets and sheet them off the surface. If you point the blower directly down at a 90-degree angle, you will simply splatter the water in all directions or trap it in nearby seams, rather than moving it off the vehicle.
Work in a systematic, top-to-bottom approach. Start with the roof of the vehicle, then move to the windshield, the hood, the trunk, the upper side panels, and finally the lower doors and bumpers. This sequence ensures that gravity works with you, preventing water from upper panels from running down and splashing onto areas you have already dried.
Adjust your air speed and movement pace based on the size of the panel and the volume of standing water. Move the blower in smooth, overlapping sweeping motions across each section. If your vehicle has a ceramic coating, wax, or paint sealant, you will notice the water beads and slides off with minimal effort, allowing you to move at a faster pace.
Navigating Tight Spaces, Seams, and Trim Pieces
One of the greatest advantages of using a handheld blower is its ability to clear water from tight spaces that towels cannot reach. However, these complex areas require extra care to avoid forcing water into sensitive components or damaging delicate trim.
Direct the airflow into side mirrors, grilles, door handles, window seals, and door jambs to force out trapped water. These areas are notorious for holding water that slowly drips out hours after you finish washing, leaving unsightly run lines down your clean paint. Hold the blower at an angle to push the water out of the crevice, and keep a clean microfiber towel nearby to catch the escaping water.
Be extremely cautious when drying delicate trim, chrome-plated plastics, emblems, and rubber weatherstripping. High-pressure air can easily dislodge loose emblems, peel back old decals, or lift degraded rubber seals. If you notice any loose components, immediately increase your distance or lower the blower’s speed setting.
Identify when it is safer to switch to a lower air setting or transition to a clean microfiber towel. For intricate areas like complex front grilles or behind side mirrors with integrated cameras and sensors, a high-pressure blast may not be suitable. In these instances, use the blower to remove the bulk of the water from a safe distance, then perform the final detail work with a plush, clean microfiber towel.
Common Mistakes and Safety Precautions
Even experienced detailers can make mistakes that lead to paint damage or equipment wear. Recognizing these common pitfalls will help you protect your vehicle’s finish and keep your handheld blower operating safely.
Avoid letting the hard plastic nozzle touch the paint or dragging the power cord across the vehicle’s surface. A sudden gust of wind or a momentary lapse in concentration can cause the nozzle to strike the bodywork, leaving a deep scratch. To mitigate this, consider wrapping the tip of the nozzle with soft silicone or microfiber tape, and always drape the power cord over your shoulder to keep it off the paint.
Be mindful of the temperature settings on your blower. While some dedicated car dryers use warm air to speed up evaporation, excessive heat can damage clear coats, warp plastic trim, or cause vinyl wraps and PPF to bubble and lift. If your blower has a heating element, ensure it is set to a moderate, paint-safe temperature, or stick to ambient air.
Recognize when the blower is ineffective against heavy standing water. If your vehicle has no wax or protective coating, water will pool in large, flat sheets that are difficult to move with air alone. Trying to blow-dry a completely unprotected surface can lead to water spots if the water dries before you can push it off. In this scenario, perform a gentle pre-dry by dragging a damp, high-quality microfiber drying towel over the flat surfaces first, then use the blower to clear the remaining water from the seams and crevices.
Maintaining Your Handheld Blower for Long-Term Use
Proper maintenance of your handheld blower ensures it remains a safe and reliable tool for your car care routine. Neglecting your equipment can lead to reduced performance or, worse, accidental damage to your vehicle during future washes.
Regularly clean or replace the blower’s intake filter. Over time, the filter accumulates dust, lint, and garage debris. A clogged filter restricts airflow, causing the motor to run hotter and less efficiently. More importantly, a clean filter is your primary defense against blowing fine abrasive dust onto your wet, vulnerable paintwork.
Store the handheld blower, power cords, and nozzle attachments in a clean, dry, and dust-free environment. Avoid leaving the equipment in damp areas or exposed to direct sunlight, which can degrade plastic nozzles and cause rubber power cords to crack. Coiling the power cord loosely will prevent internal wire damage.
Before every use, inspect the nozzle tip for wear, sharp edges, or cracks. If the blower is dropped, the plastic nozzle can develop sharp burrs that could easily scratch your paint if accidental contact occurs. Smooth out any rough edges with fine sandpaper, or replace the nozzle attachment entirely if you detect structural damage.
Frequently Asked Questions (FAQ)
Can I use a standard household hair dryer instead of a dedicated car blower?
Household hair dryers are not suitable substitutes for dedicated handheld blowers or automotive air dryers. Hair dryers are designed with low airflow volume (measured in cubic feet per minute) and rely on high heat to dry hair. Using concentrated heat on automotive paint poses a significant risk of overheating the clear coat, melting plastic trim, or peeling vinyl wraps. Additionally, because they lack the necessary air volume, they are highly inefficient at moving large amounts of water off a vehicle. Always check appliance labels and manufacturer warnings before attempting to use non-automotive tools on your vehicle.
Will a handheld blower remove all water, or do I still need a drying towel?
While a handheld blower is highly effective, surface tension and water adhesion mean that some tiny droplets may remain, especially on vehicles without a hydrophobic wax, sealant, or ceramic coating. To achieve a completely spot-free finish, it is best to use the blower to remove the vast majority of the water from the panels, seams, and crevices, and then follow up with a clean, plush microfiber drying towel for a gentle final wipe. Ensure the towel is pristine and free of debris to avoid introducing any swirl marks during this final touch-up phase.
Community discussion
Share your experience or ask a question. Comments are reviewed before publication.