
Securing cargo on a roof rack requires a balance of firm tension and careful protection. Using a ratchet strap incorrectly can easily crush your belongings, bend your roof bars, or scratch your vehicle’s paint. By understanding how to route the webbing, apply controlled tension, and cushion vulnerable contact points, you can transport bulky items safely without risking damage to your gear or creating a road hazard.
Preparation and Gear Checklist
Before lifting cargo onto your vehicle, verify that your equipment is up to the task. Inspect your ratchet straps, looking closely at the polyester webbing for any signs of fraying, cuts, burns, or UV degradation, which can significantly reduce the strap’s breaking strength. Examine the metal ratchet mechanism to ensure the spring-loaded pawls engage smoothly and the gear teeth are free of rust or debris.
Next, check the Working Load Limit (WLL) of your straps, typically printed on a fabric tag sewn into the webbing. The combined WLL of your straps must comfortably exceed the weight of the cargo you plan to carry. Do not confuse the breaking strength with the WLL; always rely on the lower WLL rating for safety calculations.
Products mentioned in this guide
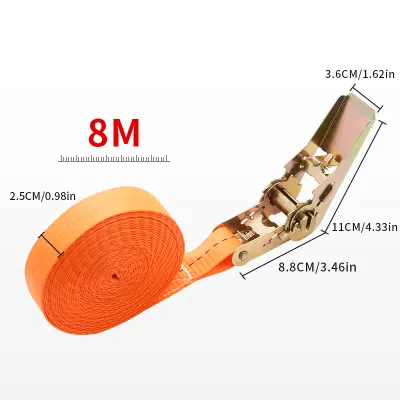
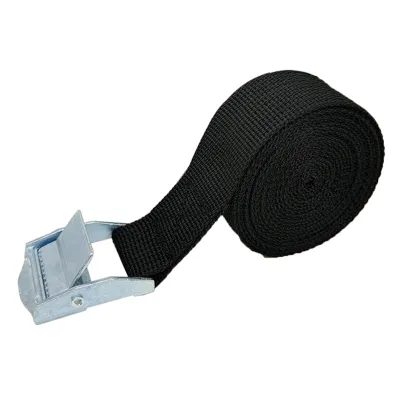
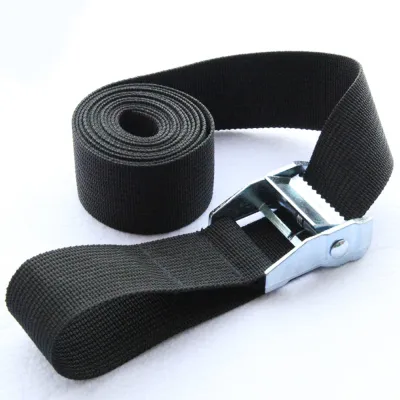
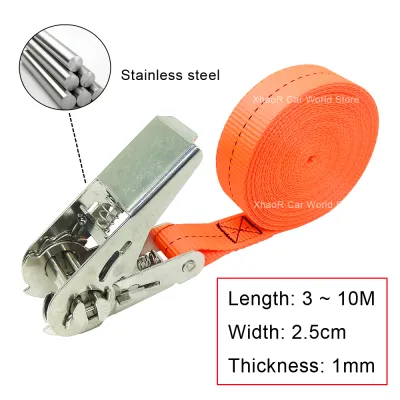
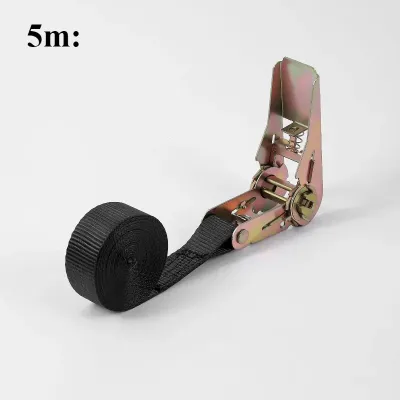
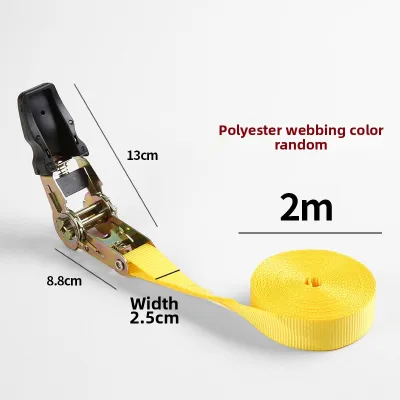
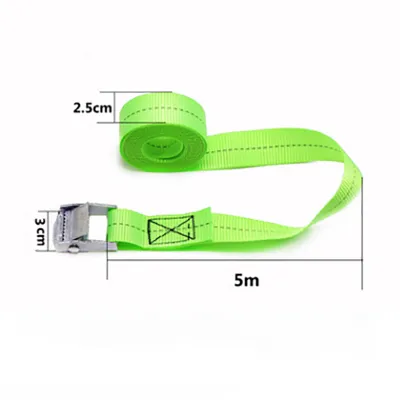
Prices are valid at publication and may change. Please refer to the product page for the latest price.
Equally important is verifying the load capacities of your vehicle and roof rack system. Consult your vehicle owner’s manual to find the maximum roof load limit, and check the documentation provided by your roof rack manufacturer. Keep in mind that these limits include the weight of the roof rack itself, the crossbars, and all securing hardware. Furthermore, dynamic load limits—the maximum weight allowed while the vehicle is in motion—are significantly lower than static limits, which apply only when the vehicle is stationary.
Finally, gather protective materials to shield your cargo and straps from friction and sharp edges. Heavy-duty foam blocks, rubber pads, corner guards, or even thick folded towels are essential. These buffers prevent the high-tension webbing from cutting into soft cargo boxes, plastic coolers, or delicate furniture, while also protecting the strap itself from being severed by sharp metal edges.
Step-by-Step Cargo Loading and Strap Routing
Proper cargo placement is the foundation of a stable load. When lifting items onto your roof rack, position the heaviest objects at the bottom and center them both laterally (between the left and right sides of the vehicle) and longitudinally (between the front and rear crossbars). This centralized placement maintains a low center of gravity, which preserves your vehicle’s handling characteristics and minimizes body roll during cornering. It also reduces wind resistance and aerodynamic lift at expressway speeds.

Once the cargo is positioned, identify the structural anchor points on your roof rack. Always route your ratchet straps around the metal crossbars or through designated tie-down loops integrated into the rack system. Never anchor straps to plastic decorative trim, window pillars, or the cargo itself, as these components lack the structural integrity to withstand high tension and wind forces.
Thread the strap webbing carefully, ensuring it lies completely flat against the cargo and the crossbars. Avoid any twists in the strap. A twisted strap reduces the surface area in contact with your load, concentrating the tension into a narrow, high-pressure line that can easily slice through cardboard boxes, plastic containers, or soft luggage. A flat strap distributes the securing force evenly across the surface of your cargo.
As you route the strap, position the metal ratchet mechanism so that it is suspended in the air or rests on a heavily padded area. Never allow the bare metal buckle to sit directly against your cargo or your vehicle’s painted surfaces. If necessary, feed the strap through the crossbars in a way that keeps the heavy metal mechanism easily accessible for tightening while remaining safely isolated from fragile materials.
Tensioning Technique to Prevent Damage
The mechanical advantage of a ratchet strap is highly effective, but it can easily become destructive if misapplied. To prevent crushing your cargo or deforming your roof rack, always use a balanced, incremental tensioning technique. If you are using multiple straps, tighten them alternately rather than fully tensioning one before moving to the next. This gradual approach keeps the load centered and prevents it from shifting to one side.
When operating the ratchet handle, use controlled hand pressure only. Never use your full body weight, lean into the mechanism, or use extension bars to gain extra leverage. The ratchet mechanism is designed to multiply your hand force; applying excessive force can easily bend aluminum crossbars, pull factory roof rails out of their mountings, or crush structural corners on your cargo.
Pay close attention to the physical state of your cargo as you tighten the straps. If you are securing soft-sided items, such as duffel bags, soft roof cargo carriers, or plastic storage bins, stop ratcheting the moment the strap becomes snug and the cargo is immobilized. Over-tightening these items will deform their shape, potentially damaging the contents inside or tearing the seams of soft bags. For rigid items, a firm, snug fit is sufficient; the cargo should not move, but the straps should not be tensioned to the point of bowing the crossbars.
Securing Loose Ends and Final Safety Checks
Once your cargo is firmly tensioned, you must manage the excess strap webbing. Leaving loose strap tails to flap freely in the wind is a serious hazard. At expressway speeds, a loose strap can whip violently against your vehicle’s exterior, scratching the paint, damaging window seals, or even wrapping around the roof rack or wheels.
Secure the excess webbing by folding it neatly and tying it off. You can use built-in hook-and-loop keepers, heavy-duty rubber bands, or zip ties. Alternatively, wrap the excess strap tightly around the crossbar and secure it with a series of half-hitch knots. Ensure there are no loose ends longer than a few centimeters hanging from the rack.
Before setting off, perform a rigorous physical shake test. Grab the cargo firmly with both hands and attempt to push, pull, and rock it in all directions. The cargo should not slide, tilt, or shift independently of the vehicle. Instead, the entire vehicle should rock slightly on its suspension, indicating that the load has become an extension of the vehicle’s structure.
Even with a successful shake test, cargo often settles and shifts slightly during the first few kilometers of driving, especially when subjected to vibrations, bumps, and wind resistance. Plan a brief stop after driving a short distance to inspect the load. Check the tension of each strap and tighten them slightly if any slack has developed. This initial check is crucial for long-distance journeys or when driving in windy conditions.
Common Mistakes and When to Stop
One of the most common mistakes when using ratchet straps is allowing the metal ratchet mechanism to make direct contact with vulnerable surfaces. The metal buckle can easily chip paint, crack plastic trim, or dent cargo shells under tension. Always use a protective buffer, such as a thick rubber pad or a dedicated neoprene sleeve, underneath the buckle if it must rest near any surface.
Another critical error is ignoring legal and physical limits. If your cargo extends beyond the sides of your vehicle or obstructs your view through the windshield or mirrors, stop immediately. Do not attempt to transport loads that compromise your visibility or exceed local road safety regulations regarding cargo overhang.
If you notice any signs of strap slippage, webbing wear, or structural flexing of your roof rack during your journey, pull over safely at the next opportunity. Do not attempt to make it to your destination with a loose or shifting load. Undo the straps, inspect the anchor points, and re-secure the cargo from scratch. If the built-in tie-down points on your roof rack seem inadequate or if you are unsure about the structural integrity of your setup, consult the roof rack manufacturer or a qualified automotive professional before proceeding.
Frequently Asked Questions (FAQ)
Can I use ratchet straps on aerodynamic crossbars?
Aerodynamic crossbars feature streamlined, hollow profiles designed to reduce wind noise and drag. While they are highly efficient, their hollow construction makes them more susceptible to crushing under concentrated downward force. Before using ratchet straps on aero bars, consult the manufacturer’s manual to verify the approved tie-down methods and load limits.
Many modern aerodynamic bars feature integrated T-tracks or dedicated accessory channels. Whenever possible, use compatible T-track eyelets or anchor bolts as your tie-down points rather than wrapping straps directly around the wide, flat profile of the bar. If you must wrap the strap around the bar, ensure the webbing is wide and flat, and apply tension with extreme care to avoid deforming the aluminum profile.
How do I protect my car's paint from the straps?
Strap friction is a common cause of paint damage, especially during long trips where wind causes the webbing to vibrate against the vehicle’s bodywork. To protect your paint, use dedicated protective sleeves made of neoprene or soft foam that slide over the strap webbing. Alternatively, wrap soft microfiber cloths or rubber pads around the straps at any point where they might contact the vehicle’s body.
When routing and tensioning the straps, take care not to drag the webbing or metal buckles across the vehicle’s painted surfaces. Always lift the straps clear of the bodywork during adjustment. Ensuring the straps are tensioned correctly and any excess webbing is tightly secured will also prevent the wind-induced flapping that leads to paint scuffs and scratches.
Community discussion
Share your experience or ask a question. Comments are reviewed before publication.