
When you need to transport bulky items, luggage, or outdoor gear on your vehicle, learning how to use a rachet strap properly is essential for road safety. A high-quality rachet strap provides the mechanical leverage and locking security needed to keep heavy loads completely stationary, even at highway speeds. Securing your cargo correctly involves centering the load, routing the webbing directly around the roof rack crossbars, threading the strap through the tensioning mandrel, and securing any loose ends to prevent dangerous flapping.
Preparation: Inspecting Your Roof Rack and Rachet Straps
Before lifting any cargo onto your vehicle, you must gather the right equipment and conduct a thorough safety inspection. Start by verifying your vehicle’s maximum dynamic weight capacity. This limit is found in your vehicle owner’s manual or the roof rack manufacturer’s documentation. Note that dynamic weight capacity—the maximum load your roof can safely support while the vehicle is in motion—is significantly lower than the static weight capacity when parked. Never exceed this limit, as overloading compromises vehicle handling, braking distances, and structural integrity.
Next, carefully inspect the crossbars, mounting feet, brackets, and bolts of your roof rack system. Look for any signs of wear, looseness, corrosion, or structural damage. Before mounting any cargo, always verify your specific vehicle model, year, and roof rack documentation to confirm compatibility, precise mounting positions, and road legality in your region. Never infer compatibility or weight limits simply from broad category terms.
Products mentioned in this guide
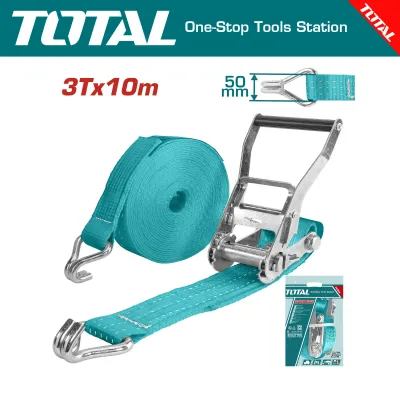
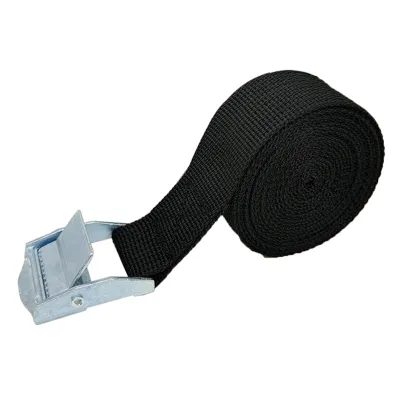
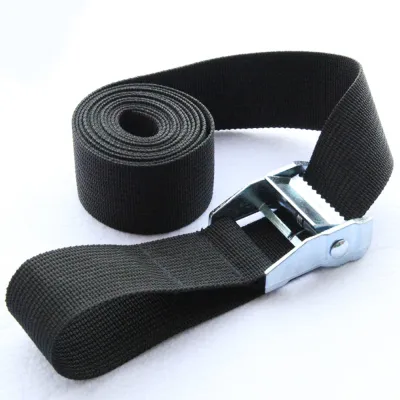
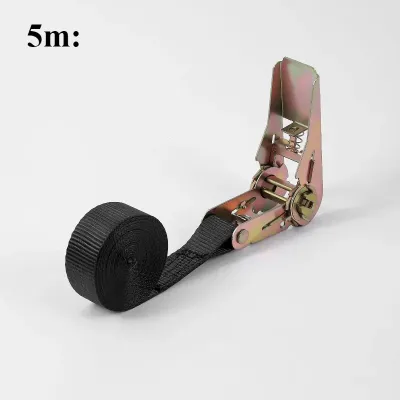

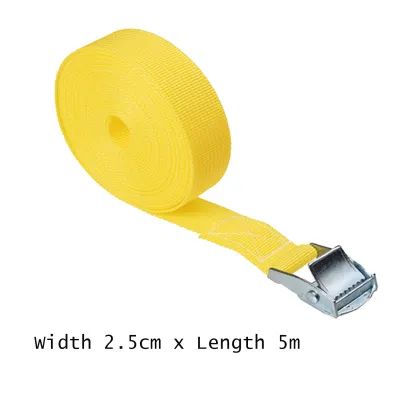
Prices are valid at publication and may change. Please refer to the product page for the latest price.
If you are installing or modifying a roof rack system for the first time, refer to your original-vehicle instructions and the manufacturer’s manual. If you are unsure about the mounting interface, structural integrity, or road legality of your setup, seek qualified professional installation before attempting to secure any heavy loads.
Selecting the right tie-down equipment is just as critical as inspecting the rack itself. Check the Working Load Limit (WLL) printed on the fabric tag of each rachet strap you plan to use. The WLL indicates the maximum weight the strap can safely secure under normal conditions. Ensure the combined WLL of your straps exceeds the total weight of the cargo you are carrying. Never rely on the “breaking strength” rating, which is simply the point at which the strap fails under extreme tension, not a safe operating limit.
Discard any straps that show signs of physical degradation. This includes frayed edges, cut webbing, broken stitching, or a ratchet mechanism that is rusty, stiff, or slipping. Finally, gather protective accessories such as rubber corner protectors, heavy-duty edge guards, or soft foam padding. These accessories prevent the high-tension webbing from cutting into soft cargo and protect your vehicle’s paintwork and roof rack finish from scratches.
Step-by-Step Guide to Securing Your Cargo
Positioning the Cargo and Routing the Straps
Begin by placing your cargo centrally on the roof rack crossbars. Distribute the weight evenly, placing the heaviest items at the bottom and as close to the vehicle’s center of gravity as possible. This balanced positioning minimizes body roll and preserves predictable handling characteristics when cornering or braking.

Once the cargo is positioned, route the rachet strap webbing completely over the load. You must anchor the strap directly under the horizontal crossbars rather than just the side rails or roof rack feet. Anchoring to the crossbars prevents the cargo from sliding forward or backward under heavy braking or acceleration.
As you route the webbing, place edge protectors or soft padding at every point where the strap contacts sharp corners of the cargo or the vehicle’s bodywork. This step distributes the pressure evenly and prevents the high tension of the strap from crushing your items or rubbing against the vehicle.
Ensure the strap webbing lies completely flat against the cargo throughout its entire run. Never allow the webbing to twist. Twisted straps have a significantly reduced load capacity, create concentrated friction points that can wear through the fabric, and generate loud, distracting whistling noises at highway speeds.
Threading and Tightening the Ratchet Mechanism
To begin threading, open the ratchet handle completely flat. This action aligns the slot in the mandrel—the central rotating cylinder of the ratchet—with the entry path of the webbing.
Take the loose end of the strap and thread it through the bottom of the mandrel slot, pulling it straight through. You must pull all the excess slack through by hand until the strap is relatively taut against the cargo before you begin ratcheting. If you leave too much slack, the mandrel will fill up with excess webbing after only a few cranks, causing the mechanism to jam and preventing you from reaching proper tension.
Once the slack is removed, hold the ratchet body steady and pump the handle up and down. This action rotates the mandrel, wrapping the webbing around itself and tightening the strap incrementally.
Stop tightening immediately once the strap is snug and the cargo is firmly immobilized. Over-tightening is a common mistake that can easily crush cardboard boxes, deform hard-shell cargo carriers, or permanently bend your roof rack crossbars. The strap should be tight enough to eliminate all movement, but not so tight that it deforms the load or structural components of the vehicle.
Position the metal ratchet mechanism so that it does not rest directly on the vehicle’s paint, glass, or fragile trim. If the mechanism must sit near a sensitive surface, place thick foam padding or a protective sleeve underneath the metal buckle to prevent scratches and impact damage from road vibrations.
Securing the Loose Ends
After tightening the straps, you will be left with a length of excess webbing tail. This loose end must be secured properly before you drive. Leaving it to dangle creates a severe hazard, as it can flap violently against your vehicle’s paint, wrap around the roof rack, or obscure your vision through the windows.
Gather the excess webbing and roll or fold it into a neat bundle. Secure this bundle using a built-in strap keeper, a heavy-duty rubber band, or by tying it off to the main tensioned strap using a series of secure half-hitch knots.
Double-check that no loose ends are free to catch the wind. A flapping strap not only causes annoying aerodynamic noise but can also fray rapidly under high-speed vibrations, potentially compromising the integrity of the entire tie-down system over a long journey.
Critical Mistakes and Safety Warnings to Avoid
Understanding what can go wrong is vital to preventing accidents on the road. Avoid these common pitfalls when using a rachet strap on your roof rack:
- Over-tightening: Applying excessive force with the ratchet handle can easily exert hundreds of kilograms of pressure. This force can snap the strap webbing, crack plastic cargo boxes, or permanently bend the metal crossbars of your roof rack. Tighten the strap until it is firm, but do not force the handle past its natural resistance.
- Improper Routing: Never allow the strap webbing or the heavy metal ratchet mechanism to rest against sunroof glass, radio antennas, plastic trim, or unpadded body panels. The high tension combined with constant road vibrations can easily crack glass, snap plastic components, or wear through your vehicle's clear coat.
- Ignoring Weather Conditions: If you are driving in wet conditions, such as the heavy downpours common in tropical climates like Singapore, be aware that moisture can affect your cargo. Water acts as a lubricant on some materials, allowing cargo to settle or shift, and can cause certain types of webbing to stretch slightly. Always plan to check strap tension more frequently when driving through rain.
- Using the Wrong Strap Type: Light-duty cam buckle straps and elastic bungee cords are entirely unsuitable for securing heavy or bulky loads on a roof rack. Bungee cords stretch under aerodynamic lift and road vibrations, which can allow cargo to lift or fly off at highway speeds. Only heavy-duty ratchet straps provide the positive mechanical lock required for safe transport.
- Skipping the Lock: Once you have finished tightening the strap, you must push the ratchet handle down into its fully closed, flat position. Ensure the spring-loaded locking plate engages with the gears. Leaving the handle partially open allows road vibrations to gradually release the tension, causing the strap to loosen while you are driving.
Final Safety Checks Before You Drive
Before you pull out of your driveway, perform a final round of safety checks to verify that your cargo is completely secure.
First, perform the shake test. Grasp the cargo firmly with both hands and try to push, pull, and lift it from multiple angles. The load should not shift, slide, or tilt independently of the vehicle. If the entire vehicle rocks on its suspension when you shake the cargo, your tie-down system is properly secured. If the cargo moves independently, you must readjust and re-tighten the straps.
Next, conduct a quick visual walk-around of the vehicle. Verify that all straps lie completely flat against the cargo, that your protective padding and edge guards remain in their correct positions, and that every ratchet handle is fully closed and locked.
Finally, implement the 15-minute rule. Plan a safe place to pull over after the first 10 to 15 minutes of your journey to re-inspect the load. Cargo often settles, compresses, or shifts slightly during the initial kilometers of travel, especially when subjected to road vibrations and wind resistance. Stopping briefly to check and re-tighten the straps ensures your load remains secure for the remainder of the trip.
Frequently Asked Questions (FAQ)
Can I use bungee cords instead of ratchet straps for a roof rack?
No, bungee cords are highly unsafe for securing primary loads on a roof rack. Bungee cords rely on elastic tension, which easily stretches under the immense aerodynamic lift and wind resistance experienced at highway speeds. This elasticity allows cargo to shift, lift, or slide off the vehicle entirely, creating a severe hazard for you and other road users. Bungee cords should only be used to secure lightweight accessories or to keep loose tarps from flapping, never as the primary structural tie-down for cargo.
How often should I replace my ratchet straps?
You should replace your ratchet straps based on their physical condition rather than a strict timeline. Inspect your straps before every use and retire them immediately if you observe severe UV fading (which weakens the fabric fibers), frayed edges, cuts in the webbing, or broken stitching. You must also replace any strap with an illegible Working Load Limit (WLL) tag, as you can no longer verify its safety capacity. Finally, discard any ratchet mechanism that slips, sticks, or shows signs of deep rust that prevents smooth operation.
Community discussion
Share your experience or ask a question. Comments are reviewed before publication.