
Using CarPro Reset on leather, vinyl, and fabric interiors is highly effective, provided you use precise dilution ratios, controlled application methods, and careful surface testing. While primarily formulated as an intensive, high-foaming car shampoo for exterior ceramic coatings, its residue-free, pH-neutral properties make it an excellent option for deep-cleaning cabin surfaces without leaving behind gloss enhancers or silicones.
Modern car interiors feature a complex mix of delicate materials, each reacting differently to moisture and agitation. When using carpro reset inside the cabin, the primary goal is to leverage its powerful surfactant action while strictly controlling the amount of water introduced to the surfaces. This approach ensures that dirt is emulsified and lifted without compromising the structural integrity of the interior components.
Before applying any cleaning solution to your vehicle’s interior, you must establish a safety baseline. Always read the specific product label instructions and verify compatibility with your vehicle manufacturer’s interior care guidelines. Performing a spot test in an inconspicuous area—such as the underside of a seat, the back of a headrest, or a hidden section of the door card—is a mandatory first step. This test helps you check for color bleeding, texture changes, or finish degradation, especially on older, heavily worn, or aftermarket-dyed materials.
Products mentioned in this guide
Prices are valid at publication and may change. Please refer to the product page for the latest price.
Understanding CarPro Reset and Interior Material Compatibility
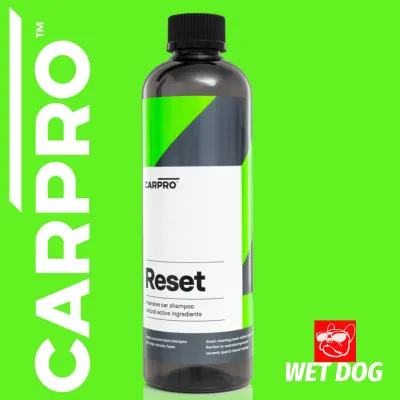
CarPro Reset is formulated as an intensive, high-foaming, and residue-free cleaner. Unlike many dedicated interior cleaners, it does not contain gloss enhancers, artificial colorants, or silicones that can leave a greasy film. This makes it highly effective for deep cleaning, as it pulls dirt out of pores and fibers, leaving the surface chemically bare and clean.
The scope of application for this product is broad, covering standard automotive finished leather, vinyl door panels, hard plastic trim, and durable fabric upholstery. Because it is highly concentrated, it must be diluted significantly more than when used for exterior washing, ensuring the surfactant levels are safe for delicate cabin surfaces.
However, not all interior materials are created equal. Finished leather has a protective polyurethane topcoat, whereas aniline or unfinished leather is highly porous and easily stained by liquids. Similarly, older vinyl or sun-damaged plastics can react unpredictably to moisture and agitation. For these reasons, checking the product label and performing a localized spot test remains your primary line of defense against accidental damage.
Essential Tools and Preparation Steps
Preparing your workspace and gathering the correct tools is essential for a safe and efficient detailing process. Because interior cleaning involves delicate surfaces, using the wrong tool can cause permanent damage, regardless of how safe the cleaning chemical is.

To clean your interior safely, assemble the following dedicated detailing tools:
- Dilution spray bottles: High-quality spray bottles, preferably with foaming trigger sprayers, to control the consistency of the solution.
- Soft-bristle detailing brushes: Natural horsehair brushes for leather and sensitive plastics, and slightly stiffer synthetic brushes for carpets and durable fabrics.
- Premium microfiber towels: Several clean, plush microfiber towels (ideally 300 to 350 GSM) to lift dirt and absorb excess moisture.
- Utility vacuum cleaner: A vacuum equipped with a crevice tool and a soft brush attachment to remove loose debris.
The preparation phase begins with clearing the cabin of all personal items, floor mats, child safety seats, and loose trash. This open space allows you to access every corner of the seats and console without obstruction.
Next, perform a thorough vacuuming of the entire interior. Loose dirt, sand, and grit act as abrasives when agitated with a brush or microfiber towel. If you skip this step, you risk grinding these particles into the leather or plastic surfaces, causing fine scratches. Use the soft brush vacuum attachment on the dashboard, instrument clusters, and console to lift dust safely, and use the crevice tool to clean deep inside seat seams and carpet edges.
Step-by-Step Application Guide for Different Surfaces
Once the cabin is free of loose debris, you can proceed to the targeted cleaning of specific interior surfaces. Each material requires a distinct approach to dilution, application, and moisture management.
Cleaning Leather Seats and Trim
Automotive leather is typically finished with a thin, protective polyurethane topcoat designed to resist wear and moisture. However, aggressive chemicals or excessive water can penetrate this barrier, leading to cracking, peeling, or discoloration of the underlying hide.
To clean leather safely with carpro reset, start by preparing a highly diluted solution in a spray bottle. Because the product is highly concentrated, start with a very mild mixture—such as a 1:10 or 1:20 ratio with distilled water—or follow the manufacturer’s specific guidelines for light interior cleaning. Using distilled water prevents mineral deposits from spotting the leather surface.
Never spray the cleaning solution directly onto the leather seats or trim. Direct spraying can cause the liquid to pool in stitching lines, perforated sections, or seams, where it can soak into the underlying foam padding and cause permanent damage. Instead, spray a small amount of the diluted solution directly onto a soft horsehair detailing brush or a folded microfiber towel.
Gently work the damp brush in small, circular motions over a manageable section of the seat, such as a single bolster or insert. Allow the foaming action of the product to lift the embedded dirt and body oils from the leather grain. Avoid applying heavy downward pressure; let the bristles and the surfactants do the work.
Immediately after agitating a section, wipe the area with a clean, slightly damp microfiber towel to lift the suspended grime and soap residue. Follow this immediately with a separate, dry microfiber towel to remove all remaining moisture. Inspect the leather to ensure it has returned to a clean, matte finish, which indicates that all oils and dirt have been successfully removed.
Cleaning Vinyl, Plastics, and Dashboard
Vinyl door cards, plastic trim pieces, and dashboard panels are durable but highly susceptible to scratching, fading, and chemical staining. Modern dashboards also house sensitive electronic components and screens that require extreme care.
When cleaning these areas, adjust your brush selection based on the texture of the material. For heavily textured vinyl door panels and lower plastic kick plates, a slightly firmer synthetic detailing brush can help dislodge scuff marks and dirt. For smooth dashboards, steering wheels, and piano-black trim, switch to an ultra-soft detailing brush or a plush microfiber towel to prevent micro-scratching.
Maintain a strict safety boundary around the dashboard and center console. Never spray any liquid cleaner directly onto the dashboard, infotainment screens, instrument clusters, or steering wheel button gaps. Liquid entering these areas can cause immediate electrical short circuits or fog up the displays. Always apply the diluted cleaner to your brush or towel first, ensuring it is damp rather than dripping wet.
Work the cleaner into the textured surfaces, paying close attention to seams and crevices where dust accumulates. Once the grime is loosened, wipe the surface clean with a fresh microfiber towel. Double-check all button gaps and seams to ensure no liquid has pooled or seeped into the electronics.
Cleaning Fabric Upholstery and Carpets
Fabric seats and carpets are highly porous, meaning they readily absorb liquids, dirt, and odors. Cleaning these surfaces requires a balance between agitating deep-seated stains and managing moisture levels to prevent long-term dampness.
To clean fabric upholstery, apply the diluted cleaning solution as a light foam over the target area. Allow the foam to dwell for a brief period—strictly following the product label instructions—to break down the dirt and oils. Do not allow the cleaning solution to dry completely on the fabric, as this will redeposit the dirt back into the fibers.
Agitate the fabric using a medium-stiff upholstery brush, working in multiple directions to loosen dirt from the weave. For stubborn stains, you may need to repeat the agitation process gently, avoiding excessive scrubbing that can fray the fabric fibers.
After agitation, the emulsified dirt must be extracted. If you have access to a wet vacuum or a carpet extractor, use it to pull the liquid and dirt out of the fabric. If you do not have an extractor, blot the area heavily with dry, clean, absorbent microfiber towels, pressing down firmly to transfer the moisture from the fabric to the towel.
In Singapore’s highly humid climate, moisture management is the most critical aspect of fabric cleaning. High humidity levels slow down natural evaporation, which can lead to the growth of mold, mildew, and unpleasant sour odors inside the cabin. To prevent this, ensure maximum airflow after cleaning. Leave all car doors and the boot open in a shaded, well-ventilated area, or run the vehicle’s engine with the air conditioning set to maximum dehumidification (recirculation turned off) to extract moisture from the cabin air.
Drying, Inspection, and Post-Cleaning Protection
The cleaning process is not complete until the interior is thoroughly dry and verified. Proper drying and inspection ensure that your hard work results in a spotless, damage-free finish.
To dry the cabin effectively, utilize natural ventilation in a dry, shaded environment. Avoid parking the car in direct, intense sunlight to dry, as the extreme heat can bake any missed soap residue into the surfaces or cause leather to dry out and crack. If natural airflow is limited, use a household fan directed into the cabin or run the vehicle’s climate control system to accelerate the evaporation of remaining moisture.
Once the surfaces feel dry to the touch, conduct a thorough inspection. Use a bright flashlight or a detailing light to examine the interior from different angles. Look for any remaining soap residue, streaks, uneven patches, or damp spots, paying close attention to stitching, seams, and tight corners. If you detect any sticky residue, wipe the area again with a clean, damp microfiber towel and dry it immediately.
One of the primary advantages of using a residue-free cleaner like carpro reset is that it leaves surfaces completely bare and free of artificial gloss enhancers or silicones. This clean state is the ideal foundation for applying protective products. Because there are no leftover oils or surfactants to interfere, leather conditioners, ceramic interior coatings, or fabric protectant sprays can bond directly to the material fibers. Applying these protectants to a bare surface ensures maximum durability and superior protection against UV rays, spills, and future wear.
Common Mistakes and Safety Boundaries
Avoiding common detailing mistakes is crucial to preserving the value and appearance of your vehicle’s interior. Minor errors during the cleaning process can result in costly damage that is difficult or impossible to repair.
- Using inappropriate brushes: Utilizing stiff-bristled utility brushes on delicate leather, soft-touch vinyl, or glossy plastics can cause permanent micro-scratches and strip away protective factory coatings. Always match the brush stiffness to the sensitivity of the material.
- Over-saturating interior surfaces: Flooding fabric seats, leather seams, or carpeted areas with excess liquid can lead to water spots, mold growth, and unpleasant odors. More importantly, excess moisture can penetrate electronic components beneath the seats, such as seat heaters, occupancy sensors, and airbag wiring harnesses, causing system failures.
- Ignoring manufacturer care guidelines: Failing to check the vehicle's owner manual or aftermarket material care labels can lead to using incompatible cleaning methods on specialized textiles or classic materials.
If at any point during your spot test or cleaning process you observe color transfer onto your towel, changes in the texture of the material, or surface discoloration, stop immediately. These signs indicate that the material or its protective coating is highly delicate, worn, or incompatible with the cleaning solution. In such cases, consult a professional automotive detailer or the material manufacturer to determine the safest course of action.
Frequently Asked Questions (FAQ)
Can I use CarPro Reset on Alcantara or suede materials?
You must exercise extreme caution when dealing with Alcantara or natural suede. These materials are highly sensitive to liquids and general detergents, which can easily mat the delicate fibers and ruin the soft texture. While some professional detailers use highly diluted interior cleaners, the safest approach is to consult your vehicle manufacturer’s specific care instructions first. If the manufacturer advises against general-purpose cleaners, use a dedicated Alcantara or suede cleaner along with a specialized suede brush to safely lift dirt without altering the pile of the material.
How do I determine the correct dilution ratio for my car?
To determine the safest dilution ratio, always start by reading the official product label, as manufacturer formulations and recommendations can update over time. As a general rule of thumb for interior cleaning, always start with the mildest possible mixture—such as a 1:20 dilution with distilled water—to assess surface reaction. For light dust and routine maintenance, a weak dilution is highly effective and easy to wipe away. For heavy, ingrained stains on durable surfaces, you can gradually increase the concentration of the solution, ensuring you never exceed the manufacturer’s recommended maximum strength to preserve the integrity of the interior finishes.
Community discussion
Share your experience or ask a question. Comments are reviewed before publication.