
Maintaining clean air inside your vehicle is essential for a comfortable and healthy driving experience. A car air purifier plays a vital role in filtering out road dust, exhaust fumes, pollen, and other microscopic particles that enter the cabin through the ventilation system. However, the effectiveness of any air purifier depends entirely on the condition of its filter. Over time, the filter media becomes saturated with trapped contaminants, which restricts airflow and reduces the unit’s ability to clean the air.
Replacing the filter in your car air purifier is a straightforward maintenance task that you can easily perform yourself. Regularly swapping out the old filter not only restores the device’s purification efficiency but also protects its internal motor from strain. By establishing a routine for filter replacement, you ensure that you and your passengers are consistently breathing clean, filtered air during every journey.
Preparation and Safety Checks
Before beginning the replacement process, it is crucial to prioritize safety and prepare your workspace. Start by turning off your vehicle’s engine, engaging the parking brake, and removing the key from the ignition. This ensures that the vehicle’s electrical system is stable and prevents any sudden power surges while you are handling the air purifier.
Products mentioned in this guide
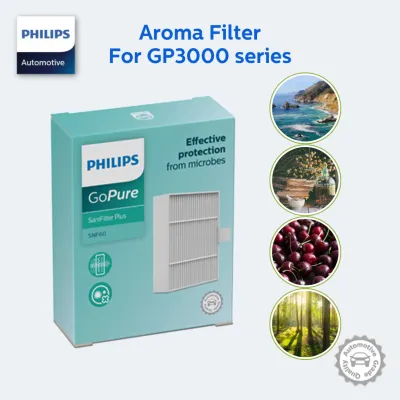
19 Lazada user ratings
Quality: Excellent Appearance: Fresh Performance: Optimal Received the goods same as you will buy from the store. No damage on the packaging…Read full reviewShow less
Quality: Excellent Appearance: Fresh Performance: Optimal Received the goods same as you will buy from the store. No damage on the packaging.
ordered on 5May, arrived on 9May via courier, SLOW!! dissapointing.
Quality: works perfectly as expected from the brand
Replacement for Philips GP3000,
ok but abit x for small item
![Xiaomi MiJia Car Air Purifier Compatible Replacement Filter Only - Enhanced Activated Carbon Version [Free Alcohol Swab] [SG Seller] [7 Days Warranty] [HEPAPAPA]](https://img.lazcdn.com/g/p/7b64d563a4f00164012eaed16b22b8c4.jpg_400x400q80.jpg_.webp)
73 Lazada user ratings
Fits well and good quality. Received 2nd day after ordering.
Easy to install and replace, Good value for money,
Fast delivery and works great. Thanks
Package well received
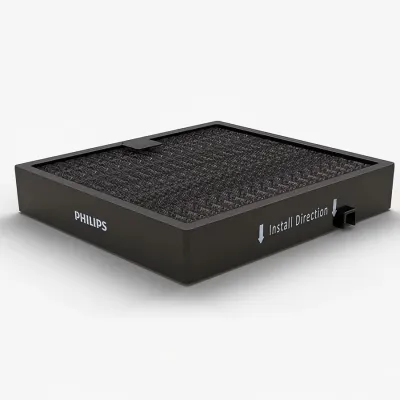
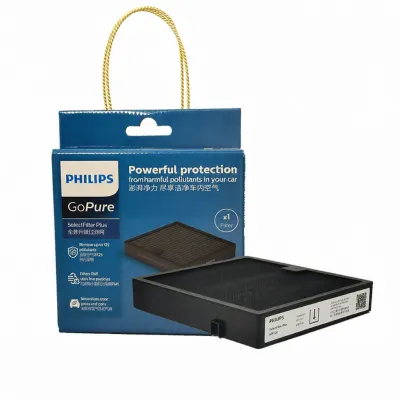
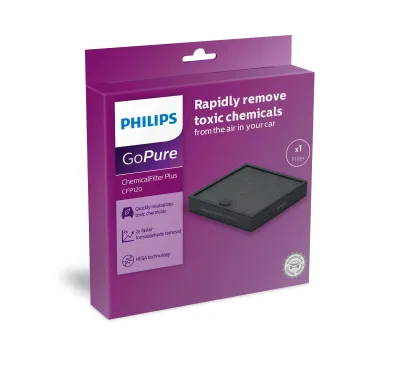
67 Lazada user ratings
2nd buy from seller. 1st refill purchase. The car filter is good as my kids sneeze less in car. Items not easy to get earlier, often OOS. Fi…Read full reviewShow less
2nd buy from seller. 1st refill purchase. The car filter is good as my kids sneeze less in car. Items not easy to get earlier, often OOS. Filter needs to change every 4-5 with the alert beeping
Product quality and packaging are good. Will continue to purchase if pricing is lowered
received and repeat purchase. good filter for use in car as family has dust allergy.
Meets requirements and fast shipment. Items arrived ahead of schedule.
fast delivery. Good pricing after discount.
Prices are valid at publication and may change. Please refer to the product page for the latest price.
Next, completely disconnect the air purifier from its power source. If your device plugs into a 12V auxiliary power outlet or a USB port, gently pull the adapter out of the socket. For advanced systems that are hardwired directly into the vehicle’s fuse box or integrated into the dashboard, consult your vehicle’s original manufacturer manual and the purifier’s installation guide. Safely isolating the power source prevents electrical shorts, accidental shocks, or damage to the unit’s internal circuitry.
Gather your cleaning supplies before opening the purifier housing. A dry, clean microfiber cloth is the ideal tool for wiping down the unit, as it attracts dust without leaving lint behind. Avoid using wet cloths, liquid sprays, or harsh chemical cleaners inside the device. Moisture can easily penetrate the sensitive electronic components, such as PM2.5 laser sensors or fan motors, leading to permanent damage or electrical failure.
Finally, locate the manufacturer’s instruction manual for your specific air purifier model. This document contains essential details regarding the location of the filter compartment, the specific latching mechanisms used, and any model-specific warnings. Having this information on hand ensures that you do not accidentally damage delicate plastic components during disassembly.
Locating and Removing the Old Filter
Car air purifiers are designed in various shapes and sizes to fit different vehicle interiors. Common mounting positions include the center console cup holders, the dashboard, the back of the headrests, or underneath the seats. Identify where your unit is secured and ensure you have clear, unobstructed access to the device before attempting to open it.

Locate the filter compartment cover on your purifier. Depending on the design, this cover may be positioned at the base of the unit, on a side panel, or beneath a removable top grille. Some models use magnetic covers that lift off easily, while others rely on plastic release tabs, slide-to-lock mechanisms, or small retaining screws.
Carefully release the securing clips or tabs to open the compartment. Apply gentle, even pressure, and stop immediately if you feel significant resistance. Plastic housings can become brittle over time due to exposure to sunlight and temperature fluctuations inside the cabin. Forcing a stuck cover can easily snap the tabs, which may prevent the compartment from sealing properly when you reassemble it.
Once the cover is removed, you will see the old filter seated in its housing. Before pulling it out, prepare a small plastic bag and place it right next to the unit. Gently grasp the filter by its edges or its dedicated pull-tab and lift it straight out of the compartment. Avoid shaking or tapping the filter, as this can release concentrated dust, pollen, and allergens back into your car’s cabin air.
Place the used filter directly into the plastic bag and seal it tightly before disposal. This simple step prevents the trapped contaminants and lingering odors from escaping and settling onto your car’s seats or dashboard. Once the old filter is safely bagged, use your dry microfiber cloth to gently wipe away any dust or debris that has accumulated inside the empty filter chamber.
Verifying New Filter Compatibility
Using the correct replacement filter is critical for maintaining the performance and safety of your car air purifier. Never rely solely on generic product descriptions or visual similarities when purchasing a replacement. Even a tiny variance in size can allow unfiltered air to bypass the filter media entirely, rendering the device ineffective.
To ensure a perfect match, locate the exact model number of your air purifier. This information is typically printed on a rating label on the base or back of the unit, or listed in the user manual. Use this specific model number to source an authorized replacement filter from a reputable retailer or directly from the manufacturer.
Before removing the new filter from its protective plastic packaging, compare it directly with the old one. Verify that the physical dimensions—including height, width, and thickness—are identical. Check the edges of both filters to ensure that any sealing gaskets or foam strips match, as these components are vital for creating an airtight seal inside the housing.
Examine the new filter for airflow direction indicators, which are usually represented by arrows printed on the side of the frame. The direction of the arrows must align with the airflow path of your purifier, which typically moves from the intake vents, through the filter, and out through the exhaust fan. Installing a filter backward can severely restrict airflow and strain the fan motor.
Avoid using unverified, off-brand, or incorrectly sized filters. A filter that is too dense or made from incompatible materials can restrict the air intake, causing the motor to work harder, run hotter, and potentially fail prematurely. Conversely, a loose-fitting filter will let dirty air bypass the filtration media, leaving pollutants circulating in your vehicle.
Installing the New Filter and Resetting the Unit
With the compatibility verified, you are ready to install the new filter. Carefully remove the protective plastic wrap from the new filter. Ensure your hands are clean and dry to avoid transferring oils or dirt to the fresh filter media.
Slide the new filter into the compartment, aligning it with the internal guide rails or slots. Make sure the airflow arrows on the filter frame point in the correct direction as indicated by the manufacturer. If the filter features a fabric pull-tab, ensure the tab faces outward so that it is easily accessible for future replacements.
Gently press the filter down until it is fully seated in the chamber. Check that the foam gaskets around the edges are compressed evenly against the housing walls, leaving no visible gaps. A snug fit ensures that all air drawn into the purifier is forced to pass through the filtration layers.
Reattach the compartment cover or grille. Align the tabs or screws carefully and press the cover firmly until you hear a distinct click or feel the locking mechanism engage. Double-check the perimeter of the cover to ensure it sits flush with the main body of the purifier, confirming a secure and airtight closure.
Reconnect the air purifier to its power source and turn on your vehicle’s ignition. Once the unit powers up, you will likely need to reset the filter-life indicator. Most modern purifiers use a timer or sensor-based system to track filter usage, and this system must be manually reset to start a new tracking cycle.
The reset procedure varies by model. Commonly, it involves holding down the power button for three to five seconds until a light flashes or a beep sounds. Other models may require pressing a recessed reset button with a paperclip, or updating the filter status within a companion smartphone application via Bluetooth. Consult your manual to perform the exact steps required for your device.
Post-Installation Testing and Maintenance
After completing the installation and resetting the indicator, perform a quick test run to verify that the purifier is operating correctly. Turn the device on and cycle through all available fan speed settings, from the lowest to the highest.
Listen closely for any unusual noises, such as rattling, whistling, or excessive vibration. A whistling sound typically indicates an air leak, suggesting that either the filter is not seated properly or the compartment cover is not fully sealed. If you hear any strange noises, turn off the unit, disconnect the power, and re-examine the installation.
Monitor the airflow coming from the exhaust vents during your first few drives. You should feel a steady, clean stream of air. If your purifier features an air quality indicator light, observe it over the next few days to ensure it responds accurately to changes in the cabin environment.
To maintain optimal air quality, establish a regular schedule for inspecting and replacing your car air purifier filter. While manufacturers provide general guidelines, your actual replacement frequency will depend on your driving habits, local climate, and cabin environment. Keeping a simple log in your vehicle’s glove compartment or setting a calendar reminder can help you stay on top of this essential maintenance task.
Frequently Asked Questions (FAQ)
Can I wash and reuse my car air purifier filter?
Most high-efficiency particulate air (HEPA) and activated carbon filters used in car air purifiers are strictly designed for single-use and cannot be washed. Exposing these filters to water or cleaning agents will dissolve the electrostatic charge of the HEPA fibers and clog the microscopic pores of the activated carbon, rendering the filter completely useless. Always check your product’s manual before attempting to clean it; only specific, durable mesh pre-filters or specialized washable models are safe to rinse and reuse.
How often should I replace the filter in my car air purifier?
As a general rule, most manufacturers recommend replacing the car air purifier filter every three to six months of regular use. However, this interval can vary significantly based on your driving environment and habits. If you frequently commute through heavy city traffic, drive on dusty roads, transport pets, or live in an area with high seasonal pollen, you may need to replace the filter more frequently to maintain optimal performance.
What happens if I run the purifier without a filter?
Operating your car air purifier without a filter installed provides no air-cleaning benefits and can cause permanent damage to the device. Without the physical barrier of the filter, airborne dust, hair, and larger debris will be drawn directly into the fan motor and internal electronics. This accumulation can cause the motor to overheat, seize, or fail entirely, which typically voids the manufacturer’s warranty and can circulate trapped dust back into your vehicle’s cabin.

Community discussion
Share your experience or ask a question. Comments are reviewed before publication.