
Mounting an On-Board Unit (OBU) or a compatible dashboard device requires balancing driver visibility, optimal signal reception, and secure attachment. To achieve this without blocking your view, the device should be positioned in the lower corner of the driver’s side dashboard, or neatly behind the rearview mirror, depending on the device’s specific function and display requirements. This placement keeps your primary line of sight completely clear while ensuring the device remains within your peripheral vision for quick, safe glances.
Choosing the right mounting location and method involves several critical decisions, especially when operating under local traffic regulations and climate conditions. A poorly placed mount can create dangerous blind spots, interfere with airbag deployment, or lose its grip entirely under intense heat. By understanding your specific device type, preparing the dashboard surface correctly, and selecting heat-resistant materials, you can maintain a safe driving environment and ensure your device performs reliably on every journey.
Understand Your OBU Type and Installation Boundaries
Before purchasing a mount or attempting an installation, you must distinguish between DIY-friendly aftermarket devices and highly regulated vehicle systems. Aftermarket units—such as portable GPS navigators, dashcams with transponder features, or basic electronic toll tags—are designed for user installation. These devices typically power via a standard 12V auxiliary outlet or USB port and can be mounted safely using consumer-grade suction cups or adhesive brackets.
Products mentioned in this guide
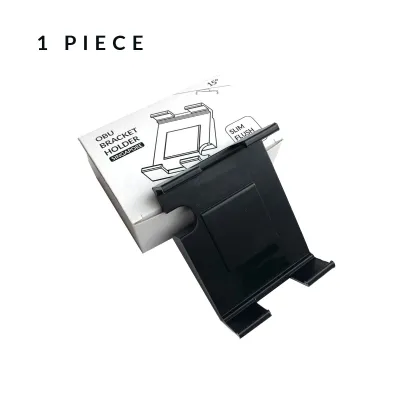
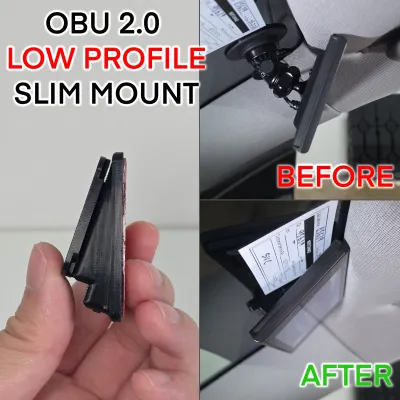
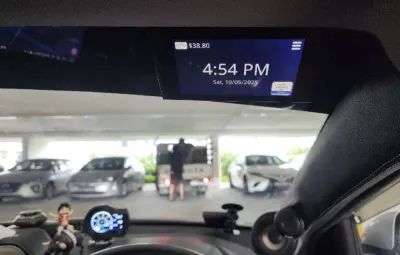
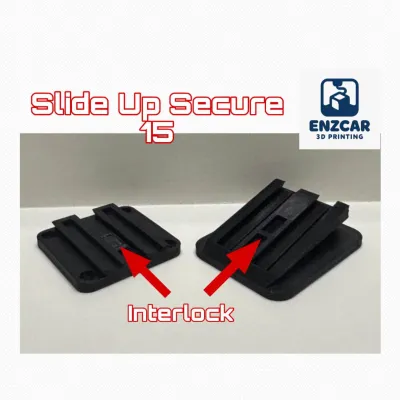
![[Readystock] OBU ERP2.0 Display Mount Casing (Case only)](https://img.lazcdn.com/g/ff/kf/S5a5fb223703d4dfaa6f798ab25e70453b.jpg_400x400q80.jpg_.webp)
Prices are valid at publication and may change. Please refer to the product page for the latest price.
In contrast, official vehicle units, such as Singapore’s Electronic Road Pricing (ERP) 2.0 OBU, feature a complex multi-piece design that integrates directly with the vehicle’s electrical architecture. Because these systems require hardwiring into the vehicle’s fuse box, precise antenna placement on the windshield, and strict calibration for accurate toll transactions, DIY installation is not permitted. These official units must be installed exclusively by authorized workshops to ensure regulatory compliance and prevent damage to your car’s electrical systems.
Attempting to hardwire any device yourself or modifying your vehicle’s dashboard structure without professional expertise carries significant risks. Improper wiring can cause electrical short circuits, drain your car battery, trigger diagnostic trouble codes, or void your vehicle’s manufacturer warranty. For any DIY device, always consult both the product’s installation manual and your vehicle owner’s manual to confirm compatibility and verify that your planned setup does not breach any local road safety regulations.
Identify the Safest Dashboard Placement for Visibility and Signal
When selecting a mounting location, your absolute priority is maintaining an unobstructed view of the road. The “no-zone” for driver visibility includes the entire sweep of the front windshield and the upper surface of the dashboard directly in front of the driver. Your mount and device must not block your view of oncoming traffic, pedestrians, or road signs, nor should they obscure your vehicle’s instrument cluster or side mirrors. Furthermore, never place a mount on or near any dashboard panels marked with “SRS Airbag” lettering, as a deploying airbag will launch the device into the cabin with dangerous force.

Signal reception is another critical factor that dictates where your device should reside. Many modern vehicles feature windshields treated with metallic solar films or embedded heating wires designed to reduce cabin heat. While highly effective at keeping your car cool in tropical climates, these metallic barriers can severely degrade or completely block GPS, RFID, and telematics signals. Check your device manual for clearance requirements, and inspect your windshield for designated “signal windows”—typically non-metallic, dotted areas near the rearview mirror—where signals can pass through unimpeded.
Screen readability and sun exposure also require careful planning. Placing a screen directly under the windshield can cause severe glare during bright mid-day hours, making the display unreadable and creating distracting reflections on the glass. To mitigate this, look for positions that offer some shade from the dashboard cowl, or select an adjustable mount that allows you to angle the screen slightly away from direct sunlight while keeping it visible with a quick glance.
Before committing to a permanent mounting spot, perform a temporary test. Use low-tack painter’s tape to hold the mount and device in your proposed location, power the device on, and sit in the driver’s seat. Verify that you can see the screen clearly without straining, that your view of the road remains completely unobstructed, and that the device successfully acquires a strong satellite or cellular signal before proceeding with the final attachment.
Prepare the Dashboard Surface and Select Heat-Resistant Materials
A secure mount relies entirely on proper surface preparation and the right materials. Dashboards accumulate dust, airborne oils, and chemical residues from interior vinyl protectants, all of which create a barrier that prevents adhesives and suction cups from bonding. To clean the surface, use a mild, non-abrasive automotive interior cleaner authorized for your specific dashboard material, and wipe the area thoroughly with a clean microfiber cloth.
If the vehicle manufacturer’s care instructions permit, you may use a light application of diluted isopropyl alcohol on a microfiber cloth to strip away stubborn oils. However, you must exercise caution: alcohol can dry out, discolor, or degrade delicate leather, synthetic leather, and soft-touch plastics. Always test any cleaning chemical on a small, hidden portion of the dashboard first to verify chemical compatibility, and refer to your vehicle owner’s manual for specific material restrictions.
In hot and humid climates like Singapore’s, parked cars experience intense greenhouse heating, with dashboard temperatures frequently climbing past 60 degrees Celsius (140 degrees Fahrenheit). Standard consumer adhesives and low-grade suction cups quickly soften, lose their grip, and slide off under these conditions, leaving a sticky residue behind. When shopping for an aftermarket mount, ignore generic “heavy-duty” marketing claims and look for products that explicitly state their maximum operating temperature ratings on the packaging.
The texture of your dashboard will dictate the best mounting mechanism for your vehicle:
- Suction Cups: Best suited for smooth, non-porous surfaces like windshield glass or highly polished plastic trim. They generally fail to hold a vacuum on textured or soft-touch dashboard surfaces unless paired with a smooth adhesive mounting disk.
- Adhesive Pads: High-bond acrylic foam tapes (such as 3M VHB) offer an exceptionally secure hold on textured hard plastics. However, they are semi-permanent and can be difficult to remove without damaging soft materials.
- Weighted Friction Mats: These mats use a heavy, non-slip silicone base that conforms to the shape of the dashboard. They require no adhesives or suction, making them an excellent choice for preserving delicate leather dashboards, though they may shift during sudden, aggressive maneuvers.
Step-by-Step Installation for DIY OBU Mounts
Once you have selected a safe location and prepared the surface, follow these sequential steps to install your DIY mount and manage its power cables safely.
Step 1: Position and Test
Place the mounting base onto the cleaned dashboard area without removing any adhesive backing or engaging the suction lock. Attach your OBU device to the mount and plug in the power cable. Sit in the driver’s seat to perform a final check of your driving visibility, ensuring the setup does not block your view of the road or the vehicle’s instrument panel. Turn the device on to confirm it boots up correctly and establishes a stable signal connection in this position.
Step 2: Secure the Base
Remove the device from the mount to reduce weight. If you are using an adhesive mount, peel off the protective backing, align the base carefully, and press it firmly onto the dashboard surface. Apply steady, even pressure across the entire base for 30 to 60 seconds to activate the pressure-sensitive adhesive. Crucially, allow the adhesive to cure—typically for 24 hours—before attaching the device or subjecting the mount to any load. For suction cup mounts, press the cup firmly against the surface to expel all air, then engage the locking lever to create a strong vacuum seal.
Step 3: Attach the OBU and Adjust the Angle
Once the base is securely cured or locked, clip or slide your OBU device into the mounting bracket. Loosen the adjustment collar or ball joint on the mount and tilt the device screen so it faces your driving position. The screen should be angled to minimize glare and allow you to read the display with a brief glance, keeping your eyes focused on the road ahead. Tighten the locking mechanism firmly to prevent the device from sagging or vibrating when driving over uneven road surfaces.
Step 4: Cable Management
Dangling power cables are a major safety hazard that can distract you, block your controls, or catch on your hands while steering. Route the power cable neatly from the device toward the nearest dashboard seam or the edge of the windshield. Use small, adhesive-backed cable clips to secure the wire along the perimeter of the dashboard or down the side of the A-pillar trim. Ensure the cable is completely clear of the steering column, gear shifter, glove box, and foot pedals, and verify that it does not cross or obstruct any side-curtain airbag deployment zones.
Verify the Mount and Perform Routine Maintenance
Your installation is not complete until you verify its long-term stability and establish a simple maintenance routine. Before driving, perform a physical shake test by gently tugging the mount to confirm the adhesive or suction cup has bonded securely. Take a short test drive on a quiet road to check for excessive vibrations, distracting reflections on the windshield, or any unexpected blind spots created by the device during turns.
Over time, exposure to intense sunlight and humidity will gradually degrade even high-quality adhesives and suction cups. Make it a habit to inspect the mount every few weeks, particularly after your vehicle has been parked in an unsheltered, sun-exposed parking lot. Check for signs of peeling edges on adhesive pads, cracking in plastic components, or a loss of vacuum pressure in suction cups, and re-secure or replace parts immediately if you notice any play.
If you need to remove or reposition an adhesive mount, do not attempt to pry it off forcefully, as this can tear or stretch soft-touch dashboard vinyl and leather. Instead, slide a piece of dental floss or high-strength fishing line underneath the adhesive pad and use a gentle sawing motion to slice through the foam core. Once the mount is removed, clean away any remaining sticky residue using a mild, automotive-safe adhesive remover, always testing it on a hidden area first to ensure it does not damage or discolor the dashboard finish.
Frequently Asked Questions (FAQ)
Can I install the ERP 2.0 OBU myself in Singapore?
No, you cannot install the official ERP 2.0 OBU yourself. The Land Transport Authority (LTA) mandates that all ERP 2.0 OBU installations must be carried out by authorized workshops. The system requires professional integration with your vehicle’s onboard electrical wiring, precise placement of the antenna on the windshield to ensure accurate toll communications, and strict regulatory compliance. Attempting a DIY installation on this official unit can lead to system malfunctions, potential vehicle warranty issues, or regulatory penalties.
How do I prevent the suction cup from falling off in hot weather?
To prevent a suction cup from failing in hot weather, start with a spotless dashboard surface and suction pad, cleaning both thoroughly to remove microscopic dust and oils. Some manufacturers recommend applying a tiny drop of water or a thin layer of specialized mounting gel to the silicone pad to enhance the vacuum seal. Most importantly, ensure you purchase a high-quality mount with an explicit high-temperature rating designed to withstand hot car interiors, or use an adhesive dashboard disk to provide a perfectly smooth, non-porous surface for the suction cup.
Will the OBU mount damage my leather or soft-touch dashboard?
Strong chemical adhesives can permanently stain, discolor, or tear delicate leather and soft-touch vinyl dashboards when removed. If your vehicle features a premium dashboard material, avoid applying strong adhesives directly to these surfaces. Instead, consider mounting the device to the windshield glass, using a weighted friction mat that relies on gravity and a non-slip backing, or applying a removable, protective dashboard barrier film underneath the adhesive base. Always check your vehicle owner’s manual for specific material care guidelines before applying any mounting hardware.
Community discussion
Share your experience or ask a question. Comments are reviewed before publication.