
Installing an aftermarket Tire Pressure Monitoring System (TPMS) is an excellent way to track tire health in real time, but its effectiveness depends on how and where you mount the receiver display. A poorly positioned display can slide off during sudden braking, block your view of the road, or interfere with airbag deployment. To achieve a secure, highly visible, and safe installation, you must match your specific mounting hardware to your vehicle’s interior design.
Choosing the right mounting location and executing the installation correctly ensures you can monitor tire pressures and temperatures with a quick glance. Whether your TPMS kit uses an adhesive pad, a suction cup, or a vent clip, taking the time to prepare surfaces and route cables properly prevents the display from becoming a distraction or a safety hazard. This guide walks you through the entire process, from preparation to final safety checks.
Preparing Your Dashboard and Gathering Tools
Before mounting your TPMS display, identify the specific mounting mechanism provided with your kit and gather the appropriate tools. Most aftermarket TPMS kits supply either a double-sided adhesive pad, a suction cup mount, or a spring-loaded vent clip. Each style requires a different preparation strategy to ensure a long-lasting hold that can withstand cabin heat and vehicle vibrations.
Products mentioned in this guide
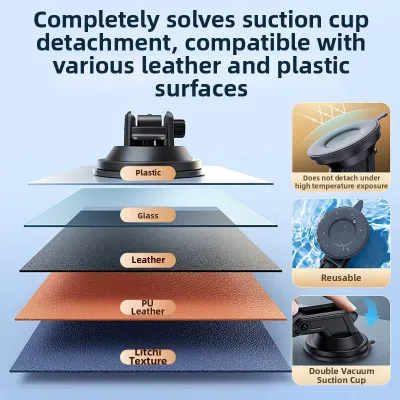
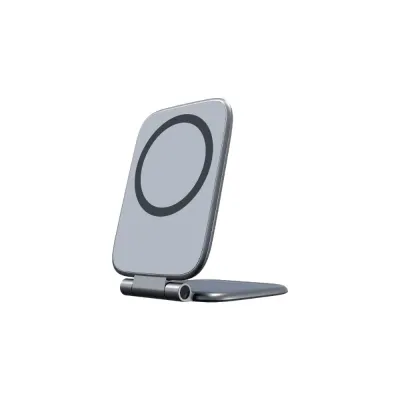

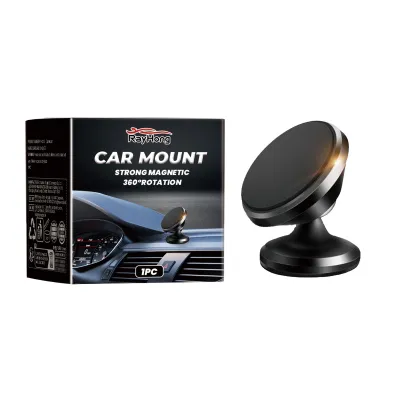
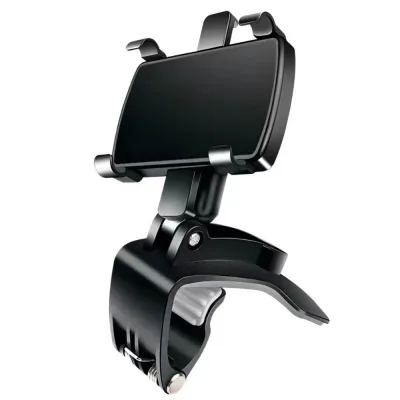
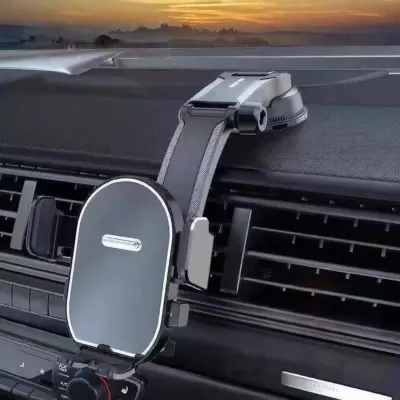
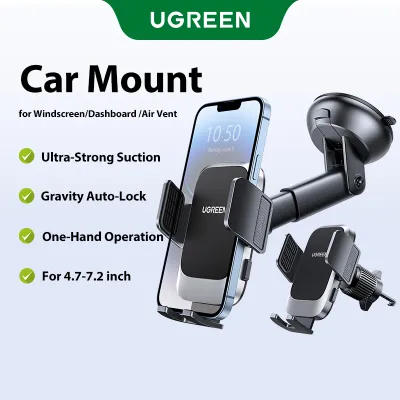

Prices are valid at publication and may change. Please refer to the product page for the latest price.
Start by inspecting your vehicle’s dashboard material to confirm compatibility with your chosen mount. Modern dashboards feature textured ABS plastic, soft-touch polyurethane, synthetic vinyl, or genuine leather. Always verify your vehicle model, mounting position, and safety impact from your specific product and vehicle documentation rather than inferring compatibility from a generic category term. Adhesive pads and suction cups require a completely smooth, non-porous surface to create a strong bond or vacuum seal. If your dashboard is heavily textured or wrapped in leather, an adhesive mount may not adhere properly, making a vent clip or a windshield suction mount a safer alternative.
Once you determine compatibility, gather the necessary cleaning supplies to prepare the surface. For hard plastic dashboards, isopropyl alcohol (typically a 70% solution) is highly effective at removing dust, grease, and dashboard protectants. However, consult your vehicle’s owner’s manual before applying alcohol-based cleaners, as they can dry out or discolor leather, vinyl, or delicate soft-touch coatings. For these sensitive surfaces, a mild, residue-free soap and water solution applied with a clean microfiber cloth is a much safer option.
Prepare the TPMS display unit itself before mounting. Many manufacturers ship these devices with protective plastic films over the LCD screen and the integrated solar panel. Remove these films now, as peeling them off after mounting can put unnecessary stress on the adhesive bond or clip mechanism. If your TPMS display features a built-in rechargeable battery, plug it into a USB power source and charge it fully before installation so you can verify its operation immediately.
Selecting the Optimal Mounting Position
Finding the perfect spot for your TPMS display requires balancing driver visibility, solar charging efficiency, and vehicle safety boundaries. The primary rule of any dashboard installation is that the device must never obstruct your forward view of the road or block your peripheral vision. Position it so you can check the tire status with a quick downward glance, similar to checking your speedometer.

Safety must be your absolute priority when selecting a mounting location. You must completely avoid placing the TPMS display or its power cable within the deployment zone of any airbags. Airbags deploy with incredible force, and any object placed on top of an airbag cover or within its path can become a high-velocity projectile. Consult your vehicle’s manual to identify the exact locations of the passenger dashboard airbag, side-curtain airbags, and knee airbags before finalizing your mounting spot.
If your TPMS display relies on an integrated solar panel for power, consider solar exposure when choosing a location. The ideal spot is on a flat section of the dashboard close to the base of the windshield where it can receive direct sunlight. However, be mindful of windshield tinting, ceramic heat-blocking films, or the dark ceramic dot matrix pattern near the edges of the glass, as these can significantly reduce solar energy. Avoid placing the unit in deep shadows created by dashboard overhangs or the A-pillars.
Finally, consider the logistics of cable routing if your TPMS display requires a continuous wired power connection. Plan a routing path from the display to your vehicle’s 12V accessory outlet or USB port. The cable must not drape across the steering wheel, gear shifter, climate controls, or pedals. A loose cable hanging down the center console is not only unsightly but can also snag on your hand or foot while driving, creating a serious safety hazard.
Step-by-Step Installation Process
With your tools gathered and the optimal location selected, you are ready to proceed with the physical installation of the mount.
Adhesive and Suction Mounts
For adhesive mounts, begin by thoroughly cleaning the selected spot on your dashboard using your approved cleaning solution. Wipe the area clean and allow it to dry completely; even a tiny amount of moisture or residual cleaning agent can ruin the adhesive bond. If you are using an alcohol wipe, wait a few minutes for the alcohol to fully evaporate from the surface pores.
Next, carefully peel the protective backing from the double-sided adhesive pad. Avoid touching the exposed adhesive with your fingers, as skin oils will weaken the bond. Position the mount precisely over the cleaned area. Most automotive-grade adhesives bond on contact and cannot be repositioned once applied, so accuracy is critical. Press the mount down firmly with even pressure across the entire base for at least 30 to 60 seconds to activate the pressure-sensitive adhesive.
After applying pressure, let the adhesive cure before subjecting it to any load. While the bond may feel strong immediately, most automotive adhesives require at least 24 hours to reach their full structural strength. Avoid mounting the heavy TPMS display unit or pulling on the bracket during this curing period, especially if the vehicle is parked in direct sunlight, as heat can slow the curing process and cause the adhesive to slip.
If you are using a suction cup mount on the windshield or a smooth dashboard disc, clean both the mounting surface and the rubber suction pad with water and dry them with a lint-free cloth. Press the suction cup firmly against the surface to push out all the trapped air, then engage the locking lever to create a strong vacuum seal. For dashboard discs that use an adhesive backing, follow the same cleaning and curing steps outlined for adhesive mounts before attaching the suction cup.
Vent Clip Mounts
Vent clip mounts offer a convenient, non-permanent alternative to adhesives, but they require careful handling to avoid damaging your vehicle’s climate control vents. Begin by inspecting the horizontal or vertical louvers of your selected air vent. Ensure the plastic blades are sturdy, free of cracks, and not brittle from years of exposure to hot cabin air and sunlight.
Gently slide the vent clip onto one of the middle louver blades. Most high-quality vent clips feature a spring-loaded mechanism or a tightening screw that grips the blade securely. Do not force the clip onto a blade that is too thick, as this can easily snap the delicate plastic louvers or damage the internal directional linkage of the vent. If the clip has adjustable jaws, open them fully, slide them over the blade, and then tighten them until they are snug but not overly compressed.
Many vent mounts include an adjustable support leg or stabilizer bracket designed to rest against the lower frame of the vent or the dashboard. Adjust this support leg so that it bears the weight of the TPMS display, preventing the vent louvers from sagging downward under the weight of the device. This stabilization is crucial for keeping the display at a readable angle and preventing it from rattling or bouncing while you drive.
Cable Management
Once the mount is physically secure, manage the power cable to ensure a clean and safe cabin environment. Start by plugging the cable into the TPMS display and routing it toward the nearest dashboard seam or panel gap. Use a plastic trim removal tool to gently pry open the seams between dashboard panels just enough to tuck the cable inside, working your way down toward the footwell or center console.
If you must route the cable along the side of the dashboard near the door jamb, be extremely careful not to run the wire across the path of side-curtain airbags or door seals. Keep the cable tucked neatly behind the weatherstripping where it will not be pinched when the door closes. Use small, adhesive-backed cable clips to secure any exposed sections of wire along the underside of the dashboard, keeping them completely clear of the driver’s feet and the steering column.
Bundle any excess cable length using a zip tie or hook-and-loop strap, and tuck the bundle neatly behind the center console trim or under the passenger seat. Ensure that the cable has enough slack near the display unit to allow for minor adjustments to the viewing angle, but not so much slack that it hangs loose or vibrates against the dashboard, which can create annoying squeaks and rattles while driving.
Post-Installation Verification and Safety Checks
Before taking your vehicle out on the road, perform a series of verification checks to ensure the installation is safe, secure, and fully functional. These checks help identify any potential issues before they cause a distraction or equipment failure while driving.
First, perform a gentle physical pull-test on the mount. Grasp the mounting bracket and apply light pressure in various directions to simulate the forces of sudden braking, sharp turns, and road vibrations. The mount should remain firmly anchored to the dashboard or vent without shifting, peeling, or wobbling. If you notice any movement in an adhesive mount, it may indicate that the surface was not cleaned properly or that the adhesive did not cure completely, requiring you to replace the adhesive pad and try again.
Next, sit in the driver’s seat in your normal driving position and evaluate the display’s visibility. Check for glare or reflections on the screen at different times of day or under different lighting conditions. If your mount features a ball-and-socket joint or a tilting mechanism, adjust the angle of the display to minimize glare and maximize readability. Ensure that you can read the tire pressure numbers clearly without having to lean forward or strain your eyes.
Finally, turn on your vehicle’s ignition to power up the TPMS display and verify that it is receiving signals from all four tire sensors. If the display is newly positioned, it may take a few minutes of driving for the sensors to wake up and transmit their current pressure and temperature data. Confirm that there is no electromagnetic interference between the TPMS display and other nearby electronic devices, such as your car radio, GPS navigation system, or dashcam. If you experience dropped signals or erratic readings, try repositioning the display slightly further away from other electronic transmitters.
Frequently Asked Questions (FAQ)
Can I reuse the adhesive pad if I need to reposition the mount?
Most double-sided adhesive pads supplied with automotive mounts are designed for single-use only. The acrylic foam and adhesive compounds used in these pads undergo significant deformation and chemical bonding when pressed onto a surface, which gives them their high holding power. Once you peel the pad off the dashboard, the adhesive layer loses its structural integrity, and attempting to reuse it will result in a weak bond that is highly likely to fail under the weight of the display or during vehicle vibrations.
If you need to reposition your mount, you should completely remove the old adhesive pad from both the dashboard and the mount bracket. To detach the old mount safely without damaging your dashboard, you can use a piece of high-strength fishing line or dental floss. Gently slide the line behind the adhesive pad and use a sawing motion to slice through the foam core. Once the mount is free, clean off any remaining adhesive residue using a mild adhesive remover or by rubbing it gently with your thumb, then apply a fresh, high-quality automotive double-sided tape before remounting.
Will the adhesive damage my dashboard when removed?
Whether an adhesive damages your dashboard depends heavily on the dashboard’s material and the removal method you use. Hard, non-porous plastics are highly resilient and rarely suffer damage from standard automotive adhesives, though they may retain some sticky residue that requires cleaning. However, soft-touch plastics, vinyl wraps, and genuine leather are much more delicate. Strong adhesives can bond so deeply to these porous materials that peeling the mount off directly can tear the surface layer, lift the paint or dye, or leave permanent indentations.
To minimize the risk of damage, always research your vehicle’s specific dashboard materials and consult the manufacturer’s guidelines before applying any strong adhesives. If you must remove a mount from a sensitive surface, never pull or pry it off with force. Instead, apply gentle heat from a hair dryer on a low setting to soften the adhesive before using the fishing line method to slice through the foam. Always test any adhesive removers or cleaning solvents on a small, hidden area of the dashboard first to ensure they do not cause discoloration or dissolve the surface finish.
Community discussion
Share your experience or ask a question. Comments are reviewed before publication.