
Installing a dash cam is one of the most practical upgrades you can make to your vehicle, providing valuable video evidence in the event of an accident or insurance dispute. While hardwiring a camera directly to the vehicle’s fuse box offers a permanent power source, utilizing the car cigarette plug remains the most popular installation method due to its simplicity, reversibility, and tool-free setup. This approach is particularly advantageous for drivers of leased vehicles, rental cars, or those who prefer not to alter their car’s electrical wiring. However, proper installation involves more than just plugging the device into the console and letting the wire hang loose. A dangling cable is not only an aesthetic nuisance but also a safety hazard that can obstruct your view or interfere with vehicle controls. To ensure your dash cam operates reliably without compromising safety, you must carefully plan the camera’s placement, route the power cable safely behind the interior trim panels, and verify the electrical characteristics of your vehicle’s accessory socket.
Preparation and Vehicle Socket Checks
Before mounting any hardware, take a few minutes to inspect your equipment and understand your vehicle’s electrical configuration. Begin by unboxing your dash cam kit and verifying that all components are present, including the camera unit, the mounting bracket, the power cable with the integrated car cigarette plug, and any included cable management clips. Lay the cable out fully to check for any visible physical defects, such as cuts in the insulation, bent connector pins, or a cracked adapter housing. Using a damaged cable can lead to short circuits or intermittent power loss, which may corrupt your recorded video files.
Next, consult your vehicle owner’s manual to locate the specifications for the cigarette lighter socket or 12-volt accessory outlet. Most passenger vehicles utilize a standard 12V system, but some larger commercial vehicles operate on a 24V system; you must ensure your dash cam’s power adapter is rated to handle your vehicle’s specific voltage. Additionally, the manual will indicate whether the socket is switched (only receiving power when the ignition is on) or unswitched (providing continuous power). Knowing this behavior beforehand is essential for managing your vehicle’s battery health. Finally, gather a few basic tools to assist with the installation, such as a plastic trim removal tool to safely pry open interior panels, a clean microfiber cloth, and an automotive-safe glass cleaner to prepare the windshield surface.
Products mentioned in this guide
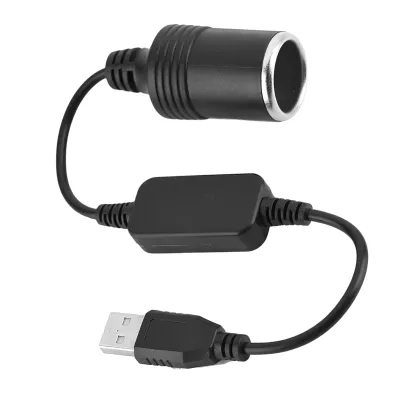
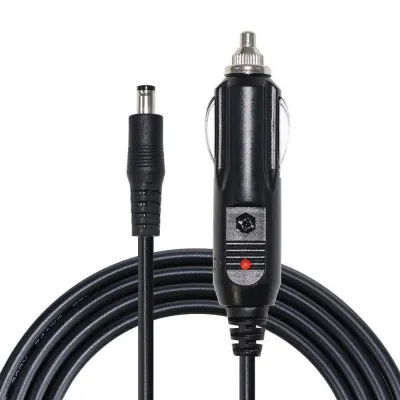
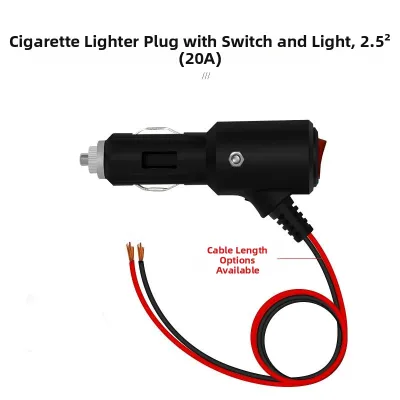
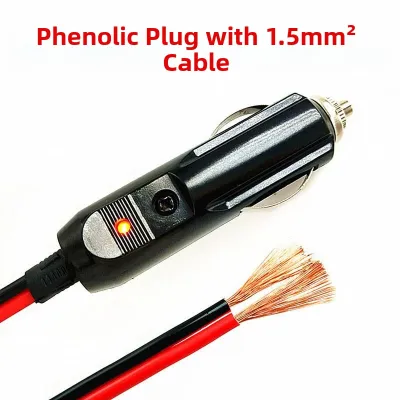
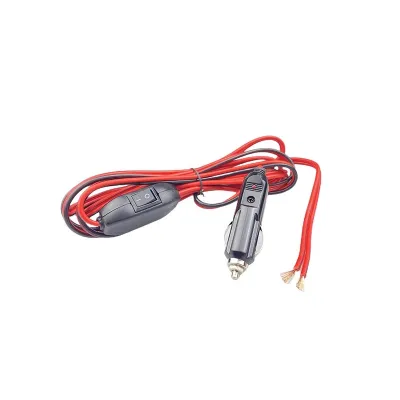
Prices are valid at publication and may change. Please refer to the product page for the latest price.
Selecting a Safe and Legal Mounting Position
Choosing the right spot on your windshield is critical for both capturing high-quality footage and maintaining compliance with local traffic laws. In many jurisdictions, including Singapore, regulations strictly prohibit any device from obstructing the driver’s direct line of sight through the front windscreen. To stay within legal boundaries, the ideal mounting location is directly behind or slightly below the rearview mirror on the passenger side. This positioning keeps the camera body hidden from your normal driving field of view while allowing the wide-angle lens to capture a balanced, unobstructed view of the road ahead.

When positioning the mount, you must also account for the vehicle’s safety systems and physical design. Avoid placing the camera or routing its cable near designated airbag deployment zones, particularly the side curtain airbags along the roofline or any knee airbags under the dashboard. Consult your vehicle’s manual to identify these safety zones. Furthermore, ensure the camera does not block or interfere with built-in windshield sensors, such as automatic rain sensors or forward-collision warning cameras. Before permanently adhering the mount to the glass, clean the area thoroughly with a microfiber cloth and glass cleaner to remove any oily residue or dust, which can cause the adhesive to fail under high cabin temperatures. Hold the camera in place temporarily to verify that the power cable can comfortably reach the cigarette lighter socket without being stretched taut.
Routing the Power Cable Through the Cabin
A professional-grade installation relies on hiding the power cable within the vehicle’s interior trim panels to prevent dangling wires from cluttering the cabin. Start by leaving a small amount of slack—approximately five to ten centimeters—near the camera mount to allow for future adjustments to the camera’s angle. Gently tuck the power cable into the gap between the headliner and the top of the windshield, working your way from the center toward the passenger-side A-pillar. A plastic trim removal tool is highly useful here, allowing you to open the gap slightly without scratching the glass or tearing the fabric headliner.
Once you reach the A-pillar, extreme care must be taken if your vehicle is equipped with side curtain airbags. Never run the cable directly across the plastic cover of the A-pillar, as a deploying airbag could launch the cable or the camera into the cabin with dangerous force. Instead, use your trim tool to gently pry the weatherstripping away from the door frame and route the cable behind the airbag mechanism, securing it to the existing factory wiring harness using small zip ties. If you are uncomfortable working around airbag components or if the trim panels require excessive force to remove, stop immediately and seek assistance from a qualified professional installer. Continue routing the cable down the side of the dashboard, tucking it securely behind the rubber door seal.
From the base of the door frame, guide the cable underneath the glovebox or passenger footwell. Use adhesive cable clips to secure the wire flat against the lower plastic panels, ensuring it remains completely clear of the passenger’s feet and does not block access to the cabin air filter compartment. Never route the cable across the driver’s side footwell, as a loose wire could easily become entangled with the accelerator, brake, or clutch pedals, creating an immediate driving hazard. Finally, bring the cable up toward the center console, keeping it tucked neatly along the edge of the plastic trim where it meets the carpet.
Connecting to the Cigarette Lighter Socket Safely
With the cable neatly routed to the center console, you can now make the final connection to the car cigarette plug. Before inserting the adapter, use a flashlight to inspect the interior of the accessory socket. Ensure the socket is completely dry and free of debris, such as dust, lint, or small metal objects like coins, which can cause an electrical short circuit. If cleaning is necessary, ensure the vehicle’s ignition is completely turned off and use a dry, non-conductive tool wrapped in a clean cloth to gently wipe the internal contacts.
Insert the dash cam’s power adapter firmly into the socket until it is fully seated. The spring-loaded metal tabs on the sides of the plug should grip the inner walls of the socket securely, preventing it from vibrating loose during travel. If you feel unusual resistance or if the plug does not seem to fit, do not force it; double-check that the plug size is compatible with your vehicle’s socket, as some older vehicles may have slightly non-standard dimensions. Once connected, gather any remaining slack in the power cable, coil it neatly, and secure it with a hook-and-loop strap or cable tie. Tuck this coiled portion into a side pocket of the center console or behind the lower dashboard trim to keep it from interfering with the gear shifter, handbrake, or cup holders. If the plug feels excessively hot to the touch during use, or if you notice a burning odor, disconnect it immediately and have the vehicle’s electrical system inspected by a professional.
Testing the Setup and Adjusting the Camera
With the physical installation complete, it is time to test the system and fine-tune the camera’s settings. Sit in the driver’s seat, ensure the vehicle is in park or neutral with the handbrake engaged, and start the engine. Most dash cams are designed to detect the incoming electrical current and power on automatically within a few seconds of the engine starting. Look for a status light or an on-screen display indicating that the device has booted up and has automatically initiated its recording sequence.
Next, adjust the physical angle of the camera lens to optimize the recorded field of view. If your dash cam features a built-in screen or connects to a smartphone companion application, use the live preview to align the horizon. A well-adjusted camera should display approximately 50% sky and 50% road, or a 40/60 split favoring the road surface. This balance ensures the camera’s auto-exposure sensor does not overcompensate for a bright sky, which would leave the road and license plates of vehicles ahead underexposed and dark. Ensure that only a tiny sliver of your vehicle’s hood is visible at the bottom of the frame to serve as a spatial reference point. Once the angle is set, access the camera’s settings menu and format the microSD card. Formatting the card directly inside the dash cam ensures that the file system is correctly configured for the camera’s continuous loop-recording write cycles, reducing the risk of file corruption over time.
Troubleshooting Power and Connection Issues
If your dash cam fails to power on or experiences intermittent shut-offs after installation, a systematic troubleshooting approach can quickly isolate the issue. First, verify the ignition state of your vehicle. Many modern cars do not supply power to the accessory socket unless the engine is running or the ignition key is turned to the “Accessory” (ACC) position. If the engine is running and the camera remains dark, check the physical connection at both ends of the cable, ensuring the plug is fully seated in the cigarette lighter socket and the power connector is securely plugged into the camera’s input port.
If the physical connections are secure but power is still lacking, the issue may lie with the fuse. Most high-quality car cigarette plug adapters contain an internal glass cylinder fuse designed to protect the dash cam from electrical surges. To check this, unscrew the plastic collar at the very tip of the plug, taking care not to lose the small metal pin or internal spring. Inspect the glass fuse; if the internal wire is broken or the glass is blackened, the fuse has blown. Replace it only with a new fuse of the exact same physical size, voltage, and amperage rating as specified in your dash cam’s user manual. If the socket itself is not providing power, check your vehicle’s main fuse box for the dedicated accessory socket fuse, referring to the vehicle manual for its location and rating. If you continue to experience power fluctuations, or if the plug becomes unusually hot, discontinue use immediately and consult a qualified automotive electrician to prevent damage to your vehicle’s wiring.
Frequently Asked Questions (FAQ)
Will leaving the dash cam plugged in drain my car battery?
Whether a plugged-in dash cam drains your car battery depends entirely on how your vehicle’s cigarette lighter socket is wired. In vehicles with a switched socket, power is cut completely when the ignition is turned off, meaning the camera will shut down and pose zero risk of draining the battery. However, if your vehicle features an unswitched socket that remains constantly powered, the dash cam will continue to draw current even when parked. Over several days of inactivity, this continuous draw can deplete your car battery, potentially leaving you stranded. To prevent this, always unplug the adapter when parking for extended periods, or monitor the camera’s power indicator light after locking the vehicle to confirm whether it shuts down.
Can I use a standard USB adapter instead of the provided plug?
While it may be tempting to use a multi-port USB adapter to power both your dash cam and your smartphone, doing so is generally not recommended unless the adapter matches the exact power specifications required by the camera. The manufacturer-provided car cigarette plug contains internal circuitry designed to step down the vehicle’s 12V or 24V output to the precise voltage and amperage required by the dash cam. Using a generic USB adapter can result in unstable power delivery, leading to frequent device reboots, overheating, or corrupted video files during critical moments. For maximum reliability and to protect your device’s warranty, always prioritize the power cable and adapter supplied by the dash cam manufacturer.
Community discussion
Share your experience or ask a question. Comments are reviewed before publication.