
Applying wax chain lube properly requires a thorough deep-clean of the chain to bare metal, precise application to the inner rollers and seals while rotating the wheel by hand, and allowing sufficient curing time for the carrier solvent to evaporate. Unlike traditional wet lubes, wax must bond directly to the clean metal surface to form a dry, protective barrier that resists dirt and prevents fling-off. Integrating this process into your regular motorcycle maintenance routine helps extend the life of your drivetrain while keeping your rear wheel and swingarm free of sticky grease.
To transition to a wax-based system successfully, you must follow a structured application method. Skipping steps or applying wax over old grease will prevent the lubricant from bonding, leading to premature chain wear and noise. By establishing a clean workspace, using compatible tools, and allowing the product to cure fully, you can achieve a clean, efficient, and long-lasting protective barrier.
Preparing Your Motorcycle and Workspace
Before starting any motorcycle chain maintenance, you must establish a stable, safe, and well-ventilated workspace. Because chain cleaners and wax lubricants release volatile organic compounds and propellants, working in an open area or a garage with active airflow is essential for your safety. Position the motorcycle on a flat, level surface and secure it using a paddock stand, center stand, or rear wheel roller. This lifts the rear tire off the ground, allowing you to rotate the wheel freely by hand during the cleaning and application processes.
Products mentioned in this guide
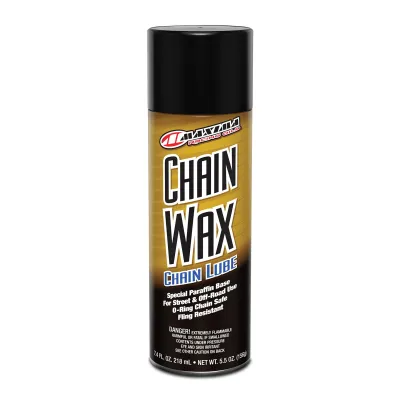
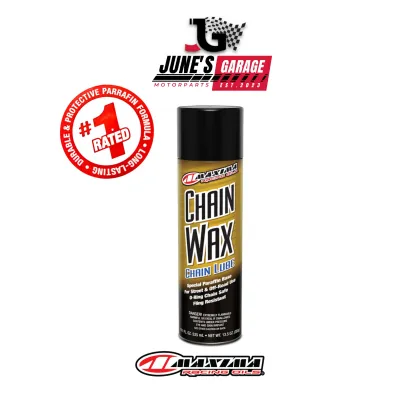
Prices are valid at publication and may change. Please refer to the product page for the latest price.
Safety is paramount when working near the motorcycle’s drivetrain. Never, under any circumstances, start the engine or put the motorcycle in gear to spin the rear wheel while cleaning or lubricating the chain. The force of the engine can easily draw your fingers, rags, or brushes into the rear sprocket, resulting in severe, irreversible injuries. Always turn the ignition off, remove the key, and rotate the rear wheel slowly and manually in a backward direction.
Gather all necessary tools and materials before you begin to keep the process efficient. Your maintenance kit should include a dedicated motorcycle chain cleaner, a soft-bristle three-sided chain brush, several clean, lint-free microfiber rags, a drip tray or large piece of cardboard, and your chosen wax chain lube. Having these items within arm’s reach prevents you from searching for tools with dirty hands and ensures you can complete each step without interruption.
Before applying any product, perform a thorough visual inspection of the chain and sprockets to verify they are in a serviceable condition. Check the chain tension by measuring the slack at the tightest point of the lower run, comparing your measurement against the specifications in your motorcycle’s owner’s manual. Inspect the physical condition of the O-rings, X-rings, or Z-rings between the link plates; if you notice cracked, split, or missing rubber seals, the chain has reached the end of its service life and must be replaced. Additionally, check the sprocket teeth for signs of hooking, thinning, or excessive wear, which indicate that a new chain and sprocket kit is required.
Cleaning the Chain for Optimal Wax Adhesion
The performance of a wax chain lube depends entirely on how well it can bond directly to the metal surfaces of the chain. Traditional wet lubes, factory grease, and road grime leave a slippery, oily residue that prevents the wax carrier solvent from adhering. Therefore, a meticulous deep-cleaning process is required to strip the chain down to bare metal before your first wax application.

When selecting a chain cleaner, always verify the product label to ensure it is explicitly formulated as safe for O-ring and X-ring chains. Harsh solvents such as gasoline, diesel, kerosene, or chlorinated brake cleaners can quickly degrade the delicate rubber seals, causing them to swell, crack, or dissolve. Once these seals are compromised, the factory-sealed grease inside the chain pins escapes, leading to rapid friction wear, tight spots, and eventual chain failure. Additionally, ensure the cleaner is safe for surrounding materials, as overspray can damage painted swingarms, plastic chain guards, or rear tire compounds.
To begin cleaning, place a large piece of cardboard or a drip tray directly underneath the lower run of the chain to catch dirty runoff and protect your workspace floor. Spray the O-ring-safe chain cleaner generously onto the entire length of the chain as you rotate the rear wheel slowly by hand. Allow the cleaner to penetrate the grime for the duration specified on the product label, making sure the solvent does not dry completely on the metal.
Use your soft-bristle chain brush to gently agitate the accumulated dirt, road grit, and old grease on all four sides of the chain links. Focus on the areas where the inner rollers meet the side plates, as this is where dirt collects and causes abrasive wear. Avoid using wire brushes or harsh metal scrapers, which can easily tear the rubber O-rings or scratch the metal plates. Once you have thoroughly brushed the entire length, use a clean, lint-free microfiber rag to wipe away the dissolved grime and dirty solvent. Repeat this spraying, brushing, and wiping process until the rag comes away clean.
After cleaning, the chain must be completely dry before you apply the wax lubricant. Any residual moisture, water, or cleaning solvent left on the metal will act as a barrier, preventing the wax from adhering and causing it to fling off immediately when you ride. Allow the chain to air-dry completely, or dry it thoroughly using a clean, dry microfiber cloth. Avoid using high-pressure compressed air directly on the chain, as the intense pressure can force water, solvent, or dislodged dirt past the rubber seals and into the sealed internal pins of the chain.
Applying the Wax Chain Lube Step-by-Step
Once the chain is completely clean and dry, you can proceed with applying the wax chain lube. Proper preparation of the product is essential for an even application. Shake the aerosol canister vigorously for at least 30 seconds before use to ensure that the wax particles, carrier solvents, and propellants are thoroughly mixed. If the canister has been stored in a cold environment, warm it to room temperature to ensure a consistent spray pattern and proper viscosity.
To apply the lubricant, position the spray nozzle close to the inner run of the chain, aiming directly at the gap between the inner rollers and the side plates where the O-rings or X-rings are located. Slowly rotate the rear wheel backward by hand, spraying a steady, controlled stream of lube onto the lower run of the chain just before it passes over the rear sprocket. This specific angle allows gravity and capillary action to draw the liquid carrier solvent deep into the rollers and behind the rubber seals before it begins to dry.
Avoid the common mistake of spraying the outer side plates of the chain. The outer plates do not experience metal-on-metal friction, and coating them with wax serves no lubricating purpose; instead, it creates an unnecessary layer that can attract dust and road debris. Keep the spray focused strictly on the inner rollers and the sealing rings where lubrication is actually required to reduce friction and prevent wear.
Take extra precautions to prevent the wax lubricant from contaminating other critical components of your motorcycle. Place a piece of cardboard behind the chain to act as a shield, preventing overspray from landing on your rear tire sidewall, swingarm, or rear brake disc. If any lubricant accidentally contacts the brake rotor or pads, it will severely compromise your braking performance and safety. If contamination occurs, immediately clean the affected brake components with a dedicated, residue-free brake cleaner before operating the motorcycle.
Additionally, avoid applying wax chain lube to a hot chain immediately after a long ride unless the manufacturer’s instructions specifically recommend doing so. While a warm chain can help some lubricants penetrate, excessive heat can cause the volatile carrier solvents in certain wax formulas to evaporate too quickly. This rapid evaporation prevents the wax from flowing into the tight clearances of the rollers, leaving the internal contact points dry and unprotected.
Curing Time and Post-Application Inspection
Unlike traditional wet chain oils that are ready to ride immediately, wax-based lubricants require a dedicated curing period to function correctly. The wax is suspended in a liquid carrier solvent that allows it to spray easily and penetrate the tight spaces of the chain. For the wax to form its dry, protective barrier, this solvent must evaporate completely.
Always consult the product label on your specific wax chain lube canister for the manufacturer’s recommended curing time. Depending on the ambient temperature, humidity, and the specific formulation, curing can take anywhere from 15 minutes to several hours. Riding the motorcycle before the solvent has fully evaporated will result in the wet lubricant flinging off the chain, leaving your drivetrain unprotected and coating your rear wheel, swingarm, and riding gear in sticky residue. For the best results, consider performing this maintenance at the end of the day, allowing the wax to cure undisturbed overnight.
Once the recommended curing time has passed, perform a quick visual and tactile inspection to verify the application was successful. A properly cured wax lubricant should leave a clean, slightly hazy, or matte finish on the inner rollers and side plates. Touch the chain gently with a clean, dry finger; the surface should feel dry, smooth, and non-sticky. If the chain still feels wet or tacky, allow additional drying time before starting the engine.
Conclude your maintenance session by cleaning up your workspace and tools. Wipe down your chain brush with a clean rag to remove any leftover wax residue, and store your maintenance tools in a dry, organized toolbox. Dispose of any solvent-soaked rags safely and in accordance with local environmental guidelines, as rags saturated with flammable cleaners can present a spontaneous combustion hazard if left piled together.
Building a Wax Lube Maintenance Schedule
To keep your motorcycle drivetrain operating smoothly, you must establish a regular maintenance schedule based on your riding habits and environmental conditions. Because wax lubricants do not leave a wet, sticky residue, you cannot rely on the typical greasy appearance of a traditional chain to determine when it is time for service.
Learn to recognize the physical and auditory signals that indicate your chain requires a fresh application of wax. A dry chain will often produce a distinct, metallic clicking or whirring noise while riding, which becomes more noticeable when coasting with the clutch pulled in. Visually, the inner rollers will lose their matte wax coating and take on a highly polished, shiny silver appearance. In humid climates or after exposure to moisture, small spots of surface oxidation or a reddish-brown tint may begin to appear on the link plates, signaling that the protective barrier has worn away.
Your maintenance intervals must be adjusted to match your specific riding environment. For standard commuting on clean, dry paved roads, a typical reapplication interval is every 400 to 600 kilometers. However, if you frequently ride through heavy tropical downpours, wet road spray, or dusty construction zones, the protective wax layer will wear down much faster. In these demanding conditions, inspect your chain weekly and reapply the wax lube as soon as you notice the dry barrier has degraded.
When deciding whether to use a wax-based lubricant long-term, consider the practical trade-offs compared to traditional wet oils or chain pastes. The primary advantage of wax is its exceptional cleanliness; because it dries completely, it does not attract road grit, sand, or dirt, which act as an abrasive paste that accelerates sprocket wear. It also eliminates the messy fling-off that stains your rear wheel and swingarm. The trade-off is that wax requires a more rigorous initial cleaning process, strict adherence to curing times, and more frequent reapplications in wet weather compared to heavy-duty wet lubricants.
Frequently Asked Questions (FAQ)
Can I apply wax chain lube over existing wet or oil-based lubricants?
No, you should never apply wax chain lube directly over existing wet, oily, or greasy lubricants. Wax requires a completely clean, bare metal surface to adhere and bond properly. If applied over oil or grease, the wax cannot penetrate the rollers or stick to the metal, causing it to slide off the chain and fling onto your motorcycle immediately. To transition to a wax system, you must perform a thorough deep-clean using an O-ring-safe chain cleaner to strip away all traces of previous lubricants, followed by a complete drying of the chain before application.
Is wax chain lube safe for all O-ring and X-ring motorcycle chains?
Most high-quality wax chain lubes are safe for sealed chains, but you must always verify this by checking the product label for explicit O-ring, X-ring, or Z-ring compatibility. Sealed chains rely on internal grease held in place by rubber rings, and using incompatible chemicals can damage these seals. Always consult your motorcycle’s owner’s manual to confirm the manufacturer’s recommendations for chain maintenance products. Avoid using any general-purpose industrial lubricants or aerosol sprays that do not explicitly state they are safe for motorcycle drive chains and rubber seals.
How do I remove wax chain lube if I want to switch to a different lubricant type?
To remove cured wax chain lube and switch back to a wet lubricant or oil, you must use a dedicated motorcycle chain cleaner or a wax-stripping solvent that is certified safe for O-ring and X-ring chains. Apply the cleaner generously to dissolve the hardened wax barrier, and use a soft-bristle chain brush to agitate the buildup in the rollers and link plates. Wipe the dissolved wax away with clean microfiber rags, repeating the process until the chain is completely bare. Ensure the chain is fully dry before applying your new choice of lubricant to prevent compatibility issues or poor adhesion.
Community discussion
Share your experience or ask a question. Comments are reviewed before publication.