
Applying a pre-wash product is the single most effective step you can take to protect your vehicle’s paintwork from wash-induced scratches and swirl marks. When a vehicle is driven, it accumulates a layer of abrasive road grit, dust, and environmental fallout. If you immediately touch the paint with a wash mitt, these hard particles act like sandpaper, grinding micro-scratches into the clear coat. A proper pre-wash chemically loosens, encapsulates, and suspends this surface contamination, allowing you to rinse it away safely before any physical contact occurs.
To achieve professional-grade results at home, you must understand the chemistry of the products you use, prepare your washing environment correctly, and master the physical application process. This guide provides a systematic, step-by-step workflow designed to maximize the cleaning power of your pre-wash while protecting sensitive vehicle components and existing paint protection.
Understanding Pre-Wash Products and Surface Compatibility
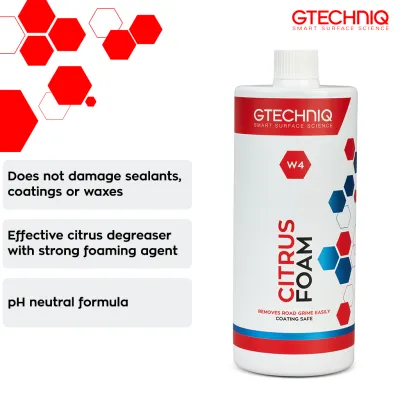
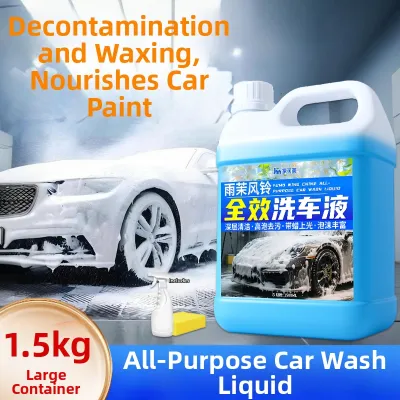
Selecting the right pre-wash chemistry requires matching the product to your vehicle’s current level of dirt and any existing paint protection. Pre-wash products generally fall into three categories: snow foams, citrus pre-washes, and traffic film removers (TFRs). Snow foams are formulated to produce a thick, clinging lather that extends contact time on vertical surfaces, making them ideal for routine maintenance washes. Citrus pre-washes utilize natural solvents to break down organic matter like bug splats and bird droppings. Traffic film removers are highly concentrated, aggressive cleaners designed to cut through greasy road film and heavy winter grime.
Products mentioned in this guide


Prices are valid at publication and may change. Please refer to the product page for the latest price.
Before purchasing any product, you must evaluate its pH level by reading the manufacturer’s technical data sheet or product label. Neutral pH formulas (around pH 7) are gentle and safe for delicate carnauba waxes and polymer sealants, preserving your existing protective layers. Alkaline formulas (pH 8 to 11) offer significantly higher cleaning power but can degrade or completely strip traditional waxes over time. If your vehicle has a professional ceramic coating, it can typically tolerate mild alkaline pre-washes due to the coating’s high chemical resistance, but you should always verify this by checking your coating manufacturer’s specific maintenance guidelines.
Surface compatibility extends beyond the paintwork to the various materials that make up a modern vehicle’s exterior. Highly acidic or heavily alkaline chemicals can stain unpainted plastic trim, dry out rubber window seals, and etch delicate anodized aluminum accents. Furthermore, modern vehicles are equipped with sensitive exterior components, including parking sensors, radar units, and camera lenses. To prevent chemical damage or clouding of these sensors, always verify that the product label explicitly states it is safe for plastics, rubber, and sensitive electronics. If you are using a new or aggressive product for the first time, perform a spot test on an inconspicuous area, such as the lower door sill, to confirm compatibility.
Essential Equipment and Vehicle Preparation
The tools you choose to apply your pre-wash will depend on your available water pressure and washing setup. A dedicated foam cannon attached to a pressure washer is the most effective tool for applying snow foams, as the high-pressure water flow draws the chemical through an internal aerator to create a thick, clinging blanket of foam. If you do not have a pressure washer, a manual compression pump sprayer equipped with a foaming nozzle is an excellent alternative. Pump sprayers allow you to pressurize the mixture manually, delivering a wet, consistent layer of product. For targeted spot cleaning of bug splats or lower-panel grime, a standard trigger spray dilution bottle is sufficient.

Vehicle preparation is critical to preventing chemical damage and ensuring the pre-wash performs as intended. Never apply pre-wash chemicals to a hot vehicle or in direct sunlight. In warm, tropical climates, car panels can quickly reach temperatures that cause chemicals to flash-dry on contact, leaving behind stubborn water spots or chemical etching. Always park the vehicle in a shaded wash bay, under a carport, or wash during the cooler hours of the early morning or late evening. Before applying any product, touch the bonnet and roof with the back of your hand to confirm that the panels are cool to the touch.
Accurate dilution is the final step of preparation and must not be overlooked. Avoid the common mistake of guessing the mixing ratio or adding extra product for “thicker foam.” Over-concentrated mixtures can strip paint protection, stain plastic trim, and leave a sticky residue that actually attracts dirt. Conversely, under-concentrated mixtures will lack the chemical strength to loosen road grime. Use a plastic measuring cup to follow the manufacturer’s exact dilution instructions, taking into account whether the ratio refers to the bottle mixture or the final output from your pressure washer nozzle.
Step-by-Step Application and Dwell Time Management
Once your vehicle is prepared and your product is correctly diluted, begin the application process. Always apply your pre-wash product from the bottom of the vehicle upward. The lower sections of a car—such as the rocker panels, wheel arches, and lower doors—accumulate the heaviest concentration of road grime, grease, and traffic film. Applying the product from the bottom up ensures that the active chemicals have the maximum amount of time to dwell on these heavily soiled areas. If you apply the product from the top down, the gravity-fed runoff from the cleaner upper panels will wash away the product on the lower panels before it has a chance to chemically break down the dirt.
Work systematically around the vehicle, overlapping your passes to ensure complete and even coverage. Keep a close eye on the product’s dwell time, which typically ranges from three to five minutes depending on the manufacturer’s instructions. The goal is to allow the chemicals to work without letting them dry on the surface. In warm or windy conditions, evaporation happens rapidly, and the foam may begin to pop and dry out sooner than expected. If you observe the product starting to dry on any panel, proceed immediately to the rinsing stage to prevent chemical staining.
Rinsing is the phase where the loosened dirt is physically removed from the vehicle, and it must be done with care. Use a pressure washer or a high-flow hose nozzle, and rinse the vehicle from the bottom up. Rinsing from the bottom up allows you to see exactly where the dirt is being blasted away and prevents the clean water from diluting the active pre-wash on the lower panels prematurely. Use slow, sweeping horizontal sweeps, keeping the nozzle at a safe distance of at least 30 centimeters from the paintwork to avoid damage. Once you have cleared the heavy grime from the lower sections, perform a final, thorough rinse from the top down to flush all remaining chemical residue out of panel gaps, door shuts, and window seals.
Identifying Common Mistakes and Stop Conditions
Understanding what can go wrong during a pre-wash allows you to take immediate corrective action before permanent damage occurs. The most common mistake is applying chemicals to a vehicle that has been sitting in the sun, or applying them to unverified aftermarket modifications. Aftermarket vinyl wraps, plasti-dip coatings, and freshly painted panels are often far more sensitive to chemical exposure than factory-baked clear coats. If your vehicle has any of these modifications, always consult the installer or manufacturer for approved cleaning products before applying standard pre-wash chemicals.
If you notice that the pre-wash solution is beginning to dry prematurely on the paintwork, do not attempt to wipe it off with a microfiber towel or wash mitt. Wiping a drying pre-wash will grind the partially loosened dirt directly into the clear coat, causing severe scratching. Instead, gently mist the drying area with clean water from a hose or a spray bottle to re-hydrate the chemical, and then rinse the entire panel thoroughly with high-pressure water immediately.
There are certain situations where you must stop the wash process immediately. If you observe unexpected chemical reactions—such as plastic trim turning white, chrome trim staining, or paint discoloration—halt the application at once. Immediately flush the affected area with copious amounts of clean, cool water to dilute and neutralize the chemical. Do not attempt to correct the staining by scrubbing or applying other chemicals. Once the vehicle is dry, consult a professional automotive detailer to assess the damage and determine the safest method of restoration.
Evaluating Results and Transitioning to the Contact Wash
After completing the rinse, take a moment to inspect the vehicle’s paintwork before moving on to the contact wash. A successful pre-wash should remove the vast majority of loose dust, mud, and road film, leaving the paint looking significantly cleaner. However, you may still notice bonded contaminants such as tar spots, iron fallout, or tree sap. Do not attempt to scrub these stubborn spots off with your wash mitt during the next stage, as doing so can cause scratching. These contaminants require specialized chemical decontamination products, which should be applied after the main wash process is complete.
Use the visual condition of the paint to adjust your subsequent contact wash technique. If the pre-wash was highly effective and the paint is mostly clear of visible grit, you can proceed with a standard, gentle contact wash. If some stubborn road film remains on the lower panels, you must exercise extreme caution. Ensure your wash mitt is heavily lubricated with a high-quality car shampoo, and use virtually no physical pressure as you glide the mitt over the surface, letting the shampoo’s slickness do the work.
To maintain safe washing practices, always use the two-bucket method for the contact wash stage. Fill one bucket with your diluted car shampoo solution and a second bucket with clean water, placing grit guards in the bottom of both. Dunk your wash mitt into the shampoo bucket, wash a single panel using straight, overlapping lines, and then rinse the mitt thoroughly in the clean water bucket to release any trapped dirt before reloading it with fresh shampoo. This simple routine ensures that any residual grit left behind after the pre-wash is trapped at the bottom of your rinse bucket, rather than being dragged across your paintwork.
Frequently Asked Questions (FAQ)
Can I use a standard household spray bottle instead of a foam cannon?
Yes, you can use a standard household spray bottle, but it has significant limitations compared to a dedicated foam cannon or pump sprayer. A standard spray bottle cannot aerate the product to create a thick, clinging foam, meaning the liquid solution will run off vertical panels very quickly, reducing its dwell time. If you must use a household spray bottle, work in smaller sections, apply the product generously, and monitor the panels closely to ensure the solution does not dry out. For a low-cost alternative that does not require a pressure washer, a manual foaming pump sprayer is highly recommended.
Is it safe to apply pre-wash products on matte paint or vinyl wraps?
Matte paint finishes and vinyl wraps require specialized care because they are highly susceptible to staining, chemical etching, and gloss alteration. You must never use pre-wash products that contain gloss enhancers, waxes, or highly acidic or alkaline chemicals, as these can permanently ruin the matte appearance. Always check the product label for explicit compatibility with matte or wrapped surfaces. Before applying any pre-wash to the entire vehicle, test a small, hidden area to ensure it does not leave stains or alter the texture of the finish.
How often should I use a heavy-duty traffic film remover compared to standard snow foam?
Standard, pH-neutral snow foam should be used during every routine maintenance wash to safely remove loose dust and light road grime without stripping your paint protection. Heavy-duty traffic film removers (TFRs) are much more aggressive and should be reserved for deep cleaning situations. Use a TFR only when the vehicle is heavily soiled with greasy road film, after driving through harsh winter road salt, or when you plan to strip old wax layers to prepare the paint for a fresh coat of sealant or ceramic coating. Always rely on the observable dirt levels of your vehicle rather than a strict calendar schedule.
Community discussion
Share your experience or ask a question. Comments are reviewed before publication.