
A successful inner tube repair relies on proper surface preparation and allowing the vulcanizing fluid to activate before applying the patch. By following a systematic approach to cleaning, scuffing, and applying the glue, you can create a chemical bond that holds air pressure reliably and gets you back on the road safely. This process is not a simple gluing task; it is a cold vulcanization process where the rubber of the tube and the patch chemically fuse into a single, continuous piece. Understanding how this chemical reaction works and executing each step with precision prevents slow leaks and sudden patch failures during your journey.
Gather Your Tools and Materials
Before beginning the repair, assembling the correct tools and materials ensures a smooth process without interruptions. Having everything within arm’s reach prevents you from handling clean components with dirty hands or letting prepared surfaces collect dust while you search for a missing item.
The core of your repair kit is the dedicated inner tube glue, which is technically a cold vulcanizing fluid rather than a standard adhesive. You will also need compatible rubber patches, which typically feature a specialized active bonding layer on the underside. To prepare the rubber surface, keep a piece of medium-grit sandpaper or a textured metal scuffer handy. A piece of chalk or a non-greasy marker is essential for marking the exact location of the puncture once you find it. Finally, secure a clean, lint-free cloth to wipe away debris without leaving fibers behind.
Products mentioned in this guide
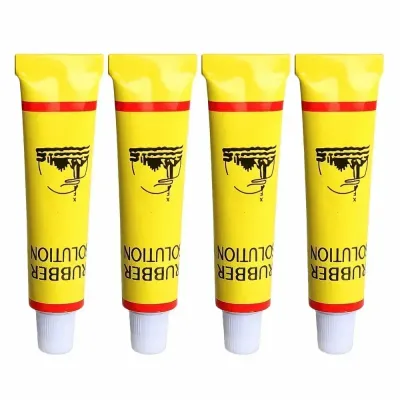
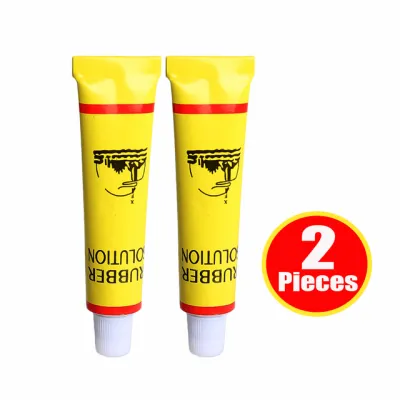
![[SG FREE ] 5× Bicycle Motorcycle Tire Tube Patching Glue Cement Adhesive Puncture Repair](https://img.lazcdn.com/g/p/d1ad43315cc7d9442265516da2122eed.jpg_400x400q80.jpg_.webp)
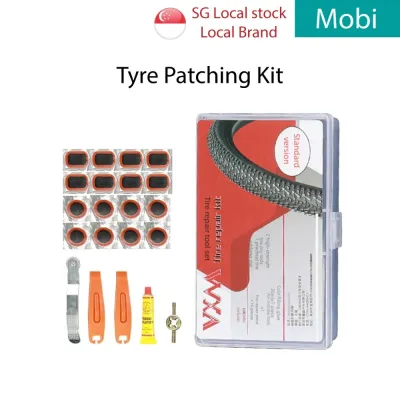
Prices are valid at publication and may change. Please refer to the product page for the latest price.
Checking the condition of your materials before starting is a critical step. Vulcanizing fluid has a limited shelf life once opened, as the solvents inside evaporate quickly if the cap is not sealed perfectly. Squeeze the tube gently to ensure the liquid is fluid and has not solidified into a rubbery mass. Examine your patches to confirm that the protective foil backing is intact and has not peeled away, which could expose the active rubber layer to air and contaminants.
Several optional but highly useful tools can make the repair process significantly easier and more reliable. Tire levers are indispensable for safely removing the tire bead from the rim without pinching the inner tube. A hand pump allows you to inflate the tube slightly to locate the leak and test the final repair. If you are working at home or in a workshop, a small basin filled with clean water provides the most reliable method for detecting tiny, slow punctures that are otherwise invisible to the eye.
Locate the Puncture and Prepare the Surface
Finding the exact source of the leak is the first active step in the repair process. While some punctures from large nails or wire are immediately obvious, tiny pinholes caused by thorns or road debris can be incredibly difficult to spot.

To locate an elusive leak, inflate the inner tube to roughly twice its normal uninstalled width so that the rubber stretches and opens up any small punctures. Submerge the inflated tube section by section in a basin of water, watching closely for a steady stream of rising bubbles. If you are on the road without water, hold the inflated tube close to your face, rotating it slowly to listen for a faint hissing sound or to feel the escaping air against your skin. Once you identify the hole, dry the area completely and draw a large crosshair or circle around the puncture with your chalk or marker, keeping the mark wide enough so it remains visible during the scuffing process.
Preparing the rubber surface is the most critical factor in determining whether your patch will hold permanently or peel off under pressure. Inner tubes are manufactured with a factory mold release agent, a slick chemical coating that prevents the raw rubber from sticking to the mold during production. If you apply vulcanizing fluid directly over this agent, the chemical reaction cannot occur, and the patch will fail to bond.
Use your sandpaper or metal scuffer to abrade the rubber surface in a circular pattern centered on the puncture. The scuffed area must be slightly larger than the physical dimensions of the patch you plan to apply. Scuff the rubber until the shiny, smooth factory finish turns into a dull, matte, and slightly textured surface. Be careful to scuff evenly, avoiding deep gouges that could thin the tube wall or create new weak points in the rubber.
Once the surface is thoroughly textured, you must clean away all the loose rubber dust and any residual oils. Use a clean, dry, lint-free cloth to wipe the area clean, brushing the debris away from the center of the repair. Never use your bare fingers to wipe the dust away, as the natural oils on your skin will contaminate the freshly exposed rubber and ruin the chemical bond. Avoid using liquid cleaners or solvents unless they are specifically approved for tire repair, as many household degreasers leave behind a thin residue that prevents vulcanization.
Apply and Activate the Inner Tube Glue
Applying the vulcanizing fluid requires a specific technique to ensure the chemical reaction initiates correctly across the entire bonding area. This fluid is not a traditional glue that dries to hold two surfaces together; instead, it contains solvents and curing agents that temporarily soften the rubber of the tube, allowing it to fuse with the patch.
Squeeze a small amount of the vulcanizing fluid directly onto the center of the scuffed area. Using a clean tool, spread the fluid into a thin, even layer across the entire prepared surface. The layer must extend slightly beyond the outer edges of where the patch will sit to ensure the edges do not lift later. Avoid applying a thick, gloppy layer, as excess fluid takes too long to dry and traps unevaporated solvents beneath the patch, which weakens the final bond.
After spreading the fluid, you must wait for the activation period to complete before attempting to apply the patch. This is the step where many repairs fail due to impatience. As the fluid sits on the rubber, the solvents must evaporate completely, leaving behind the active vulcanizing agents on the surface of the tube.
Watch the appearance of the fluid closely as it dries. It will transition from a wet, shiny liquid to a completely dull, matte film. This process typically takes several minutes, depending on the ambient temperature and humidity levels. To verify if the fluid is ready without contaminating the center of the repair, touch the very outer edge of the scuffed and glued area with a clean tool; it should feel dry and completely non-tacky, rather than wet or sticky.
Applying the patch while the vulcanizing fluid is still wet is a guaranteed way to cause a patch failure. Wet fluid traps active solvents underneath the impermeable rubber patch, preventing them from escaping. These trapped solvents continue to liquefy the rubber, preventing the chemical vulcanization process from completing and causing the patch to slide off or leak as soon as the tube is inflated.
Apply the Patch and Secure the Bond
With the vulcanizing fluid fully dried and activated, you are ready to apply the patch and complete the chemical fusion. This step requires precision, as the bond begins to form the instant the two prepared rubber surfaces make contact.
Carefully peel the protective foil backing from the underside of the patch. It is absolutely vital that you do not touch the exposed, colored active rubber layer with your fingers. Even a tiny amount of skin oil, sweat, or dirt on this surface will interrupt the chemical reaction and create a localized leak path under the patch. Hold the patch by its outer edges or by the clear plastic top film while removing the foil.
Center the patch directly over the marked puncture site. Lower it straight down onto the prepared tube surface, making sure it does not shift or slide once it makes contact. Press down firmly on the center of the patch with your thumb to establish the initial contact, then hold it in place for a few seconds to secure the alignment.
To ensure a permanent, airtight bond, you must burnish the patch to remove any trapped air bubbles and force the two rubber layers into complete contact. Use a specialized patch roller, the smooth edge of a tire lever, or the back of a screwdriver handle to press down hard on the patch. Start from the exact center of the patch and roll or slide your tool outward toward the edges in a star pattern. Apply significant pressure to squeeze out any microscopic air pockets and to ensure the edges of the patch are completely flattened against the tube.
Most high-quality patches feature a thin, clear plastic film on the top side. This film should generally be left in place after the repair is complete. Attempting to peel this film off immediately after application can pull up the freshly bonded edges of the patch, ruining your work. Leaving the film on does not harm the tube or the tire; it actually serves a practical purpose by preventing the slightly tacky edges of the patch from sticking to the inside of the tire casing during reinstallation.
Reinstall the Tube and Test for Leaks
Once the patch is securely bonded, you must handle the reinstallation process carefully to avoid damaging your fresh repair or creating a new puncture. Taking a few extra minutes to inspect your components prevents frustrating repeat repairs.
Before placing the repaired tube back into the tire, inflate it slightly using your hand pump. You only want to add enough air to give the tube a soft, round shape rather than stretching it. This slight inflation prevents the tube from twisting, folding, or getting pinched between the tire bead and the wheel rim during installation, which can easily cause a new pinch flat.
While the tube is out, you must thoroughly inspect the inside of the tire casing. Use your fingers to carefully feel along the entire inner surface of the tire, looking for the sharp object that caused the original puncture, such as a thorn, a piece of wire, or a small glass shard. If you skip this step, the offending object may still be embedded in the tire tread, ready to puncture your newly repaired tube the moment you inflate it. Remove any debris you find using pliers or a small tool.
Carefully tuck the slightly inflated tube back into the tire casing, starting at the valve stem and working your way around the wheel. Push the tire bead back over the rim flange, using only your hands if possible to avoid pinching the tube with tire levers. Once the tire is fully seated, inflate the tire to its recommended operating pressure.
If you want absolute certainty before riding, perform a final leak test. You can submerge the repaired section of the fully inflated tire and wheel assembly in water, or simply let the wheel sit for a short period to verify that it holds pressure consistently. This step ensures that your repair is completely successful and safe for the road.
Common Mistakes to Avoid During the Repair
Understanding the most common pitfalls in inner tube repair can help you avoid simple mistakes that lead to flat tires later. Most patch failures are not caused by defective materials, but rather by minor errors in technique during the preparation and application phases.
One of the most frequent mistakes is applying too much vulcanizing fluid or failing to let it dry completely. A thick layer of fluid does not create a stronger bond; instead, it slows down the evaporation process and traps wet solvents under the patch. Always spread the fluid into a thin, even layer and wait patiently until it turns completely dull and dry to the touch before placing the patch.
Inadequate surface preparation is another primary cause of patch failure. Skipping the scuffing step or performing it half-heartedly leaves the factory mold release agent intact, preventing the chemical bond from forming. Similarly, failing to wipe away the loose rubber dust after scuffing creates a barrier of loose particles that prevents the patch from adhering directly to the solid rubber of the tube.
Contaminating the prepared surfaces with bare fingers is a subtle mistake that easily ruins a repair. The natural oils, sweat, and dirt on your skin act as a barrier to the vulcanizing process. Always handle the scuffed tube and the peeled patch by their outer edges, keeping your fingers away from the active bonding zones.
Finally, using the wrong type of adhesive is a critical error. Standard household glues, super glues, or contact cements are not designed for the extreme flexing and high pressures that an inner tube experiences. These adhesives dry into a brittle layer that quickly cracks and separates from the rubber when the tire rolls. Only use dedicated vulcanizing fluid designed specifically for tire and tube repair.
When to Replace the Inner Tube Instead of Patching
While patching is an excellent and cost-effective way to extend the life of an inner tube, there are clear safety limits where a repair is no longer viable. Knowing when to discard a damaged tube and replace it with a new one is essential for your safety on the road.
Certain types of physical damage simply cannot be repaired safely with a patch. Large tears, long slits, blowouts from over-inflation, or punctures that are located directly on a seam are not suitable for patching. Additionally, if the puncture is located at the very base of the valve stem, a patch cannot seal the leak because the rubber is too thick, contoured, and subject to constant mechanical stress during pumping.
You should also consider the overall history and condition of the inner tube. While a tube can support multiple patches if they are spaced far apart, patching a tube that has already been repaired multiple times in the same localized area is highly discouraged. Multiple overlapping patches create stiff spots in the rubber that do not expand evenly, leading to uneven stress distribution and a high risk of sudden failure.
Finally, inspect the overall health of the rubber material. Over time, exposure to heat, ozone, and age causes rubber to degrade, a condition often referred to as dry rot. If the tube rubber feels brittle, shows fine cracks when stretched, or has a sticky, perished texture, it has lost its structural integrity. In these cases, the rubber will not support a patch, and the tube must be replaced entirely to ensure safe operation.
Frequently Asked Questions (FAQ)
Can I use super glue or standard adhesives instead of specific inner tube glue?
No, you cannot use super glue or standard household adhesives for a lasting inner tube repair. Standard adhesives work by drying into a hard, rigid layer that bonds two surfaces mechanically. Because an inner tube constantly stretches, flexes, and changes shape under pressure and road vibrations, these rigid bonds will quickly crack and separate from the flexible rubber. Dedicated inner tube glue is actually a vulcanizing fluid that initiates a chemical reaction, melting and fusing the rubber of the tube and the patch together into a single, continuous, flexible piece that can withstand the dynamic stresses of riding.
How long should I wait before riding after a patch repair?
While the chemical vulcanization process begins almost instantly when you apply pressure to the patch, it is best practice to allow the bond to stabilize before subjecting it to full riding stresses. Under normal conditions, you can reinstall the tube, inflate it to pressure, and ride immediately if the repair was executed correctly. However, checking the specific product label and manufacturer instructions for your vulcanizing fluid is always recommended, as some heavy-duty or specialized formulas may suggest a brief waiting period of several minutes to ensure the chemical bond has fully cured before the tube is subjected to high temperatures and heavy loads.
Community discussion
Share your experience or ask a question. Comments are reviewed before publication.