
Applying a silica-based spray sealant like CarPro Reload to your car’s interior seats requires meticulous surface preparation, precise application techniques, and strict adherence to manufacturer guidelines. While primarily formulated as an exterior paint sealant, some enthusiasts adapt silica-based products for interior surfaces to leverage their hydrophobic properties. However, because interior leather and fabric are highly porous and sensitive, you must first verify compatibility, thoroughly clean the surfaces to remove oils, and apply the product indirectly using microfiber towels to prevent staining, uneven curing, or slick residues.
Verify Compatibility and Safety Before Application
Before opening any bottle, you must verify whether the specific formulation of CarPro Reload is approved for your vehicle’s interior materials. Always consult the product label and the manufacturer’s official technical data sheet (TDS) for the most current usage instructions. Applying an exterior-focused silica (SiO2) spray to interior surfaces carries distinct risks that differ from paintwork applications.
Porous materials like natural leather and woven fabrics react differently to synthetic sealants than clear-coated metal. If applied incorrectly or to incompatible surfaces, exterior silica sprays can cause fabric whitening, alter the soft texture of premium leather, or leave a sticky residue. Furthermore, overspray on interior touchpoints can create dangerous slipping hazards on steering wheels, gear shifts, and heavily contoured seat bolsters.
Products mentioned in this guide
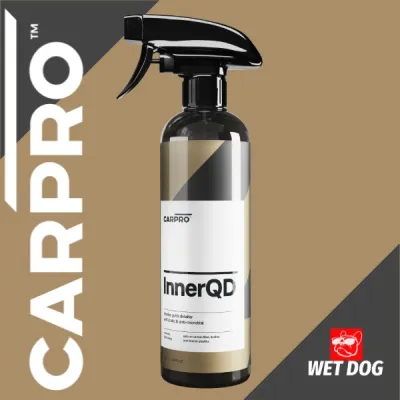
Prices are valid at publication and may change. Please refer to the product page for the latest price.
Establish a strict stop condition before proceeding. If the product label or technical data sheet does not explicitly state that the formula is safe for interior leather or fabric, halt the process immediately. In such cases, switch to dedicated interior coatings designed specifically for these materials, such as specialized leather sealants or fabric protectants, to avoid permanent surface damage.
Gather Essential Tools and Preparation Materials
Achieving a successful bond requires assembling the correct tools before beginning the application. Using the wrong materials can introduce lint, scratch delicate leather, or prevent the sealant from adhering properly to the seat fibers. While high-quality interior detailing kits can range from S$30 to S$80, investing in proper tools prevents costly damage to your cabin.

Select high-quality, high-gsm microfiber towels dedicated solely to interior detailing. Ensure these towels have been washed without fabric softeners, as softeners leave behind chemical residues that interfere with the bonding process of silica sealants. You will need several clean towels: some for cleaning, some for applying the product, and others for the final buffing step.
Prepare a dedicated, pH-neutral interior cleaner formulated for automotive leather or fabric, along with soft-bristled detailing brushes. A vacuum cleaner equipped with a crevice tool and a soft brush attachment is essential for removing loose debris from deep within the seat seams.
Personal safety and environmental control are equally critical. Wear nitrile gloves to protect your skin from chemical exposure and to prevent your natural body oils from contaminating the freshly cleaned seats. Ensure your workspace is highly ventilated, especially when working in enclosed spaces like residential garages or multi-storey carparks in humid climates. If ventilation is limited, wear an appropriate safety mask to avoid inhaling airborne product mist.
Step-by-Step Surface Preparation for Optimal Bonding
The performance of any silica-based sealant depends entirely on the cleanliness of the receiving surface. Any remaining dirt, body oils, or previous interior dressings will act as a barrier, preventing the sealant from bonding and leading to premature failure or patchy spots.
Begin by vacuuming the seats thoroughly. Slide the crevice tool deep into the seat folds, seams, and side bolsters where crumbs, dust, and grit accumulate. For perforated leather seats, use a soft brush attachment to gently dislodge trapped debris from the tiny holes without puncturing or scratching the material.
Next, apply your dedicated interior cleaner to the seats. Instead of spraying the cleaner directly onto the leather or fabric—which can oversaturate the cushioning underneath—spray it onto your soft-bristled detailing brush or a microfiber towel. Work the cleaner into the surface using gentle, circular motions to agitate and lift embedded grime, sweat, and oils.
Wipe away the suspended dirt and cleaner residue immediately with a clean, damp microfiber towel. It is vital to remove all surfactant residues, as leftover soap can degrade the sealant.
Allow the seats to dry completely before applying the sealant. In humid tropical climates, this drying phase may take several hours. Trapped moisture within fabric fibers or leather pores will actively repel the hydrophobic silica molecules, resulting in uneven bonding, cloudy white spots, or a patchy finish. You can use a clean, dry microfiber towel to press into the cushions to check for deep-seated moisture.
Application Techniques for Even Coverage
Once the seats are completely clean and dry, you can begin the application process. Precision and moderation are key when applying silica-based sealants to interior surfaces.
Work in small, manageable sections to maintain complete control over the product. Focus on one seat base, one backrest, or even one individual panel at a time. This prevents the product from flashing or drying prematurely on the surface before you have a chance to level and buff it.
Never spray the product directly onto the seats. Direct spraying leads to uncontrollable overspray, which can land on sensitive electronic controls, seatbelt webbing, stitching, or glass. Instead, lightly mist the product onto a clean, folded microfiber towel. This indirect method ensures you apply a thin, controlled, and even layer to the material.
Gently wipe the product-dampened towel over the seat surface, ensuring complete coverage without soaking the material. For leather, use light, overlapping straight strokes. For fabric, work the product into the weave using cross-hatch patterns to ensure the fibers are evenly coated.
Immediately follow the application with a separate, clean, and dry microfiber towel to buff the surface. Wipe down the area thoroughly to remove any excess product, leveling out the finish. This step is crucial to prevent high spots, sticky residues, or an unnatural gloss on matte leather surfaces. If the towel begins to feel grabby, flip it to a fresh, dry side or switch to a new towel.
Curing, Inspection, and Long-Term Maintenance
After completing the application, the sealant requires uninterrupted time to cure and form a durable protective barrier.
Refer to the manufacturer’s instructions for the exact curing duration required. During this curing window, keep the vehicle dry, well-ventilated, and parked out of direct sunlight. High heat and intense UV rays from direct sunlight can accelerate drying too quickly, potentially causing streaks, while moisture or humidity can disrupt the chemical bonding process.
Once the curing period is complete, conduct a thorough inspection of the seats under strong, diffuse lighting. Inspect the surfaces from multiple angles to check for any missed spots, uneven streaks, or areas of fabric whitening. If you detect any high spots or residue on leather, try leveling them immediately by wiping the area with a slightly damp microfiber towel, followed by a dry buff.
To preserve the lifespan of the protective layer, adjust your long-term maintenance routine. Avoid using harsh, highly alkaline, or solvent-based cleaners, as these will quickly strip the silica barrier. Instead, use only mild, pH-neutral interior cleaners or a simple damp microfiber towel for routine dust removal. Avoid applying heavy silicone-based dressings over the sealed surface, as they will not adhere properly and will create a greasy film.
Frequently Asked Questions (FAQ)
Can I use this product on all types of automotive leather?
No, silica-based sealants are generally not suitable for all leather types. While they may work on modern, polyurethane-coated (pigmented) leathers, they should not be applied to open-pore, unfinished leathers like aniline, semi-aniline, or suede. These delicate materials are highly absorbent and can easily stain, darken, or lose their natural texture when exposed to synthetic sealants. Always check the vehicle manufacturer’s care guidelines and test the product on a small, hidden area—such as the underside of a headrest or the lower back of the seat—before treating the entire cabin.
What should I do if the product leaves white residue on fabric?
If the product dries and leaves a white residue on fabric seats, it is usually a sign of over-application or incomplete buffing. To resolve this, lightly mist the affected area with a dedicated fabric cleaner or clean water to rehydrate the residue. Gently agitate the fibers with a soft-bristled upholstery brush to break up the dried silica particles, then immediately blot the area dry with a clean, absorbent microfiber towel. Avoid scrubbing aggressively, as this can fray the fabric fibers or push the residue deeper into the cushion.
How long does the protection typically last on interior seats?
The durability of the protective barrier on interior seats depends heavily on daily usage patterns, physical friction, and your cleaning habits. High-wear areas, such as the driver’s seat bolsters, will experience faster wear due to constant entry and exit friction. While exterior applications face harsh weather, interior applications are subjected to friction and body oils. Refer to the product label for baseline durability expectations, and plan to reapply the product when you notice water stops beading or when the surface loses its slick, easy-to-clean feel.
Community discussion
Share your experience or ask a question. Comments are reviewed before publication.