
To position your dash cam bracket holder for Land Transport Authority (LTA) compliance in Singapore, you must mount it directly behind or adjacent to the rearview mirror, ensuring it does not obstruct your forward field of vision, side mirrors, or the active sweep of your windshield wipers. The bracket holder must be securely fastened so that the camera remains completely stable during transit, capturing a clear, unobstructed view of the road ahead. By keeping the device within the shaded frit band or high up on the passenger side of the mirror, you maintain a legal driving view while ensuring the recorded footage remains admissible for insurance claims and traffic investigations.
Understand LTA Regulations for Dash Cam Placement
The Land Transport Authority (LTA) maintains strict regulations regarding any aftermarket accessories installed on a vehicle’s windshield. The primary directive is to preserve an unobstructed view for the driver at all times. Any object that blocks the driver’s direct line of sight to the road, side mirrors, traffic signals, or pedestrians is considered a safety hazard and can result in a compliance violation during routine vehicle inspections.
To ensure your vehicle remains fully compliant, the dash cam and its bracket holder must not encroach into the driver’s primary viewing zone. This zone generally covers the central and driver-side portions of the front windshield. When mounting any accessory, you must verify that the physical footprint of the bracket and the camera body does not create a blind spot that could obscure a pedestrian or an oncoming vehicle at an intersection.
Products mentioned in this guide
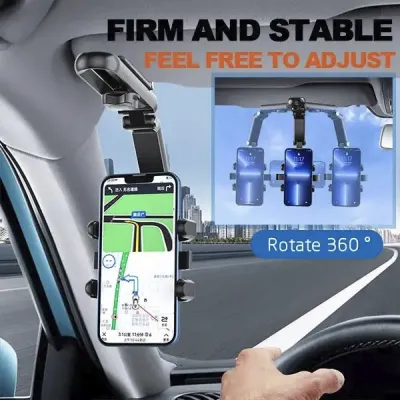
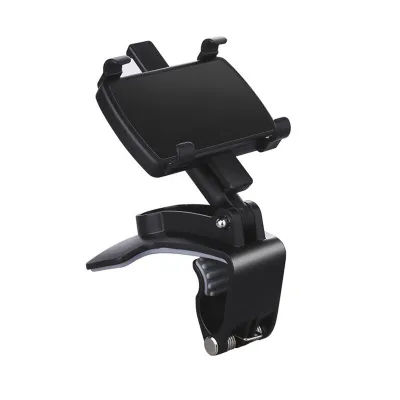
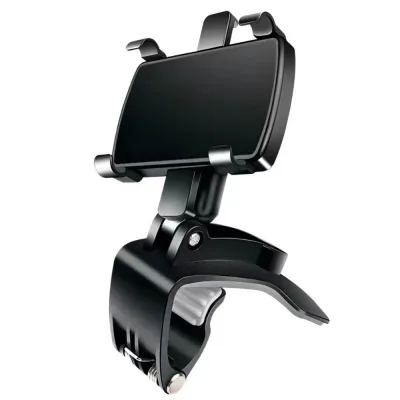
Prices are valid at publication and may change. Please refer to the product page for the latest price.
Official guidelines regarding vehicle modifications and windshield accessories are periodically updated by the LTA. Vehicle owners can verify the latest standards on the official LTA OneMotoring portal or consult authorized vehicle inspection centers across Singapore. Keeping abreast of these updates ensures that your installation choices do not lead to a mandatory removal order or a failed vehicle inspection.
Beyond avoiding regulatory fines, correct positioning directly influences the legal utility of your recorded footage. In the event of a traffic accident or dispute, insurance companies and the Singapore Police Force require clear, stable, and comprehensive video evidence. If a dash cam is mounted incorrectly, resulting in a partially blocked view or excessive vibration from an unstable bracket holder, the footage may be deemed insufficient or inadmissible, leaving you without vital protection during a claim process.
Choose the Right Bracket Holder and Mounting Spot
Selecting the appropriate bracket holder is the first step toward achieving a stable and compliant installation. The three most common mounting options are suction cups, adhesive mounts, and rearview mirror-integrated brackets. Each type offers distinct characteristics that perform differently under Singapore’s specific environmental conditions.

Suction cup bracket holders offer the highest level of flexibility, allowing you to reposition the camera easily or transfer it between vehicles. However, they tend to have a larger physical profile, which can take up more windshield space and potentially infringe on your field of view. Additionally, the vacuum seal on a suction cup can weaken over time when exposed to direct sunlight and high cabin temperatures.
Adhesive bracket holders, typically utilizing high-bond double-sided tape, provide a much more compact and low-profile mounting solution. Because they sit closer to the glass, they minimize camera vibration and are easier to hide behind the rearview mirror, making them highly effective for LTA compliance. The trade-off is that they are difficult to reposition once applied, requiring a complete replacement of the adhesive pad if you need to move the camera.
Rearview mirror-integrated bracket holders clamp directly onto the existing mirror stem. This design completely eliminates the need to attach anything directly to the glass, keeping the windshield clear of extra clutter. Before choosing this option, you must verify that the clamp mechanism is compatible with your vehicle’s mirror design and does not interfere with the manual or automatic dimming functions of the mirror.
When identifying the optimal mounting spot, look for the frit band, which is the black dotted pattern surrounding the edges of the windshield and the rearview mirror base. Mounting the bracket holder within or just below this shaded area helps conceal the device from the driver’s direct line of sight. However, you must ensure the camera lens itself sits below the frit band to avoid capturing a dark, dotted pattern in your videos.
Modern vehicles often house sensitive equipment near the rearview mirror, including rain sensors, automatic high-beam cameras, and Advanced Driver Assistance Systems (ADAS). You must position your bracket holder away from these sensor housings to prevent system errors or physical blockages. Additionally, ensure the camera lens is positioned within the clean sweep of the windshield wipers so that rain, road grime, or dust does not obscure the recorded image during inclement weather.
Before finalizing your mounting location, consult your vehicle’s owner manual for any specific warnings regarding windshield accessories. Some manufacturers use specialized acoustic glass, solar-reflecting films, or built-in heating elements that can be damaged by strong adhesives or suction cups. If your vehicle has aftermarket solar tinting film installed, applying a heavy bracket holder directly onto the film can cause it to bubble or peel, which may require a costly replacement of the tint.
Step-by-Step Guide to Positioning and Securing the Bracket
Achieving a permanent, vibration-free mount requires meticulous preparation of the windshield surface. Begin by cleaning the target area thoroughly to remove any oily residue, dust, or glass cleaner film. Use a clean microfiber cloth dampened with isopropyl alcohol to wipe the glass where the bracket holder will attach, and allow the surface to dry completely before proceeding.
Once the glass is clean and dry, sit in the driver’s seat to plan the exact placement of the bracket holder. The ideal position is centrally located on the windshield, tucked directly behind the rearview mirror, or slightly offset to the passenger side. This placement ensures that the physical body of the dash cam is completely hidden from your normal driving posture, preserving your full field of vision while keeping the camera centered enough to capture both sides of the road.
If you are using an adhesive bracket holder, peel the protective backing from the tape and press the mount firmly against the glass. Apply steady, even pressure across the entire base of the bracket for at least thirty seconds to ensure a complete bond. For the best results, allow the adhesive to cure for twenty-four hours before attaching the heavy camera body or adjusting the joint angles, as this prevents premature failure of the bond.
After the bracket holder is securely anchored, mount the dash cam and adjust the camera angle to optimize the recorded field of view. A reliable rule of thumb is the “one-third horizon” rule, where the camera is angled so that the horizon line sits in the lower third of the recorded frame. This positioning ensures that sixty to seventy percent of the video captures the road and surrounding traffic, rather than the sky.
Angling the camera too high results in excessive sky exposure, which can cause the camera’s auto-exposure sensor to darken the road details, making license plates and road signs unreadable. Conversely, angling the camera too low captures too much of your vehicle’s dashboard, which can cause distracting reflections on the windshield. Fine-tune the lateral angle so that the camera points straight ahead, ensuring equal coverage of both the left and right lanes.
Verify Footage Quality and Legal Evidentiary Value
Once the physical installation is complete, you must verify that the recorded footage meets the necessary standards for legal and insurance purposes. Take your vehicle for a short test drive during the day and at night, then review the recorded files on a computer or a smartphone application. Look closely for any signs of excessive vibration, which indicates that the bracket holder joints need to be tightened or that the mount itself is unstable.
During daytime driving, check the footage for glare and reflections from your dashboard. If the reflection of your dashboard is highly visible in the video, it can obscure crucial details like license plates or pedestrian actions. To mitigate this, you can adjust the camera angle slightly or install a compatible circular polarizing (CPL) filter over the camera lens to block polarized light reflections.
Nighttime footage verification is equally critical to ensure that oncoming headlights or streetlights do not cause excessive flare that washes out the image. Ensure that the camera lens is clean and free of fingerprints, as even a small smudge can cause severe light streaking at night. The footage must clearly show the license plates of vehicles directly in front of you when stopped at a traffic light.
For footage to be accepted as valid evidence by insurance companies or legal authorities in Singapore, it must contain accurate metadata overlays. Access your dash cam’s settings menu to verify that the date and time are correctly synchronized with local time. If your camera features a built-in GPS module, ensure that the speed and coordinate overlays are enabled, as this data provides indisputable proof of your location and travel speed during an incident.
Proper cable routing is essential to maintain a clean, compliant, and safe cabin environment. Never allow the power cable to hang loosely from the windshield down to the accessory socket, as dangling wires can distract the driver, snag on control levers, or block your view of the passenger-side mirror. Instead, route the cable neatly along the headliner, down the passenger-side A-pillar, and behind the glovebox.
When routing cables near the A-pillar, you must observe a critical safety boundary. Many modern vehicles are equipped with side curtain airbags housed inside the A-pillar trim. If you route the dash cam cable directly across the airbag deployment path, the cable could prevent the airbag from deploying correctly or turn into a dangerous projectile during a collision. Always route the cable behind the airbag mechanism or consult a qualified automotive technician to ensure a safe installation.
Maintenance and Troubleshooting for Long-Term Compliance
Singapore’s tropical climate, characterized by high humidity and intense solar heat, presents a challenging environment for windshield-mounted accessories. Over time, the extreme heat that builds up inside a parked vehicle can degrade the adhesive properties of mounting tapes or dry out the rubber of suction cups. Regular maintenance is necessary to prevent your dash cam from suddenly falling while you are driving.
Perform a quick physical check of your bracket holder at least once a month. Gently wiggle the mount to ensure it remains firmly attached to the glass and that the adjustment knobs or ball joints have not loosened due to road vibrations. If you notice any play or movement in the bracket, tighten the securing collars or screws immediately to maintain a stable recording angle.
If you observe that the adhesive pad is beginning to lift at the edges, or if a suction cup frequently loses its vacuum seal, you must take immediate corrective action. Operating a vehicle with a loose or dangling dash cam is a safety hazard and violates LTA visibility regulations. Do not attempt to temporarily secure a failing mount with household tape or glue, as these materials cannot withstand cabin heat and may damage your windshield or tint.
When a mount shows signs of failure, remove the bracket holder entirely from the windshield. Clean the glass surface again using isopropyl alcohol to remove all old adhesive residue or dirt. Reapply the bracket using a fresh, high-quality replacement adhesive pad designed for automotive use, or thoroughly clean and re-moisten the suction cup before reattaching it to the glass.
Frequently Asked Questions (FAQ)
Can I mount the dash cam on the driver's side of the windshield?
Mounting a dash cam on the driver’s side of the windshield is highly discouraged and may lead to non-compliance with LTA regulations. Placing the camera or its bracket holder on the driver’s side directly encroaches into your primary field of vision, creating a physical blind spot that can obscure oncoming traffic, pedestrians, or road signs. To ensure full compliance and maximum safety, always position the bracket holder on the passenger side of the rearview mirror, where it remains out of your direct line of sight while still capturing a comprehensive view of the road.
What should I do if the bracket holder keeps falling off in hot weather?
If your bracket holder repeatedly detaches during hot weather, the primary cause is usually adhesive degradation or a compromised suction seal due to extreme cabin heat. To resolve this, remove the bracket and thoroughly clean both the glass and the mount surface with isopropyl alcohol to eliminate any oily film. Replace the old adhesive with a high-temperature-rated automotive acrylic foam tape, or if using a suction cup, ensure the glass is completely smooth and free of micro-scratches. Parking in shaded areas or using a front windshield sunshade can also help reduce cabin temperatures and prolong the life of the mount.
Does the dash cam need to record audio to be valid evidence in Singapore?
No, a dash cam does not need to record audio to be considered valid evidence for insurance claims or police reports in Singapore. The visual recording of the road conditions, vehicle positions, and traffic signals is the primary evidence used to determine liability in an accident. While audio recording can sometimes provide helpful context, such as the sound of an indicator or a horn, it is not a legal requirement. Many drivers choose to disable audio recording to protect the privacy of passengers inside the vehicle without affecting the legal admissibility of the video footage.
Community discussion
Share your experience or ask a question. Comments are reviewed before publication.