
Upgrading your car’s audio system with the VSYS CS5 digital signal processor (DSP) amplifier can dramatically transform your in-vehicle listening experience. Achieving this audio upgrade requires a systematic approach to installation, balancing electrical safety with precise audio routing. Whether you choose to tackle this project in your own garage or hire a professional, understanding the step-by-step setup process is essential for protecting your vehicle’s electronics and maximizing your sound quality.
The installation process involves mounting the hardware, routing dedicated power and ground lines, integrating the unit with your factory or aftermarket head unit, and configuring the system using specialized tuning software. While a DIY approach is highly rewarding, it demands patience, basic electrical knowledge, and the right set of tools. This guide breaks down the entire installation path to help you decide if you are ready to handle the project yourself or if you should seek professional assistance.
Assess Your Readiness: DIY vs. Professional Installation
Before turning a single screw, you must honestly evaluate your comfort level with automotive electronics. Installing a DSP amplifier like the VSYS CS5 is more complex than swapping out a standard car stereo. It requires you to identify factory wiring colors, safely splice or tap into existing signal lines, and route heavy-gauge power cables through the vehicle’s firewall without damaging existing components.
Products mentioned in this guide
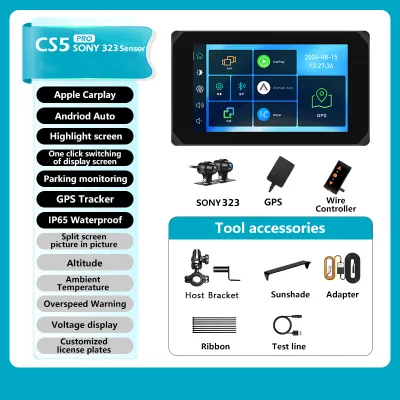
Prices are valid at publication and may change. Please refer to the product page for the latest price.
If your vehicle features a modern infotainment system, the integration process becomes significantly more intricate. Many contemporary cars utilize complex Controller Area Network (CAN bus) systems, fiber-optic audio networks, or active noise cancellation (ANC) systems that interact directly with the factory amplifier. Splicing into these systems incorrectly can trigger dashboard error lights, disable safety warning chimes, or cause persistent audio interference.
For vehicles with standard analog audio systems, a DIY installation is highly feasible with the right preparation. However, if your car is equipped with a premium factory sound system, a hybrid or electric drivetrain, or integrated active safety features, professional installation is strongly advised. A qualified car audio technician has the specialized diagnostic tools and vehicle-specific integration harnesses required to interface with these advanced systems safely.
Essential Tools and Pre-Installation Preparation
Having the correct tools on hand is the key to a clean, damage-free installation. You will need a set of plastic trim removal tools to pry away dashboard panels without scratching the interior plastics. For the electrical work, gather high-quality wire strippers, a reliable crimping tool, heat shrink tubing, electrical tape, and a digital multimeter to verify voltage and ground continuity.

Safety must be your absolute priority when working on any automotive electrical system. Before touching any wiring, park your vehicle on a level surface, engage the parking brake, and switch off the ignition. Locate your car’s battery and disconnect the negative terminal using an appropriate socket wrench, securing the cable away from the battery post to prevent accidental contact. This simple step eliminates the risk of short circuits that could damage the VSYS CS5 or your vehicle’s sensitive onboard computers.
Once the electrical system is safe, consult the official VSYS CS5 user manual to study the wiring diagrams, pinout configurations, and power requirements. Compare these specifications with your vehicle’s factory wiring diagrams, which can often be sourced from online enthusiast forums or professional service databases. Verifying these details beforehand prevents costly wiring mistakes and ensures you have the correct fuse ratings and wire gauges ready.
Step-by-Step Wiring and Mounting Process
The physical installation begins with routing the main power wire from the vehicle’s battery to the mounting location of the VSYS CS5. You must run a dedicated, appropriately rated power cable through an existing rubber grommet in the firewall, ensuring it does not rub against sharp metal edges or touch hot engine components. Install an inline fuse holder on this power wire within 45 centimeters of the battery terminal to protect the circuit against potential shorts.
A solid ground connection is just as critical as a clean power source for preventing unwanted audio noise. Locate a factory ground point or find a solid metal section of the vehicle chassis near the mounting location. Use sandpaper or a wire brush to scrape away all paint, rust, and primer until you expose bare, shiny metal. Secure the ground wire tightly using a ring terminal and a self-tapping screw or factory bolt, ensuring a low-resistance connection.
Next, connect the audio input and output signals. If you are retaining your factory head unit, you will likely need to tap into the speaker outputs using high-level inputs or a vehicle-specific T-harness. For aftermarket head units, run high-quality RCA patch cables from the preamp outputs to the VSYS CS5 inputs. Carefully label and route these signal cables down the opposite side of the vehicle from your power wires to minimize electromagnetic interference.
Choosing the right mounting location for the VSYS CS5 is vital for its long-term reliability. The unit must be secured in a dry, well-ventilated area where it is protected from physical damage, extreme heat, and moisture. Common locations include under the front passenger seat or mounted to a dedicated board in the trunk. Ensure the unit is firmly screwed down so it cannot slide or vibrate loose during daily driving.
Powering Up and Initial Software Configuration
With all physical connections secure and double-checked, it is time to restore power to the vehicle. Reconnect the negative battery terminal and tighten the clamp. Turn the vehicle’s ignition to the accessory position and perform a low-volume power-on test. Observe the status LEDs on the VSYS CS5 to ensure it powers up normally without triggering protection mode or showing error indicators.
Once the unit is powered on, connect your laptop or smartphone to the VSYS CS5 using the designated USB cable or built-in Wi-Fi connection. Launch the official VSYS tuning software to begin the digital configuration process. The software interface allows you to map your input channels to the correct output channels, ensuring that left, right, front, and rear signals are routed properly.
Before playing any audio, set all initial gain levels to their lowest settings within the software. Apply basic crossover filters to protect your speakers; for example, set a high-pass filter on your door speakers to prevent them from trying to reproduce deep bass frequencies they cannot handle. Gradually increase the source volume to about 75 percent, then slowly raise the software gains until you reach a clear, distortion-free listening level.
Reassembly and Final Audio Verification
After confirming that the system is functioning and the basic software settings are applied, you can begin reassembling your vehicle’s interior. Carefully tuck all wiring harnesses away, securing them with zip ties to prevent them from rattling against plastic panels. Reinstall the dashboard trim pieces, head unit, and seats, taking care not to pinch any wires or break the plastic retaining clips.
With the interior fully restored, conduct a comprehensive listening test using high-quality, uncompressed audio tracks across various musical genres. Pay close attention to the soundstage, vocal clarity, and overall channel balance. Sit in both the driver and passenger seats to verify that the time alignment and crossover settings deliver a cohesive, balanced sound throughout the cabin.
If you notice any issues during this final test, such as a high-pitched whine that rises and falls with the engine’s RPM, you will need to troubleshoot. This alternator whine is typically caused by a ground loop or poorly shielded signal cables running too close to power lines. Double-check your ground point’s contact with bare metal and ensure your RCA cables are physically separated from the main power wire.
Frequently Asked Questions (FAQ)
Do I need a specific wiring harness for my car model?
Using a vehicle-specific T-harness is highly recommended if you are integrating the VSYS CS5 with a factory head unit. These plug-and-play harnesses plug directly between your factory radio and the vehicle’s wiring loom, allowing you to intercept the speaker signals without cutting or splicing any original wires. If a custom harness is not available for your specific vehicle make and model, you will need to manually splice or solder the connections, which requires careful reference to the factory wiring schematics.
Can I mount the VSYS CS5 under the passenger seat?
Mounting the unit under the passenger seat is a popular, space-saving option, but it requires careful planning. You must ensure there is sufficient clearance so the seat can slide forward and backward along its tracks without pinching the wires or crushing the unit. Additionally, consider environmental factors; in tropical climates with heavy rainfall, wet shoes or umbrellas can introduce moisture to the floorboards, making it essential to elevate the unit slightly or protect it from direct water exposure.
What should I do if I hear a high-pitched whine after installation?
A high-pitched whine that changes pitch with your engine speed is a classic symptom of alternator noise, often caused by a ground loop. To resolve this, first verify that your ground wire is connected to a completely clean, paint-free section of the metal chassis. Next, ensure that your RCA signal cables are routed along the opposite side of the vehicle from your main power and ground wires. If the noise persists, you may need to install a ground loop isolator or re-evaluate the grounding point of your head unit to ensure both devices share a common ground potential.
Community discussion
Share your experience or ask a question. Comments are reviewed before publication.