
Applying reflective strips to your car’s exterior is a practical and highly effective way to improve safety on the road. These strips work by bouncing light from other vehicles’ headlights directly back to the source, making your car significantly more visible during nighttime driving, heavy rainstorms, or when parked in poorly lit areas. While the installation process is straightforward enough for a weekend DIY project, achieving a durable, professional finish requires careful planning, precise application techniques, and a clear understanding of local automotive regulations.
Understanding Legal and Safety Boundaries Before Installation
Before purchasing or applying any reflective material, it is crucial to understand the legal framework governing vehicle modifications in your region. In Singapore, the Land Transport Authority (LTA) maintains strict guidelines regarding the color, placement, and brightness of exterior vehicle lighting and reflective materials. These regulations are designed to prevent confusion on the road and ensure that civilian vehicles do not mimic emergency services, such as police cars, ambulances, or civil defense vehicles.
As a general rule, reflective strips must follow standard vehicle lighting color conventions. This means white or yellow reflective materials are typically permitted on the front of the vehicle, yellow or amber on the sides, and red on the rear. Using blue, green, or flashing reflective patterns is highly restricted and can result in fines or failure during your vehicle’s periodic inspection.
Products mentioned in this guide
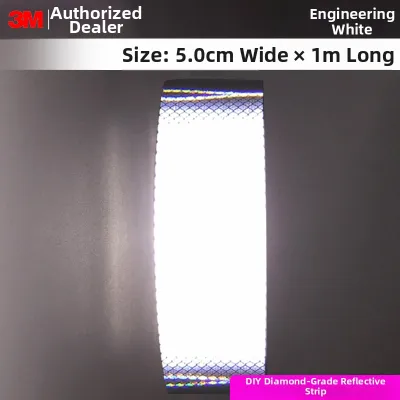
13 Lazada user ratings
I've bought this multiple times, and the one I got two years ago is still shining bright. The quality is genuinely great, and the service is…Read full reviewShow less
I've bought this multiple times, and the one I got two years ago is still shining bright. The quality is genuinely great, and the service is quick and patient.
paste on my travel luggage, easy to notice from far.
Easy installation, High reflectivity,
The results are really great!
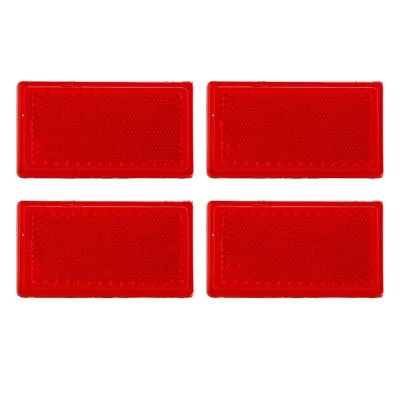
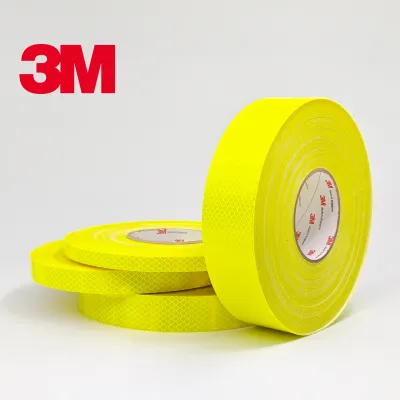
13 Lazada user ratings
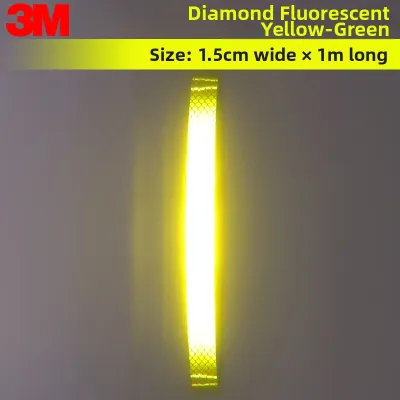
This product is a genuine 3M DG3 4083 reflective film (fluorescent yellow-green) that arrived in good condition. It fits a bit snugly, which…Read full reviewShow less
This product is a genuine 3M DG3 4083 reflective film (fluorescent yellow-green) that arrived in good condition. It fits a bit snugly, which slightly lifted the silicone backing at the back of the adhesive, but it's nothing serious. The color is very bright, and the adhesive is super strong. The reflection quality is excellent, providing great visibility (class 3). It meets European and French safety standards. The seller is reliable, and the quality is impressive. I recommend it, but just a heads up: the roll is only 1 meter long, and the width of 5 cm is accurate. It might be nice if sellers offered longer sizes, like 3 m or 5 m in the future. Overall, I'm satisfied and thinking about reordering soon.
The product is exactly as described—the 3M DG3 4083 reflective film (fluorescent yellow-green) arrived in perfect condition. The colors are …Read full reviewShow less
The product is exactly as described—the 3M DG3 4083 reflective film (fluorescent yellow-green) arrived in perfect condition. The colors are vibrant, and the adhesive is extremely strong. The reflectivity is excellent, the quality is high, and it’s highly visible (type 3). It meets European and French safety standards. The seller is trustworthy, and the product quality is equally impressive. I highly recommend this product—but please note that the roll is precisely 1 meter long and 5 cm wide. It would be great if the seller offered longer sizes, such as 3 meters or 5 meters, for example. I’m very satisfied, and I think I’ll place another order soon.
Product reviews are another effective way to boost sales, as they showcase the results and feelings experienced after trying out various pro…Read full reviewShow less
Product reviews are another effective way to boost sales, as they showcase the results and feelings experienced after trying out various products or services. This helps new customers who have never used these products before become more interested and makes it easier for them to make a purchase decision.
I had a great experience with this product; it works really well and has exceeded my expectations. I'm really happy with it!
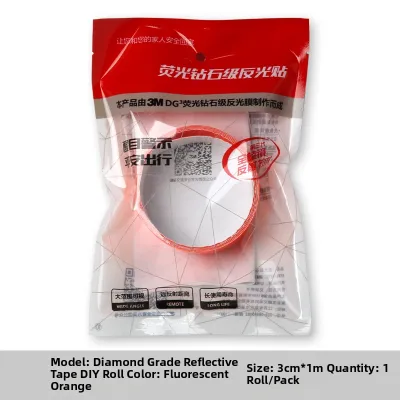
1 Lazada user ratings
👓Visibility:5/5

5 Lazada user ratings
items received well packed and in good condition. Fast shipping and im very happy.....thanks
Prices are valid at publication and may change. Please refer to the product page for the latest price.
Beyond color restrictions, placement is critical for safety. You must never place reflective strips over essential vehicle components. This includes headlamps, taillights, license plates, parking sensors, radar units, and cameras. Obstructing these sensors can compromise your car’s active safety systems, such as collision warning or lane-keeping assist. Additionally, avoid applying strips across moving parts, door seams, or trunk hinges where constant friction can cause the material to peel and catch on surrounding panels.
Finally, ensure the product you select is specifically rated as automotive-grade. Standard craft or industrial safety tapes may use adhesives that can degrade your car’s clear coat or fail to withstand highway speeds (such as on the PIE or AYE), leading to peeling and debris hazards for vehicles behind you.
Choosing the Right Reflective Strips and Tools
Selecting the correct reflective strip involves understanding the environment your vehicle operates in. In Singapore’s tropical climate, your car is constantly exposed to intense UV radiation, high humidity, and sudden, heavy downpours. Therefore, the adhesive backing must be highly weather-resistant and temperature-tolerant. Look for strips featuring pressure-sensitive acrylic adhesives, which form a stronger bond over time and resist lifting when exposed to moisture and heat.

Reflective strips generally fall into different categories based on their construction. Retroreflective microprismatic tape is highly recommended for automotive exteriors. Unlike basic glass-bead reflective tapes, microprismatic strips use tiny, man-made prisms to return a much higher percentage of light directly to the source, providing superior visibility from wider angles. High-quality automotive reflective tape typically costs between S$10 and S$30 per roll, making it an incredibly cost-effective safety upgrade.
To ensure a flawless application, gather the necessary tools before starting. You will need mild car wash soap and water, isopropyl alcohol (diluted to 50% or 70%) or a dedicated wax and grease remover, clean microfiber cloths, high-quality masking tape to act as a guide, a flexible plastic squeegee (ideally with a felt edge to prevent scratching), a utility knife or sharp scissors, and a measuring tape or ruler.
The application environment is just as important as the tools. Plan to work in a clean, dry, and shaded area, such as an HDB multi-storey car park or a private garage. Avoid working in direct sunlight, as a hot car body will cause the adhesive to grab instantly, making repositioning impossible and increasing the risk of trapping air bubbles.
Step-by-Step Guide to Applying Reflective Strips
Achieving a long-lasting bond requires meticulous preparation and a steady hand. Follow these steps to ensure your reflective strips are applied correctly and look professionally installed.
First, deep clean the surface. Begin by washing the entire vehicle, focusing heavily on the areas where you plan to apply the strips. Use a standard car wash soap to remove road grime, mud, and dust. Once the car is dry, wipe down the specific application zones with a microfiber cloth dampened with isopropyl alcohol or a dedicated wax remover. This step is critical; even a microscopic layer of wax, polish, or ceramic coating will prevent the adhesive from bonding securely to the clear coat, leading to premature peeling. Allow the alcohol to evaporate completely.
Second, measure and mark the placement. Do not attempt to apply the strips by eye. Use a measuring tape to identify symmetrical points on both sides of the vehicle. Apply strips of low-tack masking tape slightly below or above your intended placement line to serve as a straight-edge guide. Aligning the reflective strips with the car’s natural body lines, such as the shoulder crease or the lower door trim, ensures a clean, factory-installed appearance that complements the vehicle’s aerodynamics.
Third, cut and prepare the strips. Measure the length of the area and cut the reflective strip to size using sharp scissors. A useful professional tip is to slightly round the sharp corners of the cut strip. Sharp 90-degree corners are highly susceptible to catching on wash mitts, microfiber cloths, or high-velocity wind, which can cause the edges to lift over time. Rounding the corners distributes physical stress more evenly and prolongs the life of the installation.
Fourth, apply the strip gradually. Peel back approximately 5 centimeters of the backing paper from one end of the strip. Align this exposed adhesive section carefully with your masking tape guide. Press it down firmly onto the car’s surface. Slowly peel away the remaining backing paper with one hand while using your other hand to slide the plastic squeegee over the strip. Work in smooth, overlapping strokes from the center of the strip outward to the edges. This technique pushes out air and prevents bubbles from forming. Avoid stretching the reflective tape during application, as the material has a natural memory and will eventually shrink back, causing the ends to lift or curl.
Fifth, secure the edges and cure. Once the entire strip is down, wrap a clean microfiber cloth around your squeegee and run it firmly over the entire surface several times, paying extra attention to the edges and corners. This pressure-sensitive adhesive requires physical force to activate the chemical bond. After application, keep the vehicle dry and out of direct rain or automated car washes for at least 24 to 48 hours. This curing period allows the adhesive to reach its maximum bonding strength.
Post-Installation Inspection and Maintenance
After the curing period, it is important to verify the quality of your work and establish a simple maintenance routine to keep the reflective strips functioning optimally.
To perform a nighttime visibility test, park your car in a dark location. Stand approximately 10 to 15 meters away and shine a flashlight held at eye level toward the vehicle. Walk in a semi-circle around the car to observe how the strips reflect light from different angles. This test confirms that the placement is effective and that the strips are positioned to catch the headlights of approaching traffic.
Regularly inspect the edges of the strips during your weekly car washes. Look closely for any signs of lifting, peeling, or dirt accumulation under the adhesive. If you notice a small corner starting to lift, you can carefully trim the loose portion with a utility knife to prevent it from peeling further.
When cleaning your vehicle, treat the reflective strips with care. Use a soft microfiber wash mitt and mild car wash shampoo. If you use a high-pressure water spray at a self-service car wash, keep the nozzle at least 30 centimeters away from the vehicle’s body and avoid pointing the high-pressure jet directly at the edges of the strips. The sheer force of the water can easily penetrate the adhesive layer, causing immediate and irreversible lifting.
Troubleshooting Common Application Issues
Even with careful preparation, you may encounter minor issues during or after the installation process. Knowing how to address these common problems will save you time and materials.
If you notice air bubbles after applying the strip, do not try to peel the entire tape up, as this can stretch and ruin the reflective layer. For small bubbles, try using your squeegee to gently push the air toward the nearest edge. If the bubble is stubborn or located in the middle of a long strip, use a very fine sewing needle to prick a tiny hole in the center of the bubble. Use your thumb or a squeegee to press the air out through the hole, smoothing the material flat against the paint.
If the reflective strip fails to stick or begins peeling off within a few days, the primary culprit is almost always surface contamination. Residual car wax, polish, or ceramic coatings prevent the adhesive from making direct contact with the clear coat. Another common cause is applying the tape in extreme temperatures. If you must apply the strips in cooler, air-conditioned environments, use a hair dryer on a low, warm setting to gently heat the car panel and the adhesive backing before pressing them together.
If you need to remove a damaged or misplaced strip, do not scrape it off with metal tools, which will scratch your car’s paint. Instead, use a hair dryer or a heat gun on a low setting to warm the strip. The heat softens the adhesive, allowing you to slowly peel the tape back at a sharp 45-degree angle. If any sticky residue remains on the clear coat, apply a small amount of automotive-safe adhesive remover or isopropyl alcohol to a microfiber cloth and gently wipe the area until clean. Always wash and re-wax the treated area afterward to restore paint protection.
Frequently Asked Questions (FAQ)
Will reflective strips damage my car's paint when removed?
High-quality, automotive-grade reflective strips are designed to be removed without damaging healthy, original factory paint. However, if your vehicle has undergone aftermarket respraying, has existing clear coat damage, or has deep paint chips, the strong adhesive may pull up loose paint during removal. To minimize this risk, always use gentle heat from a hair dryer to soften the adhesive before peeling, and avoid using sharp metal scrapers.
Can I install reflective strips on my car windows?
It is highly recommended to avoid installing reflective strips on any glass surfaces of your vehicle. Applying opaque materials to your windows can severely obstruct your visibility, creating dangerous blind spots. Furthermore, most transport authorities, including those in Singapore, have strict regulations regarding window tinting and obstructions on front, side, and rear glass. To remain fully compliant and safe, keep all reflective applications restricted to the metal or plastic body panels of your car.
Community discussion
Share your experience or ask a question. Comments are reviewed before publication.