
Installing car LED light strips as daytime running lights (DRLs) or fog lights can improve road visibility and update your vehicle’s appearance. However, integrating aftermarket lighting requires careful handling of your vehicle’s electrical system. Improper wiring can lead to blown fuses, battery drain, or damage to sensitive onboard computers. To complete this installation safely, you must follow structured mounting and wiring principles that protect your car’s electrical integrity and ensure compliance with local road safety regulations.
Working on modern automotive electrical systems carries inherent risks of short circuits, component damage, or voiding manufacturer warranties. Always consult your vehicle’s official workshop manual and wiring diagrams before making modifications. If you are uncomfortable with automotive electrical work, seek qualified professional installation.
Pre-Installation Checks and Safety Boundaries
Before purchasing or installing any aftermarket lighting, verify compatibility with your specific vehicle model and year. Review your vehicle owner’s manual to locate the fuse boxes, identify electrical load limits, and check for manufacturer warnings regarding aftermarket modifications. Modern cars often use sensitive Controller Area Network (CAN bus) systems that monitor electrical resistance; adding unauthorized loads can trigger dashboard error lights or disable factory lighting circuits.
Products mentioned in this guide
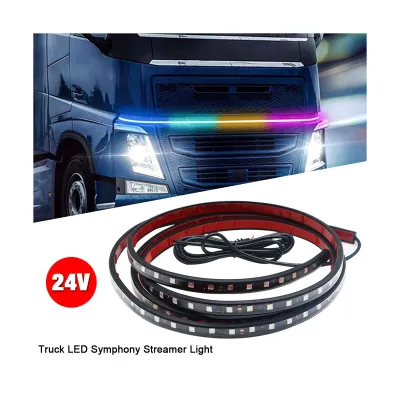
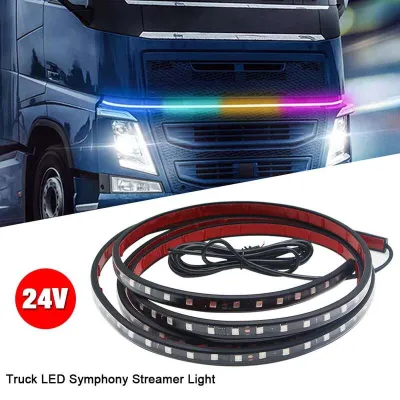
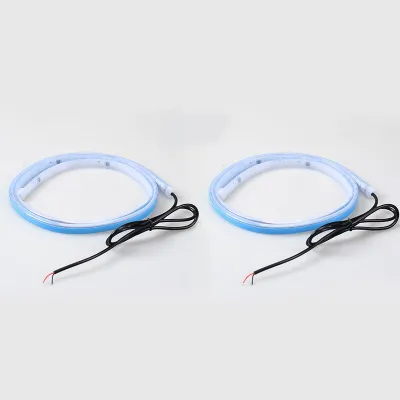
Prices are valid at publication and may change. Please refer to the product page for the latest price.
Next, verify local transport authority regulations regarding auxiliary lighting. In many regions, including Singapore, strict rules govern the color, brightness, and positioning of exterior lights. Front-facing daytime running lights must typically emit white or amber light, while fog lights are generally restricted to white or yellow. There are also specific limits on mounting heights and horizontal spacing to prevent blinding oncoming drivers. Ensure your chosen LED light strips carry the necessary compliance markings and meet these local standards before proceeding.
Gathering the correct tools beforehand prevents delays and ensures a secure installation. You will need a digital multimeter to test circuits, wire strippers, crimping tools, heat shrink tubing, electrical tape, zip ties, and a basic socket set. A basic automotive multimeter can be purchased for under S$30 at local hardware stores and is essential for identifying safe power sources.
Finally, inspect your LED light strip kit. A safe installation requires more than just the light strips themselves. Ensure the kit includes or is paired with an appropriate automotive relay, an inline fuse holder with the correct amperage fuse, and waterproof connectors rated for exterior automotive use. Never connect raw wires directly to a power source without circuit protection.
Choosing the Right Mounting Location
Selecting the physical mounting point for your LED light strips requires balancing aesthetic preferences with safety and functionality. For daytime running lights, identify mounting zones on the front grille or bumper that align with local height requirements. The lights must be positioned high enough to be visible to other motorists but angled slightly downward to avoid projecting glare directly into the eyes of oncoming drivers.

If you are installing the strips as auxiliary fog lights, position them lower on the front bumper or within the lower grille inserts. Fog lights are designed to cast a wide, low beam that cuts underneath fog or heavy rain. When choosing these lower mounting points, ensure the light strips do not obstruct critical airflow to the radiator, intercooler, or brake cooling ducts. Restricting airflow can lead to engine overheating or reduced braking performance during extended driving.
Avoid mounting the light strips near high-heat components or moving parts. Keep all wiring and light strips clear of the radiator core, exhaust manifold, and air conditioning condenser, as well as moving parts like cooling fans, steering linkages, and suspension components.
Proper surface preparation is critical for securing the light strips, especially if they rely on adhesive backing. Clean the mounting surface thoroughly using an appropriate surface cleaner authorized by the manufacturer, such as isopropyl alcohol, to remove road grime, wax, and grease. If your kit uses mounting brackets, carefully mark the pilot holes and ensure there are no fluid lines, sensors, or wiring harnesses directly behind the drilling surface before securing the screws.
Step-by-Step Wiring Guide for LED Light Strips
Before touching any electrical wiring, disconnect the negative terminal of your car battery. This simple step eliminates the risk of accidental short circuits, sparks, or damage to sensitive electronic control units (ECUs) while you are splicing wires or connecting terminals. Secure the loose negative cable away from the battery post to prevent it from making accidental contact during the installation.
Begin routing the wiring harness from the mounting location of the LED strips into the engine bay. Route the wires along existing factory wiring looms whenever possible, securing them with zip ties every 15 to 20 centimeters. If you need to bring wires into the vehicle cabin to connect to an interior fuse box or switch, pass them through an existing rubber firewall grommet. Never run bare wires over sharp metal edges of the chassis or firewall, as vibration will eventually wear through the insulation and cause a short circuit. Use protective split-conduit loom to shield the wires from physical wear and heat.
To power the lights safely, use an add-a-circuit fuse tap in either the engine bay or cabin fuse box. For daytime running lights, select an accessory (ACC) circuit that only receives power when the ignition key is turned to the “on” or “run” position. This ensures the DRLs turn on automatically when you start the car and turn off when the engine is shut down. If you are wiring fog lights, connect them to a circuit that is active only when the parking lights or low beams are turned on, depending on local legal requirements.
Never wire high-draw accessories directly through a standard dashboard switch. Instead, use an automotive relay to handle the electrical load. The relay acts as an electromagnetic switch: a low-current signal from your ACC circuit or manual switch triggers the relay, which then closes a high-current circuit directly from the battery to the LED light strips. Install an inline fuse holder on the main power wire between the battery and the relay, placing it as close to the battery terminal as possible. This fuse protects the entire circuit in the event of a short.
A reliable ground connection is just as important as the power source. Locate an existing factory ground point on the unpainted metal chassis of the vehicle. Clean the area with a wire brush to remove any paint, rust, or dirt that could restrict electrical flow. Secure the ground wire terminal tightly using a bolt, and treat the finished connection with an anti-corrosion spray to prevent moisture from degrading the ground over time.
Testing, Sealing, and Final Adjustments
Once all connections are secure, temporarily reconnect the negative battery terminal to test the system. Turn the ignition to the accessory position and verify that the LED light strips illuminate as intended. If you installed a manual switch, test its operation to ensure the lights turn on and off consistently. Observe the light strips closely for any signs of flickering, dimming, or uneven brightness, which can indicate a weak ground connection or insufficient voltage supply.
After verifying correct operation, disconnect the battery once more to finalize the insulation and sealing. Inspect every wire splice, crimp connection, and terminal. Slide heat shrink tubing over all exposed connections and apply heat until the tubing shrinks tightly around the wire, creating a moisture-resistant seal. For added protection in high-exposure areas like the front bumper, apply a small amount of marine-grade silicone sealant to the ends of the heat shrink tubing and waterproof connectors to prevent water ingress during heavy rain or car washes.
Next, perform final physical adjustments in a dark environment or against a flat wall. Turn on the lights and check the beam pattern. Ensure the light strips are aligned horizontally and do not project light upward into the windshields of oncoming vehicles. If necessary, adjust the mounting brackets or shim the adhesive backing to correct the angle.
Finalize the installation by securing all loose wiring under the hood and behind the bumper. Use high-quality, UV-resistant zip ties to bundle excess wire and secure it tightly to structural components of the vehicle. Ensure no wires hang low enough to catch on road debris or make contact with moving suspension parts. Double-check that the hood closes completely without pinching any newly installed wires.
When to Stop and Seek Professional Help
While installing LED light strips is a common DIY project, certain scenarios require you to stop immediately and seek professional assistance. If your vehicle’s dashboard displays CAN bus errors, warning lights, or if your factory headlights and taillights begin to flicker or malfunction after you connect the light strips, disconnect the aftermarket system immediately. Modern vehicle electronics are highly sensitive to changes in resistance, and forcing a connection can damage expensive control modules.
You should also consult a professional automotive electrician if your vehicle’s fuse box layout is highly complex, lacks clearly labeled accessory circuits, or uses a fully digital power distribution system (such as a body control module) that does not accommodate traditional fuse taps. Attempting to splice into these systems without specialized diagnostic tools and wiring schematics can lead to catastrophic electrical failure.
Lastly, if your vehicle is covered under an active manufacturer warranty, review the terms carefully. Some warranties strictly prohibit aftermarket electrical modifications and may void coverage for any electrical faults if unauthorized wiring is detected. In such cases, having the installation performed by an authorized dealer or a certified professional technician can help preserve your warranty coverage.
Frequently Asked Questions (FAQ)
Can I wire LED light strips directly to the car battery?
Wiring LED light strips directly to the car battery is not recommended. If you connect the positive and negative wires of the light strip directly to the battery terminals without a switched relay, the lights will remain on constantly, even when the vehicle is turned off and locked. This continuous draw will quickly drain your car battery, leaving you stranded. To prevent this, always use an automotive relay triggered by an accessory (ACC) or ignition-switched power source, ensuring the lights only draw power when the engine is running or the ignition is active.
Will installing aftermarket LED strips void my car's warranty?
Installing aftermarket LED light strips does not automatically void your entire vehicle warranty. However, under consumer protection laws in many regions, the manufacturer cannot void the warranty unless they can prove that the aftermarket modification directly caused the failure of a specific component. If your DIY wiring causes a short circuit that damages the vehicle’s body control module, the repair cost for that module will not be covered under warranty. To minimize risk, use non-invasive power adapters like fuse taps instead of cutting or splicing factory wiring harnesses, and consult your dealer if you have concerns about warranty compliance.
Community discussion
Share your experience or ask a question. Comments are reviewed before publication.