
Mounting a phone holder on the back of a front seat transforms the rear cabin into a comfortable entertainment or navigation station for passengers. Whether you are preparing for a long road trip or looking to keep passengers occupied during daily commutes, a secure backseat mount provides hands-free convenience. While the exact installation mechanism depends on your specific Seametal model—whether it clamps directly to the headrest posts or utilizes a strap-based system—the core principles of secure attachment, passenger safety, and interior protection remain identical.
Achieving a stable, rattle-free setup requires careful preparation and attention to detail. A poorly installed mount can vibrate excessively, distract the driver, or even damage your vehicle’s upholstery. By understanding your car’s seat design and following a systematic installation process, you can create a reliable rear-seat entertainment station that remains secure over bumps and sharp turns. This guide walks you through the essential preparation, mounting steps, adjustment techniques, and troubleshooting methods to ensure a professional-grade installation.
Pre-Installation Checks and Seat Preparation
Before unpacking your Seametal phone holder, verify that your vehicle’s front seats are compatible with the mounting hardware. Most backseat phone holders are designed to clamp onto the exposed metal posts of adjustable headrests. If your vehicle features integrated sports seats or active head restraints with no visible metal rods, a standard clamp-style mount will not fit. Consult your vehicle’s owner manual to identify the headrest type and check if your car uses active head restraint systems, which could be obstructed or damaged by aftermarket accessories clamped to the support posts.
Products mentioned in this guide
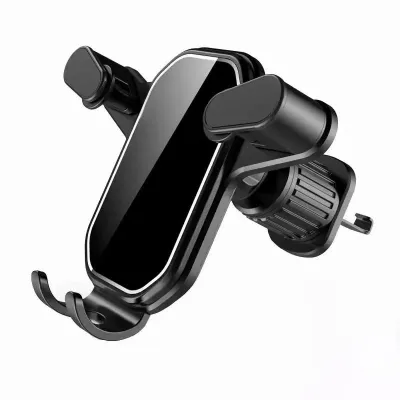
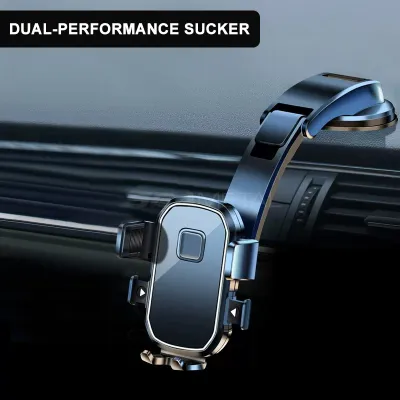
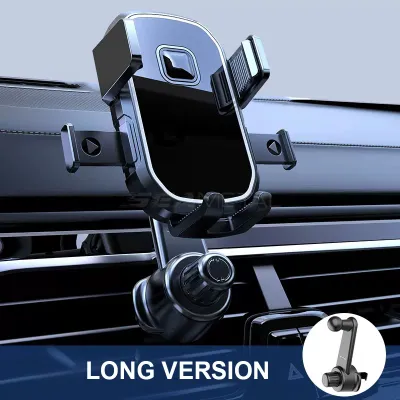
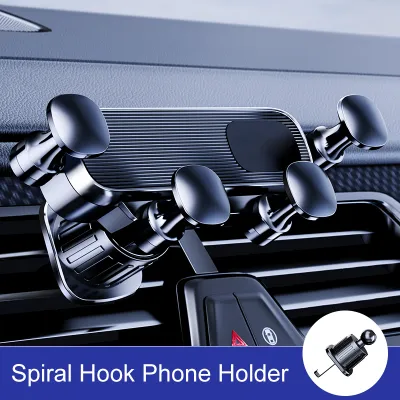

Prices are valid at publication and may change. Please refer to the product page for the latest price.
Once compatibility is confirmed, prepare the installation area to protect your car’s interior. Dust, grit, and oils accumulated on the headrest posts or seat back can act as abrasives under the pressure of a tight clamp, leading to micro-scratches on metal or leather surfaces. Wipe down the metal posts and the surrounding seat material using a clean microfiber cloth and a mild, interior-safe cleaner authorized for your specific upholstery type. Allow the area to dry completely before proceeding, as moisture trapped under rubber or silicone mounting pads can cause mildew or degrade the grip over time.
Take a moment to review the manufacturer’s instruction manual included with your phone holder. Pay close attention to any specified torque limits, recommended tool usage, and the placement of protective rubber inserts. Some models require specific spacer rings to match different headrest post diameters, while others use a spring-loaded tension bar that requires no tools. Identifying these components beforehand prevents assembly errors and ensures you do not accidentally strip plastic threads or bend metal components during the physical installation.
Step-by-Step Mounting Process
The physical installation begins with positioning the mounting base or clamp assembly around the front seat’s headrest posts. For models featuring dual-clamp brackets, open the clamps fully and position them around the left and right metal rods. If your Seametal holder utilizes a telescopic, spring-loaded mounting bar, compress one end of the bar against one headrest post, align the opposite end with the second post, and allow the internal spring tension to expand the bar into place. Ensure the mounting base is centered between the posts to maintain balanced weight distribution.

Once the base is positioned, secure the fasteners evenly to distribute clamping pressure across the headrest structure. If your mount uses thumbscrews or hex bolts, tighten them incrementally, alternating between the left and right sides. This balanced approach prevents the bracket from twisting and avoids putting uneven stress on the headrest rods. Tighten the fasteners until the base is firmly anchored and does not slide up or down the posts, but avoid using excessive force or tools like pliers, which can easily crack plastic components or strip the threads.
With the mounting base securely anchored, you can now attach the articulating arm or the phone cradle. Most modern mounts use a ball-and-socket joint or a quick-release slide mechanism to connect the cradle to the base. Align the male connector on the arm with the female socket on the base, pushing firmly until you hear a distinct click or feel the locking mechanism engage. If your model features a threaded collar nut around the ball joint, slide the nut onto the joint before connecting the pieces, then thread it onto the socket loosely to allow for subsequent angle adjustments.
Finally, verify the structural integrity of the entire assembly before placing your mobile device into the holder. Gently wiggle the mount from side to side and pull it downward to simulate the forces of vehicle acceleration and road vibrations. The base should remain firmly fixed to the headrest posts without slipping, rotating, or making squeaking noises. If you detect any play or movement, recheck the tightness of the fasteners and ensure that any included rubber spacer rings are properly seated inside the clamps.
Adjusting the Viewing Angle for Rear Passengers
Optimizing the position of the phone holder is crucial for passenger comfort and safety. Start by adjusting the tilt, swivel, and extension joints of the articulating arm to align the screen with the rear passenger’s natural eye level. This positioning prevents passengers from having to slouch or strain their necks during extended viewing sessions. If multiple passengers of different heights will share the screen, position the mount centrally and utilize the swivel joint to allow easy adjustments between left and right viewing angles.
Reducing screen glare is another key factor in creating a comfortable viewing experience. Sunlight entering through the rear and side windows can wash out mobile displays, causing eye strain. Tilt the phone cradle slightly downward or away from direct light sources to minimize reflections. If your vehicle is equipped with a sunroof or panoramic glass roof, ensure the screen is angled to avoid direct overhead light paths while still maintaining a clear line of sight for the passenger.
Next, test the cradle’s grip with the specific smartphone you plan to use, keeping its protective case installed. Open the cradle’s spring-loaded side arms or gravity clamps, insert the phone, and allow the arms to close securely around the device. Ensure the rubber or silicone pads on the inside of the cradle arms make full contact with the edges of the phone. Double-check that the clamps do not compress the phone’s side buttons, such as the volume or power keys, which could cause the device to restart or malfunction during use.
Before finalizing the installation, verify that the fully extended phone holder does not interfere with the driver’s operations or safety. Sit in the driver’s seat and check the rearview mirror to ensure the mounted device does not obstruct your line of sight through the rear window. Additionally, adjust the front seat through its full range of slide and recline motions. The phone holder must not strike the rear passenger’s knees or restrict the front seat’s travel, ensuring comfort and safety for occupants in both the front and rear cabins.
Safety Boundaries and Interior Protection
Operating aftermarket interior accessories requires a clear understanding of safety boundaries to protect both vehicle occupants and the car’s interior. Never attempt to adjust the phone holder, change the mounted device, or alter the viewing angle while the vehicle is in motion. These actions can distract the driver and put sudden, uneven physical stress on the mounting hardware, potentially causing the device to fall. If adjustments are necessary during a journey, pull over safely in a designated parking area before handling the mount.
Continuous vehicle vibrations, road bumps, and temperature fluctuations inside the cabin can cause mounting fasteners to loosen over time. Establish a routine to check the tightness of all screws, clamps, and straps every few weeks. A quick physical check ensures the mount remains securely anchored and prevents the assembly from rattling or detaching unexpectedly while driving. If you notice any structural wear, hairline cracks in the plastic, or frayed straps, replace the affected components immediately to maintain safety.
Protecting your vehicle’s upholstery from long-term cosmetic damage is equally important, especially on leather or synthetic leather seats. The constant pressure exerted by mounting clamps can leave permanent indentations, creases, or discoloration on the seat back or headrest material. To mitigate this risk, ensure the mount utilizes soft silicone or felt protective pads at all contact points. If your specific model does not include these, you can apply aftermarket adhesive felt pads to the inner surfaces of the clamps to distribute the pressure more evenly.
Additionally, consider periodically removing the phone holder during periods of non-use. Removing the mount every few months allows the compressed upholstery fibers or leather grain to recover its natural shape. This practice also gives you an opportunity to clean any dust or debris that may have settled beneath the mounting pads, preventing localized wear and ensuring your vehicle’s interior remains in pristine condition.
Troubleshooting Wobbling and Slippage Issues
If you experience excessive wobbling or shaking while driving, the most common cause is a mismatch between the clamp size and the headrest post diameter. Many vehicles feature thin metal posts that require additional padding to achieve a tight fit. Check your product packaging for included rubber spacer rings or adapters designed to reduce the clamp’s inner diameter. If these are missing, wrapping a small strip of high-friction rubber tape around the headrest posts before attaching the clamps can provide the necessary thickness and grip to eliminate movement.
Rattling noises originating from the mount can quickly become annoying in a quiet cabin. These sounds are typically caused by loose articulating joints or plastic-on-plastic contact. Tighten the collar nuts and adjustment screws on the arm assembly until the joints are firm but still adjustable. If the noise persists, inspect the connection points between the cradle and the mounting base. Applying a thin layer of non-abrasive felt tape or a tiny drop of silicone lubricant to the interlocking plastic tabs can dampen vibrations and eliminate squeaks.
Device slippage within the cradle is another common issue, often caused by the accumulation of dust, lint, and body oils on the silicone grip pads. Over time, this buildup reduces the friction required to hold the phone securely. Clean the grip pads periodically using a microfiber cloth lightly dampened with water or a mild soap solution, as authorized by the manufacturer’s instructions. Avoid using harsh chemical solvents or abrasive cleaners, which can dry out and crack the silicone, permanently destroying its gripping properties.
Finally, ensure that the weight of your mobile device does not exceed the maximum rated capacity of the phone holder. Mounting heavy, oversized smartphones or devices with bulky battery cases can overload the articulating joints, causing the arm to sag or droop when driving over rough roads. If your device is near the weight limit, keep the articulating arm retracted as close to the headrest posts as possible to minimize leverage and reduce the physical strain on the mounting joints.
Frequently Asked Questions (FAQ)
Will the mount damage leather car seats?
Using a backseat phone holder can potentially leave marks on leather car seats if proper precautions are not taken. The continuous clamping force required to keep the mount stable can compress the leather fibers and the underlying foam padding, leading to permanent indentations or creases. To prevent this cosmetic damage, always ensure that the mount’s contact points are lined with soft, protective silicone or felt pads that distribute the pressure evenly across a wider surface area.
To maintain the pristine condition of your leather interior, avoid over-tightening the mounting clamps beyond what is necessary to secure the device. It is also highly recommended to periodically remove the phone holder when it is not in use, especially during hot weather when leather is more pliable and susceptible to marking. This temporary removal allows the leather fibers to breathe and recover their original shape, preventing long-term creasing or discoloration.
Can I use the holder with a thick tablet instead of a phone?
Whether you can use the holder with a tablet depends entirely on the specific dimensions and weight limits specified by the manufacturer. Before attempting to mount a larger device, check the maximum width, thickness, and weight capacity printed on the product packaging or in the instruction manual. Many standard phone holders are designed with spring-loaded arms that only expand to accommodate typical smartphone widths and cannot safely grip the larger frame of a tablet.
Exceeding the manufacturer’s specified limits poses significant safety and hardware risks. A device that is too heavy or thick can slip out of the cradle during sudden braking, potentially injuring rear passengers or damaging the device itself. Furthermore, the excessive weight puts severe leverage and mechanical strain on the articulating joints and the vehicle’s headrest posts, which can lead to joint failure, sagging, or even bent metal hardware over time.

Community discussion
Share your experience or ask a question. Comments are reviewed before publication.