
Installing a dashcam is one of the most practical upgrades you can make to your vehicle. It provides invaluable visual evidence in the event of an accident, protects against insurance fraud, and monitors your car while it is parked. However, a poor installation can compromise your safety, damage your car’s interior, or result in a camera that fails when you need it most. Properly routing the power cables and securing a reliable power connection ensures your dashcam operates flawlessly without cluttering your dashboard or interfering with critical safety systems.
While many drivers opt for professional installation, completing the process yourself is entirely achievable with the right preparation. The key lies in understanding your vehicle’s layout, choosing the correct power source for your needs, and adhering strictly to automotive safety boundaries. By taking a systematic approach, you can achieve a clean, original-equipment manufacturer (OEM) look that keeps your wires hidden and your cabin safe.
Essential Tools and Vehicle Preparation
Before handling any wiring or mounting hardware, gather the necessary tools to ensure a smooth, damage-free installation. Using the correct tools prevents scratches on your plastic trim panels and ensures a lasting mount on your windshield.
Products mentioned in this guide
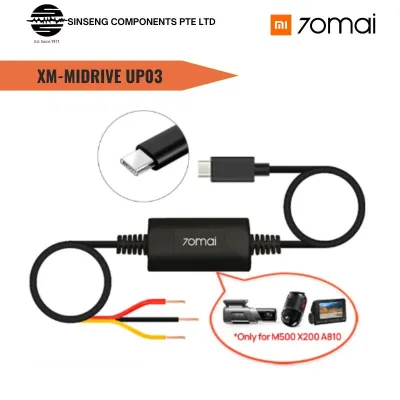



![Dashcam Installation [On-site Available] | Car camera installation service](https://img.lazcdn.com/g/p/b1396102d445982759928b79ee1b9e29.jpg_400x400q80.jpg_.webp)
Prices are valid at publication and may change. Please refer to the product page for the latest price.
Prepare the following equipment before you begin:
- Plastic trim removal tools (pry tools): These are essential for gently lifting interior panels and weather stripping without scratching or gouging the plastic.
- Microfiber cloth and isopropyl alcohol wipes: Used to prepare the glass surface for the adhesive mount.
- Adhesive cable clips and zip ties: For securing loose wires along their run.
- Digital multimeter: Required if you plan to hardwire the camera to the fuse box, allowing you to test for active circuits safely.
- Flashlight or headlamp: To illuminate dark footwells and fuse box cavities.
- Your vehicle's owner manual: To locate the fuse box and identify airbag locations.
Preparing the mounting surface is critical, especially in tropical climates like Singapore, where high humidity and intense cabin heat can cause adhesive mounts to fail. Clean the target area of your windshield thoroughly with isopropyl alcohol and a microfiber cloth to remove grease, dust, and glass cleaner residue.
Always check the product label of any cleaning agent you use. If your windshield has aftermarket solar film or window tint installed, avoid using isopropyl alcohol or harsh chemical cleaners on the film side, as these can permanently damage or discolor the tint. In such cases, consult your tint installer’s care instructions or use only a damp microfiber cloth with water, allowing the glass to dry completely before applying the adhesive mount.
Finally, consult your vehicle’s owner manual to familiarize yourself with the interior trim layout and fuse box locations. Understanding how your dashboard panels snap together will prevent broken plastic clips and save you significant time during the routing process.
Mounting the Dashcam and Hiding the Windshield Cable
Proper camera placement is vital for capturing a clear view of the road while keeping your driving vision unobstructed. The optimal mounting position is typically behind the rearview mirror on the passenger side. In right-hand drive vehicles, this means placing the camera slightly to the left of the mirror assembly. This positioning keeps the camera out of your direct line of sight while keeping the lens centered enough to capture both sides of the road equally.

Once the camera is firmly pressed onto the clean glass, you can begin concealing the power cable. Start by leaving a small amount of slack at the camera connection to prevent strain on the port, then route the cable upward toward the headliner. Use your plastic trim tool to gently tuck the wire into the gap between the headliner and the windshield. In most modern vehicles, this gap has enough natural tension to hold a thin power cable securely without adhesive.
Next, route the cable toward the side of the vehicle along the top of the windshield. When you reach the corner where the headliner meets the A-pillar (the metal frame on either side of the windshield), you must exercise extreme caution. Most modern vehicles house side curtain airbags inside these pillars.
Safety Warning: Never route a dashcam cable directly across the front of the A-pillar trim or over the path of a side curtain airbag. If the airbag deploys in an accident, a cable routed over it can prevent the airbag from inflating properly or turn the cable and camera into dangerous projectiles inside the cabin. To route the cable safely, you must either remove the A-pillar trim panel entirely and route the wire behind the airbag mechanism—securing it to the existing factory wiring harness with zip ties—or route the cable along the outer weather stripping completely clear of the airbag deployment zone. Always refer to your vehicle’s service manual to verify the exact path and deployment boundaries of your safety systems.
Choosing Your Power Source: Plug-and-Play vs. Hardwiring
How you connect your dashcam to your vehicle’s electrical system depends on your technical comfort level and whether you require continuous monitoring when the car is parked. There are two primary power connection methods, each with distinct advantages and trade-offs.
Plug-and-Play (12V Socket or USB Port)
This is the simplest and most reversible installation method. It involves plugging the dashcam’s power adapter directly into your car’s 12V accessory socket (cigarette lighter) or a built-in USB port.
- Pros: Requires no electrical knowledge, involves zero risk to your vehicle's wiring, and is highly portable if you change cars frequently.
- Cons: The power adapter occupies a socket that you might need for charging other devices, some cabling may remain visible near the center console, and the camera will turn off as soon as you shut off the engine. This means you cannot use the dashcam's parking surveillance features.
Hardwiring to the Fuse Box
This method connects the dashcam directly to your vehicle’s internal electrical system via the passenger-side or driver-side fuse box.
- Pros: Completely hides all cables from view, frees up your 12V socket, and enables continuous 24/7 parking mode by drawing power directly from the car battery even when the engine is off.
- Cons: Requires basic electrical knowledge, the use of a multimeter, and careful routing. If done incorrectly, it can drain your car battery or interfere with vehicle electronics.
If your primary goal is simple daytime recording, the plug-and-play route is highly efficient. However, if you park in public areas and want protection against hit-and-run incidents, hardwiring is the superior choice.
Routing Cables to a 12V Socket or USB Port
If you choose the plug-and-play method, your routing path will take the cable from the top of the A-pillar, down the side of the dashboard, and across to your center console. This path must be planned carefully to keep the cable hidden and out of the way of passenger feet and moving parts.
Start by opening the passenger-side door and locating the rubber weather stripping that runs along the door frame. Gently pull the weather stripping away from the frame near the dashboard junction. This reveals a natural channel where you can lay the cable. Run the wire down this channel from the top of the A-pillar to the bottom of the dashboard, then press the rubber weather stripping firmly back into place to seal the wire inside.
From the lower dash area, route the cable underneath the glovebox toward the center console. Avoid letting the wire hang down into the passenger footwell, where it can easily be kicked, caught, or unplugged. Use plastic adhesive cable clips or zip ties to secure the wire to the structural plastic panels or existing wire bundles under the glovebox.
Once the cable reaches the center console, plug the adapter into your 12V socket or USB port. If you have excess cable, do not leave it bunched up around the shifter or handbrake. Gather the extra length, coil it neatly, and secure it with a zip tie or velcro strap tucked safely out of sight behind the lower center console trim. Ensure the cable does not interfere with the glovebox door opening or any passenger seat adjustment mechanisms.
Hardwiring to the Fuse Box for a Seamless Look
Hardwiring your dashcam requires a dedicated hardwire kit, which typically consists of a power regulator box, a ground wire, and two power input wires (usually labeled ACC and BAT). The kit must feature a built-in low-voltage cutoff. This safety feature automatically cuts power to the dashcam if your car battery’s voltage drops below a set threshold (such as 11.8V or 12.0V), ensuring your car always has enough power to start.
To connect the kit safely without cutting or splicing any factory wires, use fuse taps (also known as “add-a-circuit” adapters). These adapters plug directly into an existing slot in your fuse box, allowing you to draw power while keeping the original vehicle circuit fully protected by its own fuse.
To identify the correct fuses, use a digital multimeter with your vehicle’s ignition in different states:
- Switched Power (ACC): Find a fuse slot that reads 0 volts when the car key is removed, but registers approximately 12 volts when the ignition is turned to the "On" or "Accessory" position. Common options include the radio, accessory outlet, or cigarette lighter fuses.
- Constant Power (BAT): Find a fuse slot that registers approximately 12 volts at all times, even when the car is locked and the key is removed. Common options include the hazard lights, central locking, or interior dome light fuses.
- Ground (GND): Locate a solid, unpainted metal bolt attached directly to the vehicle's metal chassis near the fuse box. Loosen the bolt, slide the hardwire kit's U-shaped ground terminal underneath, and tighten the bolt securely. A poor ground connection is the most common cause of dashcam power cycling and interference.
Safety Boundary: Never tap into critical safety-related circuits such as those for airbags (SRS), anti-lock braking systems (ABS), electronic stability control, or engine control modules (ECU). Tapping these circuits can cause electrical faults or system failures. If you cannot confidently identify safe, non-critical fuse circuits using your multimeter, if your vehicle’s fuse box is located in an inaccessible area, or if you are working with a hybrid or electric vehicle with complex high-voltage systems, stop immediately and consult a qualified automotive electrician to complete the installation.
Securing Loose Cables and Testing the Setup
With your power connections made and cables routed, the final step is to tidy up the installation and verify everything works correctly. Walk around the cabin and inspect all the areas where you tucked the wire. If you see any sagging sections—particularly near the rearview mirror or along the top of the windshield—use small adhesive cable clips to secure them flush against the glass or plastic trim.
Go back over the A-pillar and door frame, ensuring all plastic panels are snapped firmly back into their original clips and that the rubber weather stripping is fully seated. Loose weather stripping can allow rainwater to seep into the cabin, leading to electrical issues or mold growth.
Now, perform a systematic test of the system:
- Ignition On: Insert your key and start the engine. Verify that the dashcam powers up automatically within a few seconds and begins recording. Check the camera's viewing angle on its screen or via its smartphone app. Ensure the horizon is level and that the camera's view is not blocked by windshield wipers, toll transponders, or window tint lines.
- Ignition Off: Turn off the engine and remove the key. If you used a plug-and-play setup, the camera should power down immediately. If you hardwired the camera for parking mode, verify that the camera transitions smoothly into its parking state (such as motion detection or time-lapse mode) rather than shutting down completely.
- Battery Protection Test: If your hardwire kit has an adjustable voltage cutoff, ensure it is set to a safe threshold (typically 12.0V or higher for 12V systems) to protect your car battery's health, especially during periods when the vehicle is parked for several days.
Once the system passes these checks, your installation is complete. You can now drive with peace of mind, knowing your dashcam is securely mounted, safely wired, and ready to record.
Frequently Asked Questions (FAQ)
Will routing cables through the A-pillar affect side curtain airbags?
Yes, if routed incorrectly, a dashcam cable can severely interfere with side curtain airbags. To prevent this, never run the cable directly across the face of the A-pillar trim. You must route the cable behind the airbag assembly, securing it to the vehicle’s factory wiring harness using zip ties, or run it along the outer door weather stripping entirely clear of the airbag’s deployment path. Always consult your vehicle’s service manual to confirm the airbag locations.
Is a hardwire kit required to use dashcam parking mode?
Yes, a dedicated hardwire kit is generally required to use parking mode. Standard 12V accessory sockets and USB ports lose power immediately when the vehicle’s ignition is turned off, which prevents the camera from monitoring your car while parked. A hardwire kit connects directly to a constant power source in your fuse box and includes a vital low-voltage cutoff to prevent the camera from draining your car battery.
Community discussion
Share your experience or ask a question. Comments are reviewed before publication.