
Installing a dash cam using a windshield sucker holder requires balancing physical stability with legal compliance. To secure the mount firmly without obstructing your view, you must position the device directly behind the rearview mirror (ideally on the passenger side), thoroughly clean the glass surface to remove microscopic road film, and engage the vacuum lock on a cool windshield. In Singapore, improper placement can violate Land Transport Authority (LTA) regulations regarding driver visibility, turning a helpful safety device into a traffic offense. Achieving a secure, legal setup involves understanding specific spatial boundaries, preparing your materials, and executing a methodical installation process that resists tropical heat.
Understanding LTA Rules for Windshield Obstructions
The Land Transport Authority (LTA) prioritizes an unobstructed field of vision to ensure safe driving conditions on Singapore’s roads. Under local regulations, any device, accessory, or sticker that significantly blocks the driver’s direct line of sight is strictly prohibited. Mounting a dash cam carelessly can result in warnings, fines, or a failure during your vehicle’s periodic inspection at authorized centers. Compliance is not merely about avoiding penalties; it is about maintaining a clear, split-second view of pedestrians, cyclists, and changing traffic conditions.
To keep your setup fully compliant, the optimal mounting zone for your sucker holder is directly behind the rearview mirror. From the driver’s seated perspective, this area is already physically blocked by the mirror housing itself, meaning the dash cam body adds virtually zero additional blind spots. If the physical shape of your mirror or its integrated sensor housing prevents this, position the mount slightly to the passenger side of the mirror assembly. This layout ensures the driver’s side of the windshield remains completely clear of visual clutter.
Products mentioned in this guide
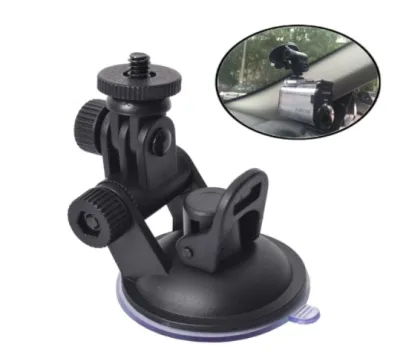
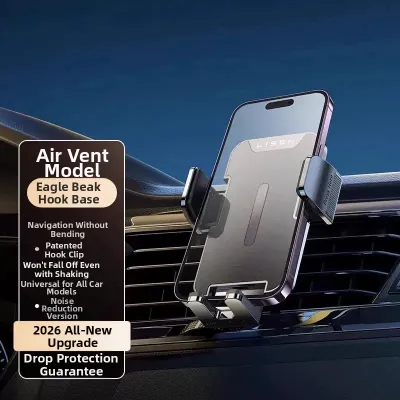
Prices are valid at publication and may change. Please refer to the product page for the latest price.
Before finalizing your mounting spot, consult your vehicle’s owner’s manual to identify the locations of built-in safety sensors, cameras, and airbag deployment zones. Many modern vehicles feature camera-based safety systems mounted near the top center of the windshield; placing your dash cam too close to these sensors can interfere with emergency braking or lane-keep assist systems. Additionally, observe the outer sweep of your front windshield wipers. Mounting the camera outside the wiped area means rain, dirt, and road grime will obscure the lens, rendering your footage useless during heavy downpours, while mounting too far down into the swept area can violate visual clearance margins.
Preparing the Windshield and Mounting Tools
A secure mount depends entirely on the quality of the vacuum seal, which is easily compromised by invisible road film, dust, and off-gassing residues from your car’s interior plastics. To prepare the glass, gather a clean, lint-free microfiber cloth, a high-quality automotive glass cleaner, and a bottle of isopropyl alcohol (70% concentration or higher). Avoid household glass cleaners that contain ammonia or heavy silicones, as these can degrade aftermarket window tint films or leave a slippery residue that causes the sucker holder to slide off over time.

Begin by spraying the automotive glass cleaner onto the microfiber cloth rather than directly onto the windshield to prevent overspray from landing on your dashboard or delicate electronic sensors. Thoroughly wipe the chosen mounting zone, applying firm pressure to dissolve stubborn road oils and grime. Once the initial cleaner has dried, apply a small amount of isopropyl alcohol to a clean section of the microfiber cloth and wipe the area again. This step strips away any remaining oily films, leaving a perfectly bare glass surface that allows the rubber suction cup to make direct, airtight contact.
Timing and temperature are critical factors during this preparation phase. The windshield must be completely dry and cool to the touch before you attempt to apply the sucker holder. If your car has been parked under the direct Singapore sun, the glass temperature can easily exceed 60 degrees Celsius. Attempting to install the mount on hot glass causes the pocket of air trapped beneath the suction cup to expand rapidly, which prevents a proper vacuum from forming and leads to premature failure once the cabin cools down. Park in a shaded multi-storey car park or turn on your car’s air conditioning to cool the windshield before proceeding.
Step-by-Step Guide to Installing the Sucker Holder
To achieve a lasting hold, begin by inspecting the rubber suction cup of your sucker holder. Look closely for any tiny tears, micro-cracks, or permanent warps along the flexible outer edge. Even a microscopic imperfection will allow air to slowly seep into the chamber, gradually destroying the vacuum over a matter of hours or days. If the rubber feels stiff or shows signs of dry rot from previous use, it must be replaced to prevent your dash cam from falling and suffering damage.
If your mount manufacturer’s instructions explicitly permit it, you can slightly dampen the inner rim of the suction cup with a tiny drop of water or a damp finger. This micro-layer of moisture acts as a temporary barrier that helps seal any minor imperfections on the glass surface during the initial application. However, do not use excessive water, spit, or oils, as these can degrade the rubber compound or cause the mount to slide downward under the weight of the camera.
Hold the sucker holder with the locking lever or twist mechanism in its fully released, open position. Align the mount with your pre-cleaned, cool windshield spot. Press the center of the suction cup firmly against the glass, applying steady, direct pressure. This physical force pushes the air outward from the center, flattening the rubber dome and creating the initial physical contact required for a vacuum.
While maintaining strong forward pressure with one hand, use your other hand to engage the locking lever or rotate the twist collar to its fully locked position. This mechanical action pulls the center of the rubber cup backward, away from the glass, while the outer edges remain sealed. This displacement creates a low-pressure vacuum chamber inside the cup, securing the mount with hundreds of Newtons of atmospheric force.
Once locked, do not immediately attach the heavy dash cam body. Let the sucker holder sit undisturbed for at least ten to fifteen minutes to allow the vacuum pressure to stabilize and to verify that the seal is holding. Visually inspect the suction cup from the outside of the windshield; if you see large air bubbles forming or if the locking lever feels loose and lacks tension, release the mechanism immediately and repeat the cleaning and mounting process.
Preventing Suction Failure in Singapore's Tropical Heat
Singapore’s intense tropical climate presents a constant challenge for suction-mounted automotive accessories. When a vehicle is parked in an open lot under direct sunlight, greenhouse effects can raise cabin temperatures well above 70 degrees Celsius. This extreme heat causes the tiny pocket of residual air trapped inside the sucker holder to expand significantly, increasing its internal pressure and neutralizing the vacuum seal that holds the mount to the glass.
To mitigate this thermal expansion and prevent your dash cam from crashing onto the dashboard, adopt proactive parking and shielding habits. Whenever possible, park in sheltered, multi-storey, or basement car parks to keep cabin temperatures within a reasonable range. If you must park in an open lot, place a high-quality, reflective windshield sunshade across your front glass. Position the sunshade so that it sits behind your dash cam mount, shielding the rubber suction cup from direct, concentrated solar radiation and UV exposure.
Regular maintenance is essential to counteract the gradual physical changes that occur within the mounting hardware. Make it a habit to check the physical firmness of your sucker holder at least once a month. Release the locking lever, wipe the glass and rubber surface to remove any accumulated dust, and re-seat the mount using the step-by-step method outlined above. This simple routine prevents the slow, unnoticed loss of vacuum pressure that typically precedes a sudden mounting failure.
Over time, continuous exposure to high temperatures and ultraviolet rays will inevitably degrade the polymer structure of the suction cup. The rubber will gradually lose its plasticizers, causing it to become stiff, yellowed, or brittle. Once the material loses its natural flexibility, it can no longer conform to the microscopic curves of the windshield glass, making a secure seal impossible. When you notice the rubber hardening or failing to hold for more than a few days, replace the sucker holder immediately rather than risking damage to your dash cam or distracting yourself while driving.
Verifying the Mount and Dash Cam Field of View
Before hitting the road, you must verify both the structural integrity of your installation and the legal compliance of the camera’s field of view. Begin by performing a gentle tug test: grasp the base of the sucker holder firmly and apply light pressure in various directions. The mount should feel completely rigid and fused to the glass, without any wobbling, sliding, or flexing at the suction base. If there is any play in the joint, re-examine the locking mechanism and the cleanliness of the windshield.
Next, power on your dash cam and open its companion mobile application or look directly at its integrated display screen. Adjust the camera’s ball joint or mounting arm so that the lens captures a balanced, wide-angle view of the road ahead. Ideally, the bottom edge of the video frame should capture just a small sliver of your car’s hood to provide a spatial reference point, while the remaining portion of the frame should focus entirely on the lanes, traffic signals, and roadside signs. Avoid tilting the camera too far upward, as excessive sky exposure can cause the camera’s auto-exposure sensor to underexpose the road surface, making license plates difficult to read in high-contrast lighting.
Finally, sit comfortably in the driver’s seat in your normal driving position and look forward. Verify that your natural sightlines to the road ahead, adjacent lanes, pedestrian crossings, and side-view mirrors are completely unobstructed by the dash cam body or its dangling power cables. If any part of the device cuts into your critical viewing angles, adjust its position immediately. Tuck all power cables neatly into the headliner and down the A-pillar trim to prevent loose wires from swinging across your field of vision. If routing the cable requires removing trim panels that house side-curtain airbags, always consult a qualified automotive professional to ensure safety systems are not compromised.
Frequently Asked Questions (FAQ)
Is an adhesive mount better than a sucker holder for dash cams?
Adhesive mounts, which typically utilize heavy-duty acrylic tape, offer superior resistance to Singapore’s high cabin temperatures and are less likely to detach during extreme heat spikes. However, they are semi-permanent and highly destructive to aftermarket window tint films, often tearing the delicate polyester layer if you attempt to remove or reposition the camera. A sucker holder offers a completely non-destructive, highly flexible alternative that can be repositioned or transferred between vehicles instantly. This makes suction mounts the ideal choice for leased vehicles, rental cars, or windshields protected by expensive solar films, provided you commit to cleaning and re-seating the mount periodically to prevent heat-induced drops.
What should I do if the suction cup keeps falling off?
If your mount repeatedly detaches, the most common culprit is microscopic dirt or oil buildup on either the windshield or the suction cup itself. Remove the sucker holder entirely and wash the rubber cup with warm, soapy water to strip away accumulated dust and oils, then rinse it thoroughly and allow it to air-dry completely. Avoid drying the rubber with paper towels or cloths that leave lint behind. If the mount continues to fall off even after thorough cleaning and glass preparation, inspect the rubber for physical degradation; if the cup has warped, hardened, or developed micro-cracks from UV exposure, the material can no longer maintain a vacuum, and you must replace the sucker holder to ensure safety.
Community discussion
Share your experience or ask a question. Comments are reviewed before publication.