
Installing a car door projector—often referred to as a puddle light or logo light—is an excellent way to personalize your vehicle while adding functional ground illumination when stepping out at night. These compact LED units project a crisp logo, pattern, or bright light onto the ground directly beneath the open door. While the visual upgrade is highly satisfying, the installation process requires a methodical approach to avoid damaging your vehicle’s interior panels, window mechanisms, or sensitive electrical systems.
Whether you are installing a custom universal kit that requires drilling or a vehicle-specific plug-and-play unit, understanding the correct wiring and mounting procedures is essential. This guide walks you through the entire process, from safety preparations to final testing, ensuring a clean and professional finish.
Pre-Installation Checks and Electrical Safety Boundaries
Before purchasing or installing any aftermarket lighting accessories, you must verify your vehicle’s specific model, year, and door configuration. Consult your vehicle’s documentation to confirm the mounting dimensions and ensure that adding aftermarket lighting complies with local road safety regulations. Some jurisdictions have strict rules regarding exterior vehicle lighting colors and brightness levels while the vehicle is in motion.
Products mentioned in this guide

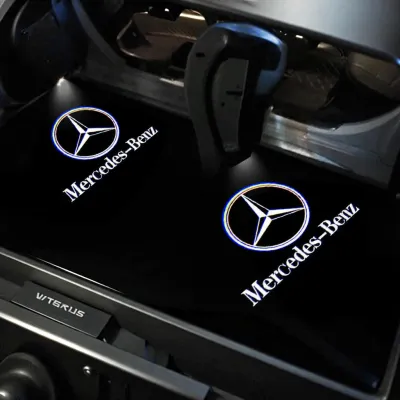
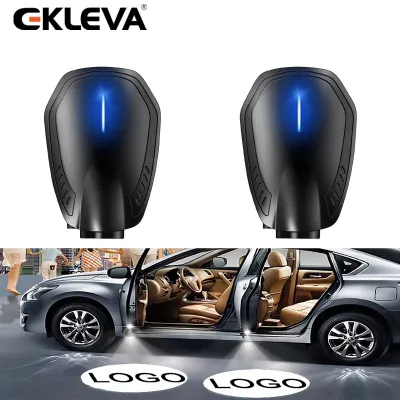
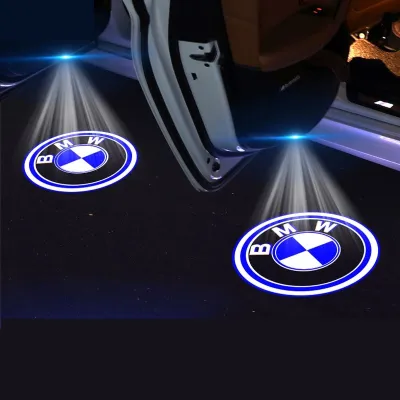


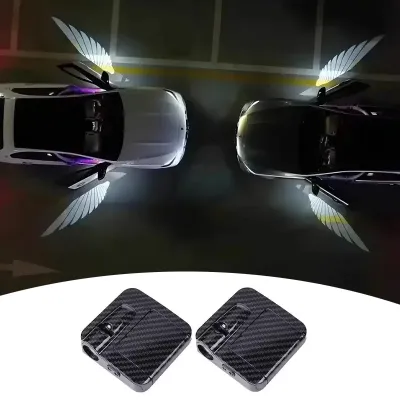
Prices are valid at publication and may change. Please refer to the product page for the latest price.
Electrical safety is the most critical aspect of this installation. Always disconnect the negative battery terminal before touching any internal wiring or removing door panels. This simple step prevents accidental short circuits, blown fuses, and the potential triggering of side-impact airbag or Supplemental Restraint System (SRS) warning lights, which can be costly to reset.
Review your vehicle’s owner manual to understand the complexity of the door’s electrical architecture. Modern vehicles often utilize advanced multiplexed wiring or Controller Area Network (CAN bus) systems to manage windows, locks, and mirrors through a centralized door control module. Splicing into these data-sensitive lines can disrupt communication networks and trigger system-wide fault codes. If your vehicle uses a CAN bus system within the door panel, stop immediately and consult a qualified automotive electrician.
Finally, inspect the bottom edge of the door panel to confirm there is adequate flat space and internal clearance for the projector housing. The projector must sit completely flush against a flat surface to prevent water ingress and ensure it does not snag on the door sill or weatherstripping when the door is closed. Measure the depth inside the door cavity to guarantee the projector body will not interfere with the window glass when it is fully rolled down.
Essential Tools and Materials for the Job
Having the correct tools on hand prevents damage to fragile plastic components and ensures secure, long-lasting electrical connections. Avoid using makeshift tools like metal screwdrivers to pry panels, as they will scratch the paint and gouge the interior plastics.

Gather the following essential tools and materials before starting:
- Plastic trim removal tools: These specialized pry bars allow you to safely pop door panel clips without scratching or bending the trim.
- Digital multimeter: Essential for testing voltage, continuity, and polarity to identify the correct power and ground wires.
- Wire strippers and crimpers: For preparing clean wire ends and securing electrical connectors.
- Soldering iron and heat shrink tubing: The most reliable method for joining wires, providing a vibration-resistant and insulated connection.
- Zip ties and adhesive wire clips: To route and secure loose wiring away from moving parts inside the door.
- Isopropyl alcohol: For cleaning the mounting surface to ensure maximum adhesion if using adhesive-backed components.
Step-by-Step Installation Process
Installing a car door projector requires patience and a gentle touch. Door panels are held in place by a combination of hidden screws and tight plastic clips that can easily snap if forced. Take your time during each phase of the installation to ensure all components fit back together perfectly.
Removing the Door Panel Without Damage
To access the internal wiring and mount the projector, you must remove the interior door panel. Start by locating and removing all hidden fasteners. Manufacturers typically conceal these screws behind small plastic covers, inside the door pull handle cup, behind the interior door release lever, or underneath the window switch bezel. Use a small plastic pick to gently pop these covers off and expose the screws.
Once all screws are removed, insert a wide plastic trim tool between the metal door frame and the plastic door panel, starting at a bottom corner. Gently pry outward until you hear the plastic retaining clips release. Work your way systematically around the bottom and sides of the panel, popping each clip one by one. Avoid pulling the panel from the top edge first, as it usually hooks over the window channel.
Once all perimeter clips are disengaged, lift the door panel slightly upward to clear the lock pin. Do not pull the panel away quickly, as it is still connected by wiring harnesses and mechanical cables. Reach behind the panel to carefully disconnect the wiring harnesses for the window switches, door locks, and speakers. Unhook the mechanical door latch cables from their retainers, then set the door panel aside on a soft, clean surface to prevent scratches.
Routing Wires and Identifying a Safe Power Source
With the door panel removed, you must locate a safe power source that triggers only when the door opens. Use a digital multimeter to identify a suitable 12V source, such as the existing factory courtesy light or puddle light circuit. Connect the negative lead of your multimeter to a clean, unpainted metal ground on the door frame, and use the positive lead to probe the connector pins until you find one that registers 12V when the door is open and drops to 0V when the door switch is pressed.
Never cut, splice, or tap into yellow-sleeved wires, airbag harnesses, or main data lines, as doing so can compromise critical safety systems. If your vehicle manual permits splicing, use approved T-tap connectors or strip a small section of the target wire, wrap the projector wire around it, solder the joint, and seal it securely with heat shrink tubing. A poor connection can lead to intermittent operation or electrical shorts over time.
Route the projector wires along the factory wiring harness inside the door cavity. Use zip ties to secure the new wires tightly, ensuring they do not hang loose where they could get caught in the window regulator tracks or scissor mechanisms when the glass is rolled down. If you must run wires from the cabin into the door, always route them through the existing rubber boot at the door hinge to protect them from weather exposure and pinching.
Mounting and Aligning the Projector Unit
The mounting method depends on whether you have a drill-in projector or an adhesive-mounted unit. For drill-in models, use the hole saw bit provided in the kit, ensuring its diameter matches the projector housing. Mark the mounting spot on the flat bottom of the plastic door panel, verifying that the drill path is clear of any internal brackets, speakers, or structural supports. Drill slowly at a perpendicular angle to create a clean, round hole without melting the plastic.
If you are using an adhesive-mount unit, clean the mounting surface thoroughly with isopropyl alcohol to remove any dirt, grease, or interior dressings. Apply the high-strength automotive adhesive tape to the projector bracket, press it firmly against the cleaned surface, and hold it in place for at least one minute to ensure a strong bond.
Before securing the projector permanently, check the unit’s IP (Ingress Protection) rating label to understand its water exposure limits, as the bottom of a car door is frequently exposed to rain and road splash. Temporarily connect the power wires and turn on the projector. Rotate the lens housing until the projected logo or light pattern aligns perfectly with the ground when the door is open. Once you are satisfied with the alignment, tighten the locking ring on the back of the drill-in unit or finalize the adhesive mount.
Testing the System and Reassembling the Door
Before reassembling the door panel, you must perform a thorough functional test. Reconnect the negative battery terminal and open the door to verify that the projector illuminates clearly. Manually depress the door jamb switch or latch mechanism to confirm that the light turns off when the door is closed, preventing battery drain.
Start the vehicle and check the instrument cluster for any warning lights or error codes. Test the window operation by rolling the glass all the way down and up several times. Listen closely for any scraping sounds or resistance, which could indicate that the window glass is contacting the new projector housing or loose wiring.
Once everything functions correctly, disconnect the battery once more to ensure safety during reassembly. Reconnect all switch wiring harnesses and mechanical latch cables to the door panel. Align the plastic retaining clips on the panel with their corresponding holes in the metal door frame. Press firmly around the perimeter of the panel until you hear each clip snap securely back into place. Reinstall all screws, covers, and trim pieces, then reconnect the battery for final operation.
Troubleshooting Common Post-Installation Issues
If your car door projector does not function as expected after installation, follow these troubleshooting steps to diagnose and resolve the issue:
- Projector does not turn on: Verify the condition of the inline fuse in the projector kit and the vehicle's accessory fuse. Use a digital multimeter to check for 12V power at the tap point and ensure your ground wire is connected to clean, unpainted metal. If the connection is loose or corroded, clean the contact point and re-secure the wire.
- Blurry or distorted image: Many projector units feature an adjustable focus ring on the lens. Rotate this ring slowly in either direction until the projected image becomes sharp and clear. If the image is distorted, check if the projector is mounted at an angle; the housing must be perpendicular to the ground for a clean projection. Additionally, wipe the lens with a soft microfiber cloth to remove any dust or road grime.
- Door rattles or loose panels: A rattling sound when driving or closing the door usually indicates that a wire harness is vibrating against the metal door skin. Re-open the panel and wrap any loose wires in foam tape or secure them with additional zip ties. Ensure no plastic trim clips were broken during removal; replace any damaged clips to keep the panel tight against the door frame.
Frequently Asked Questions (FAQ)
Will installing a door projector void my car's warranty?
Modifying your vehicle’s factory wiring can affect the warranty coverage for that specific electrical circuit or any components damaged by the modification. Under consumer protection laws in many regions, a manufacturer cannot void the entire vehicle warranty unless they can prove the aftermarket accessory directly caused the failure. To minimize warranty risks, look for plug-and-play projector kits that plug directly into existing puddle light housings without splicing, or consult your local dealership regarding warranty boundaries.
Can I use a wireless battery-operated projector instead of hardwiring?
Yes, wireless battery-operated projectors are an excellent alternative if you want to avoid prying panels or splicing wires. These units typically mount to the interior door panel using double-sided adhesive tape and use a small magnet placed on the door sill to trigger the light when the door opens. While they eliminate electrical risks, they require periodic battery replacement, and the adhesive mounts may degrade over time due to humidity, heat, and door-slamming vibrations.
Community discussion
Share your experience or ask a question. Comments are reviewed before publication.