
Maintaining correct tire pressure is fundamental to vehicle safety, handling, and fuel economy. Driving with underinflated or overinflated tires compromises your vehicle’s grip on the road, accelerates tread wear, and increases fuel consumption. To keep your tires in optimal condition, you must know how to locate your vehicle’s specific recommended tire pressure and how to use a tyre monitor gauge to take accurate readings. This guide provides a comprehensive walkthrough to help you master this essential maintenance task.
Where to Find Your Vehicle's Recommended Tire Pressure
To find the correct tire pressure for your vehicle, look for the manufacturer’s tire placard. This is typically a highly visible sticker located on the driver-side door jamb, also known as the B-pillar. Open the driver’s door and inspect the metal frame where the door latches. The placard displays the recommended cold inflation pressure for both the front and rear tires, which often differ depending on the vehicle’s weight distribution.
If the placard is missing or faded, your next resource is the vehicle owner’s manual. The manual contains comprehensive tire specifications, including adjustments for specific driving conditions. For instance, the manufacturer may recommend increasing the pressure slightly when carrying a full load of passengers, towing a trailer, or driving at sustained high speeds on the highway. Always refer to these official guidelines rather than relying on generic estimates.
Products mentioned in this guide
![[Ready Stock] KIPRUN TG105 Digital Car Tire Tyre Air Pressure Gauge Meter LCD Display Manometer Barometers Tester for Car Truck Motorcycle Bike](https://img.lazcdn.com/g/p/07a52bd518e442d1dbbff71990d43383.jpg_400x400q80.jpg_.webp)
![[Ready Stock] KIPRUN High-precision Tire Pressure Gauge 0-150 PSI LCD Backlight Digital Tire Pressure Monitoring Car Tire Pressure Gauge](https://img.lazcdn.com/g/p/6cd235b0b79688bc08a40cb550d8b6e6.jpg_400x400q80.jpg_.webp)
![[Ready Stock] KIPRUN High-precision Tire Pressure Gauge 0-150 PSI LCD Backlight Digital Tire Pressure Monitoring Car Tire Pressure Gauge](https://img.lazcdn.com/g/p/9ee8b124bbc79be45a4de8b0f539d31a.jpg_400x400q80.jpg_.webp)
Prices are valid at publication and may change. Please refer to the product page for the latest price.
It is critical to distinguish between the vehicle’s recommended pressure and the maximum pressure printed directly on the tire’s sidewall. The number on the sidewall indicates the absolute maximum pressure the tire can safely hold under maximum load. Inflating your tires to this maximum limit can result in a harsh ride, reduced traction, rapid center-tread wear, and an increased risk of a blowout. Always adhere to the lower, vehicle-specific recommendation found on the door placard or in the owner’s manual.
Preparing for an Accurate Tire Pressure Check
Before taking any measurements, you must ensure your tires are “cold.” In automotive terms, a cold tire is one that has been parked for at least three hours or driven less than 1.6 kilometers at moderate speeds. As you drive, the friction between the tire tread and the road surface generates heat. This heat transfers to the air inside the tire, causing it to expand and temporarily increase the internal pressure. Measuring a hot tire will yield an artificially high reading, which can lead you to underinflate your tires.

In tropical environments like Singapore, checking your tires in the morning before the sun has heated the pavement is highly recommended. Even if the car has been parked, sitting in an open-air parking lot under direct sunlight can warm the tires and skew your baseline measurements. Whenever possible, perform your checks in a shaded multi-storey car park or early in the day.
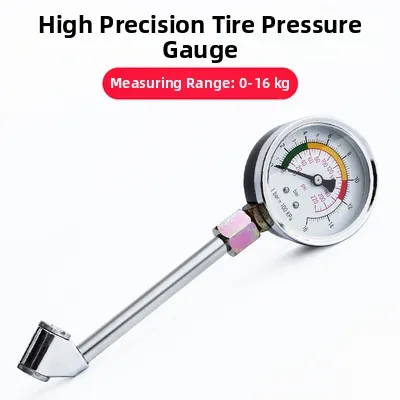
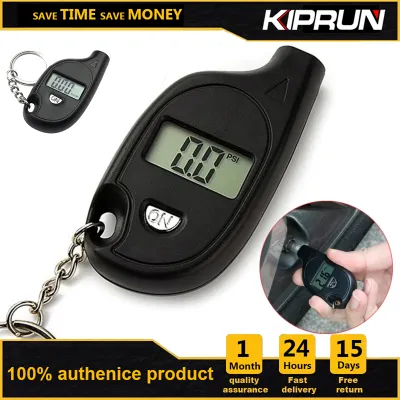
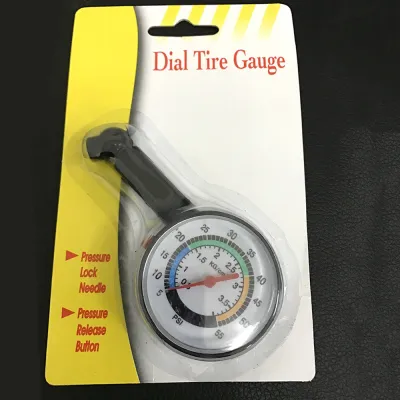
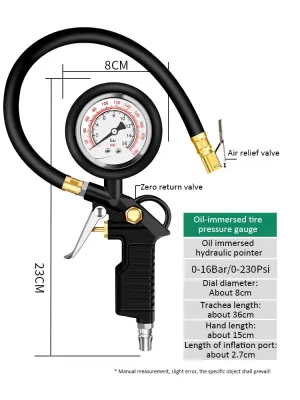
To prepare for the check, gather a reliable tyre monitor gauge and a clean microfiber cloth. Tyre monitor gauges come in several styles, including digital, dial, and traditional pencil-style pocket gauges. Ensure your gauge is clean and free of dust. A clean cloth is useful for wiping away road grime, mud, or brake dust from the valve stems before you begin, preventing debris from entering the valve or clogging your gauge.
Perform a quick visual inspection of each tire and its valve stem before attaching the gauge. Look for obvious signs of damage, such as deep cuts in the rubber, embedded nails, or a cracked valve stem. Ensure the valve stem is straight and secure. If you notice any severe damage or if the valve stem feels loose, avoid inflating the tire yourself and contact a professional tire technician immediately to prevent sudden pressure loss.
Step-by-Step Guide to Using a Tyre Monitor Gauge
To begin the measurement, unscrew the plastic dust cap from the tire’s valve stem. Place the cap in a secure location, such as your pocket or a clean tray, so it does not roll away or get lost in the dirt. Wiping the tip of the valve stem with your cloth ensures a clean connection and prevents dirt from being forced into the valve core.
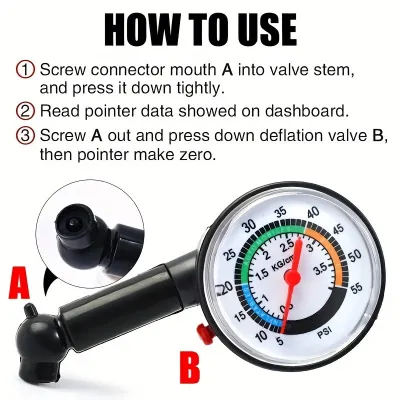
Hold your tyre monitor gauge firmly and press the nozzle squarely onto the valve stem. You will likely hear a brief hissing sound as the gauge engages. Press down firmly until the hissing stops completely, indicating a tight, airtight seal. If the hissing continues, the gauge is misaligned; tilt or reposition the nozzle until the seal is secure. Holding the gauge at an angle can allow air to escape, resulting in an inaccurate, lower-than-actual reading.
Once the seal is established, read the measurement displayed on the gauge. For digital gauges, wait a moment for the reading to stabilize on the screen. For dial gauges, note where the needle points. For pencil-style gauges, read the highest number visible on the graduated plastic bar that slides out from the bottom. Compare this reading directly to the recommended cold tire pressure specified on your vehicle’s door placard.
If the reading is lower than the recommended specification, you will need to add air. You can use a portable air compressor that plugs into your vehicle’s 12V accessory socket or visit a local service station. Most service station air pumps allow you to preset your desired pressure on a digital screen. Once connected, the machine will automatically inflate or deflate the tire and beep when the target is reached. However, always use your own tyre monitor gauge to double-check the final pressure, as station gauges can sometimes be miscalibrated due to heavy daily use.
If the reading is too high, you must release some air. Most tyre monitor gauges feature a small bleeder valve or a small protrusion on the back of the chuck. Press this gently against the center pin (the valve core) inside the valve stem to release small bursts of air. Re-measure the pressure after each adjustment to verify you have reached the correct target.
After achieving the correct pressure, securely screw the valve cap back onto the stem. The valve cap is not just a cosmetic accessory; it acts as a primary barrier against moisture, road salt, and dirt. If debris enters the valve stem, it can damage the delicate internal valve core, leading to a slow, persistent leak that is difficult to diagnose.
Tires are critical safety components that directly affect braking, steering, and stability. Always refer to your vehicle’s original documentation for specific safety instructions. If you are uncomfortable performing these checks or if you suspect a mechanical issue with your wheels or valves, seek qualified professional installation and maintenance services.
Common Measurement Mistakes and When to Seek Professional Help
One of the most common mistakes drivers make is adjusting tire pressure immediately after a long drive. If you find that your hot tires read higher than the recommended cold pressure, do not let air out to match the cold specification. Doing so will leave the tires dangerously underinflated once they cool down. If you must add air to hot tires, only add enough to match the pressure of the other tires, and verify the cold pressure the following morning.
Another frequent error is relying on a faulty or uncalibrated gauge. Over time, mechanical dial and pencil gauges can lose calibration due to drops or rough handling. Digital gauges can produce erratic or incorrect readings when their batteries run low. If your gauge fails to reset to zero, provides highly inconsistent readings across multiple checks on the same tire, or has a fading display, it is time to replace the battery or the gauge itself.
While routine pressure checks are a straightforward DIY task, certain conditions require immediate professional intervention. If you observe a bulge or bubble in the tire sidewall, this indicates that the internal structural cords have failed, making the tire highly susceptible to a sudden blowout. Similarly, deep cracks in the tread, exposed steel belts, or visible tears in the rubber of the valve stem are severe safety hazards. If you encounter any of these issues, do not attempt to inflate or drive on the tire; instead, consult a qualified technician or call for roadside assistance.
Caring for Your Tyre Monitor Gauge and Building a Check Routine
To ensure your tyre monitor gauge remains accurate, store it in a dry, temperature-controlled environment. Avoid leaving the gauge loose in your trunk or exposed to direct sunlight on the dashboard. In tropical climates like Singapore, the intense heat inside a parked car can damage digital screens, degrade battery life, and affect the internal springs of mechanical gauges. Keeping the gauge in a protective case inside your glove compartment is an excellent way to shield it from physical impact and temperature extremes.
For digital gauges, monitor the battery level closely. A fading liquid crystal display (LCD) or slow response times are clear indicators that the battery needs replacement. Always use high-quality replacement batteries specified by the manufacturer to maintain consistent sensor performance.
Establishing a consistent check routine is key to maximizing tire life and ensuring road safety. Make it a habit to check your tire pressures at least once a month, as tires naturally lose pressure over time due to the microscopic permeability of rubber. Additionally, always perform a thorough pressure check before embarking on long-distance trips, such as driving on interstate highways, where sustained high speeds put extra stress on your tires.
Frequently Asked Questions (FAQ)
Should I inflate my tires to the pressure printed on the tire sidewall?
No, you should never inflate your tires to the pressure printed on the sidewall for daily driving. The sidewall pressure is the maximum inflation limit the tire can safely withstand under its maximum load capacity, determined by the tire manufacturer. It does not account for your specific vehicle’s weight, suspension design, or handling characteristics. Always follow the recommended cold tire pressure listed on your vehicle’s door jamb placard or in the owner’s manual to ensure optimal safety, braking performance, and tire longevity.
Does the recommended tire pressure change if I install aftermarket wheels?
Yes, changing your vehicle’s wheel diameter, width, or tire size can alter the required inflation pressure. Aftermarket wheels and tires often have different load indexes and air volume capacities compared to the original equipment. To determine the correct pressure for an aftermarket setup, you should consult a professional tire retailer or reference industry-standard load and inflation tables. These tables calculate the precise pressure required for the new tire size to safely support your vehicle’s specific axle loads.
Why do my tires lose pressure even when there are no visible punctures?
Tires naturally lose pressure over time because rubber is slightly porous, allowing air molecules to slowly escape at a rate of about 1 to 2 PSI per month. Additionally, ambient temperature changes directly affect tire pressure; a drop in temperature causes the air inside the tire to contract, lowering the pressure. Slow leaks can also originate from non-puncture sources, such as an aging or damaged valve core, a loose valve stem, or corrosion along the wheel rim’s bead seat, which prevents a perfect seal between the tire and the wheel.
Community discussion
Share your experience or ask a question. Comments are reviewed before publication.