
A coolant leak can quickly lead to engine overheating and severe mechanical damage if left unaddressed. Finding and fixing a coolant leak involves a systematic approach: performing a thorough visual inspection, checking for interior symptoms, and using a pressure tester to pinpoint the source. While some cooling system repairs are straightforward DIY tasks, others require advanced mechanical knowledge and professional tools. Understanding how to safely diagnose the system, evaluate the severity of the leak, and perform basic component replacements can save you time and protect your vehicle’s engine from catastrophic failure.
Safety First: Preparing for Coolant System Work
Working on an automotive cooling system carries inherent risks that demand strict safety precautions. The most critical rule of cooling system maintenance is to never open the radiator cap or expansion tank cap while the engine is hot or warm. The system operates under high pressure, and opening a hot cap can cause boiling coolant and steam to spray out violently, resulting in severe burns. Always allow the vehicle to sit undisturbed for several hours until the engine block and the upper radiator hose are completely cold to the touch.
In addition to thermal hazards, engine coolant is highly toxic to humans and animals. It has a sweet smell and taste that can attract pets, making immediate containment essential. Always wear heavy-duty nitrile gloves and safety glasses to protect your skin and eyes from chemical exposure. Place a dedicated, clean drip pan directly beneath your work area before loosening any hoses or drain plugs. Never allow coolant to drain onto the ground; instead, collect the waste fluid in sealed, clearly labeled containers and transport it to a licensed recycling facility or local hazardous waste collection point.
Products mentioned in this guide
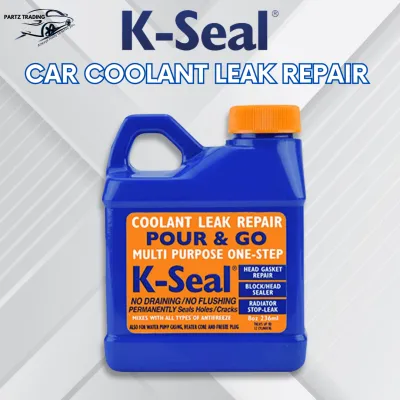
63 Lazada user ratings
Highly recommended for radiator repairs, Great solution for radiator problems, Easy to use and effective, No more coolant leakage, Saved me …Read full reviewShow less
Highly recommended for radiator repairs, Great solution for radiator problems, Easy to use and effective, No more coolant leakage, Saved me from expensive repairs,
Works like magic, Great solution for radiator problems, weird but seems to work. i guess it patched up any tiny leak from my cooling system.
Fast delivery and packaging is good. Hope the quality is good as promoted.
ok. very tiny bottle but works
received in good order.
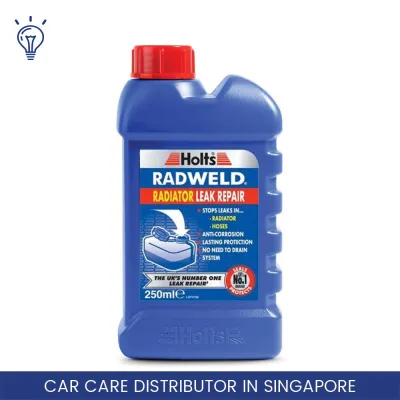
49 Lazada user ratings
Delivery is fast, only in a few days after ordering. Label is different from the photo shown by seller, but still does the same function to …Read full reviewShow less
Delivery is fast, only in a few days after ordering. Label is different from the photo shown by seller, but still does the same function to stop leaks in cooling system. Yet to use.
My car radiator standby tank runs out of coolant readily. Need to top up fortnightly. Remembered there's additive that can be used to relief…Read full reviewShow less
My car radiator standby tank runs out of coolant readily. Need to top up fortnightly. Remembered there's additive that can be used to relief the leak and trying out this one.
No more radiator leaks!, Bought another brand but still leaking which was why I bought this.
got a free air freshener and 2 alcohol wipes very thoughtful, fast delivery, hope this works
Recommended by friend, good and trusted product. Yet to try on..
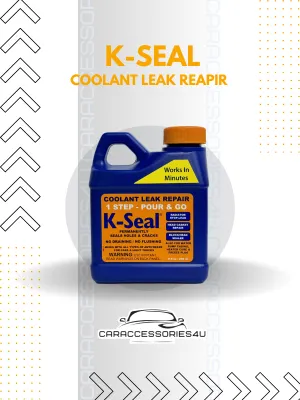
18 Lazada user ratings
Last used lasted for 5mth, keeping my fingers crossed for another 5mths
Effective coolant leak fix, Trusted by professionals,
received n yet to try
As described. Good
so far so good
Prices are valid at publication and may change. Please refer to the product page for the latest price.
Tools and Materials Needed for Coolant Leak Repair
Before beginning any diagnostic work or repairs, gather the necessary tools and verify the exact specifications required for your vehicle. Basic hand tools are essential, including a metric socket set, flathead and Phillips screwdrivers, and specialized hose clamp pliers designed to safely compress spring-tension clamps. A bright, adjustable LED flashlight is also invaluable for illuminating dark, recessed areas of the engine bay where slow leaks often hide.

When sourcing replacement fluids, never assume that all coolants are identical. Modern vehicles use highly specific coolant formulations—such as Inorganic Additive Technology (IAT), Organic Acid Technology (OAT), or Hybrid Organic Acid Technology (HOAT)—tailored to the specific metals and elastomers used in their engines. Mixing incompatible coolant chemistries can cause a chemical reaction that forms a thick gel, clogging the radiator and heater core passages. Always consult your vehicle’s owner’s manual or check the reservoir cap to verify the correct specification before purchasing fluid. Additionally, consider acquiring a manual cooling system pressure tester; ensure the tester kit includes the correct adapter interface to match your specific radiator neck or expansion tank thread pattern.
Step 1: Locating the Source of the Coolant Leak
Locating a coolant leak requires a methodical, step-by-step inspection of the entire cooling loop. Begin with a thorough visual check of the engine bay while the engine is cold and off. Trace the upper and lower radiator hoses from the engine block to the radiator, looking for signs of cracking, swelling, soft spots, or white, powdery residue around the hose clamps. Inspect the radiator itself, paying close attention to the seams where the plastic end tanks are crimped to the aluminum core, as these joints frequently fail over time. Check the water pump housing, specifically looking at the small weep hole behind the pulley; a slow drip or dried crust around this hole indicates that the internal shaft seal has failed.
Do not limit your inspection to the engine compartment. If you notice a sweet, syrupy smell inside the cabin, persistent oily fog on the interior windshield when using the defroster, or damp passenger-side floor mats, the heater core is likely leaking. The heater core is a small radiator located behind the dashboard, and diagnosing it early can prevent significant interior damage.
If a visual inspection does not reveal the leak, a manual pressure tester is the most reliable tool for finding hidden faults. Attach the correct adapter to the radiator neck or expansion tank, connect the pressure pump, and slowly pressurize the system. Do not exceed the pressure rating stamped on your radiator cap—typically between 12 and 15 psi. Over-pressurizing the system can rupture fragile plastic components or blow out seals. With the system under pressure, listen for hissing sounds and watch for dripping fluid. This test simulates operating conditions without the hazard of a hot engine, allowing you to safely pinpoint pinhole leaks in hoses or hairline cracks in the plastic overflow reservoir.
Step 2: Evaluating Repairability and Knowing When to Stop
Once you have identified the source of the leak, you must objectively assess whether the repair is suitable for a DIY project or if it requires professional intervention. Simple, bolt-on components are generally safe and practical to replace at home. These include cracked or spongy radiator hoses, worn spring clamps, a damaged plastic overflow tank, or a faulty radiator pressure cap. Replacing these parts requires basic tools and standard safety precautions, making them excellent DIY tasks.
However, certain failure points indicate severe mechanical issues that mandate professional repair. If you pull the engine oil dipstick and find a milky, coffee-colored emulsion, or if you observe thick, sweet-smelling white smoke exiting the exhaust pipe, the engine likely has a blown head gasket. This condition allows coolant to mix with engine oil, which destroys lubrication and can cause catastrophic engine failure. Other complex repairs, such as replacing a leaking water pump bearing, swapping a damaged radiator core, or replacing a buried heater core that requires complete dashboard disassembly, should be left to a qualified mechanic.
Avoid the temptation to use temporary patch jobs, such as wrapping high-pressure hoses with tape or applying external silicone to cracked plastic tanks. The cooling system operates under high heat and significant pressure; temporary external patches will quickly fail under these conditions, leading to sudden, complete coolant loss and severe engine overheating.
Step 3: Executing the Repair and Refilling the System
To execute the repair, begin by draining the cooling system to a level below the component you need to replace. Locate the radiator drain petcock or disconnect the lowest radiator hose, allowing the fluid to drain slowly into your clean drip pan. Only drain what is necessary to complete the job to minimize waste. Once the fluid level is lowered, carefully remove the damaged component. When installing the new part, ensure all mounting surfaces are clean and free of debris. Position hose clamps slightly behind the flared end of the metal fitting and tighten them securely; avoid over-tightening worm-gear clamps, as they can cut into the rubber hose or crack plastic fittings.
After securing the new component, you must refill and bleed the system to prevent air pockets. Mix your vehicle-specific coolant with distilled water in a 50/50 ratio, or use pre-diluted coolant if specified. Slowly pour the mixture into the radiator or expansion tank. Air pockets trapped in the cooling system can cause localized hot spots, erratic temperature readings, and engine damage. To bleed the system, locate the cooling system bleed valve (if equipped) and open it until a steady stream of coolant flows out without air bubbles. Alternatively, use a spill-free funnel attached to the radiator neck, start the engine, and let it idle.
With the radiator cap off or the spill-free funnel in place, turn the cabin heater to its maximum temperature and fan speed. This opens the heater control valve, allowing coolant to circulate through the entire loop and push trapped air out of the heater core. Let the engine run until it reaches normal operating temperature and the radiator fan cycles on. Watch the coolant level in the funnel or reservoir, topping it off as air bubbles escape. Once the bubbles stop, replace the cap securely, let the engine cool completely, and verify that the fluid level aligns with the cold fill marks on the reservoir. Inspect the repaired area one final time for any signs of fresh moisture.
Frequently Asked Questions (FAQ)
Can I use plain water instead of coolant in an emergency?
Using plain water is acceptable only in an absolute emergency to drive a short distance to a safe location or repair shop. Distilled water is preferred, but any clean water can prevent immediate overheating. However, water lacks the essential corrosion inhibitors, water pump lubricants, and boil-and-freeze protection provided by proper coolant. Running on plain water for extended periods will lead to internal rust, scale buildup, and potential boiling over. The system must be thoroughly flushed and refilled with the correct coolant mixture as soon as possible.
How do I know if my coolant reservoir cap is failing?
A failing coolant reservoir cap or radiator cap can cause slow, mysterious coolant loss and overheating. The cap contains a spring-loaded pressure valve designed to maintain system pressure, which raises the boiling point of the coolant. If the rubber seal is cracked, dry-rotted, or torn, or if the internal spring loses its tension, the cap will fail to hold pressure. Observable signs of failure include coolant boiling over into the expansion tank at normal operating temperatures, white crusty residue around the cap threads, or radiator hoses that collapse flat when the engine cools down.
Is it safe to use a chemical stop-leak additive for a radiator leak?
Chemical stop-leak additives should be approached with caution and viewed only as a temporary, emergency measure. While these products are formulated to seal small pinholes or hairline cracks, they cannot distinguish between a leak and the narrow passages inside your radiator or heater core. Using them carries a high risk of clogging these vital passages, which can restrict coolant flow, disable your cabin heater, and cause severe engine overheating. Always check the product label to ensure compatibility with your vehicle’s specific coolant type and materials, and plan for a proper mechanical replacement of the leaking component as the only reliable, permanent fix.
Community discussion
Share your experience or ask a question. Comments are reviewed before publication.