
Achieving a perfectly clear, streak-free windshield is essential for safe driving, especially when handling sudden tropical downpours or night glare. Sonax CleanStar is a highly effective glass cleaner designed to cut through tough road grime, insect residue, and interior haze. However, achieving professional-grade results depends entirely on proper dilution and application techniques. Using the incorrect water source, mixing an overly concentrated solution, or wiping the glass under direct sunlight will inevitably leave behind distracting streaks and oily residue.
By mastering the preparation, understanding the dilution principles, and executing a systematic two-towel wiping method, you can ensure optical clarity every time you clean your vehicle’s glass. This guide outlines the exact process to get the most out of your glass cleaner while protecting your vehicle’s sensitive trim and surfaces.
Essential Tools and Preparation for Auto Glass
Before spraying any cleaner onto your windshield, gathering the correct tools and establishing a controlled working environment is critical. Auto glass is highly sensitive to abrasive particles and temperature changes, meaning preparation directly dictates the success of your cleaning session.
Products mentioned in this guide
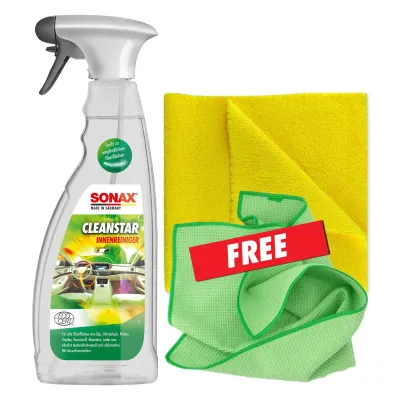
Prices are valid at publication and may change. Please refer to the product page for the latest price.
First, select the right cleaning media. Standard household paper towels or generic cloths often shed lint or contain rough fibers that can cause micro-scratches over time. Instead, prepare at least three to four high-quality microfiber towels. For glass cleaning, waffle-weave microfiber towels or specialized ultra-low-pile glass towels are highly recommended. These unique weaves feature deep channels designed to trap dirt, dust, and moisture away from the glass surface, preventing you from simply pushing the contamination around.
Next, secure a clean, dedicated spray bottle if you are mixing the solution from a concentrate. Residual chemicals from previous household cleaners can react with the glass cleaner, altering its chemical properties and leaving streaks. Pair this bottle with distilled water. Standard tap water contains dissolved minerals like calcium and magnesium. When tap water evaporates from the glass, these minerals remain behind, forming stubborn hard water spots that are incredibly difficult to remove. Distilled water is entirely free of these minerals, ensuring a completely clean evaporation process.
Environmental conditions also play a decisive role. In warm or tropical climates, such as Singapore, the ambient heat can rapidly warm your vehicle’s bodywork and glass. Never clean your windshield in direct sunlight or when the glass is hot to the touch. High temperatures cause the cleaning solution to flash-dry almost instantly upon contact. When the liquid evaporates too quickly, the active cleaning agents dry on the glass before you can wipe them away, resulting in severe streaking and dried chemical residue. Always work in a shaded area, a garage, or during the cooler morning or evening hours.
Finally, establish safety boundaries by reviewing the product label. While Sonax CleanStar is formulated to be highly compatible with automotive surfaces, you must verify its safety regarding surrounding materials. Check the manufacturer’s label instructions to ensure compatibility with your vehicle’s specific paint finish, rubber window seals, wiper cowls, and plastic trim. If the label advises caution or if you are working with sensitive aftermarket trim, use painters’ tape to mask off these adjacent areas before application to prevent overspray from causing discoloration or degradation.
How to Determine the Right Dilution Ratio
Diluting your glass cleaner correctly is a balancing act between cleaning power and residue prevention. Many car owners mistakenly believe that a stronger, more concentrated mixture will clean better. In reality, an over-concentrated glass cleaner is one of the most common causes of persistent smearing and haze.

The exact dilution ratio depends strictly on the specific Sonax CleanStar concentrate variant you have purchased and the manufacturer’s official label instructions. Because product formulations can change, always read the packaging directly rather than relying on generic dilution ratios found on internet forums. If the product is sold as a ready-to-use spray, do not dilute it further, as this will weaken the active ingredients below their effective threshold. If it is a concentrate, the label will typically provide a range of ratios tailored to different cleaning needs.
To mix the solution safely, always pour the distilled water into your clean spray bottle first, followed by the measured amount of Sonax CleanStar concentrate. Adding the water first prevents the concentrated cleaner from foaming up excessively inside the bottle, allowing for an accurate measurement.
Adjust your mixture within the manufacturer’s recommended limits based on the specific type and level of soil on the glass:
- Light Soil (Interior Glass & Dust): For interior windshield surfaces, which primarily suffer from light dust, fingerprint oils, and plastic outgassing film, a weaker dilution is highly effective. This lighter concentration ensures minimal chemical buildup on the inside of the car, where ventilation is limited.
- Heavy Soil (Exterior Grime & Road Film): For the exterior windshield, which is constantly exposed to road oils, exhaust soot, bug splatter, and tree sap, a slightly stronger mixture—up to the maximum limit specified on the product label—is necessary to break down tough organic binders.
Using too much concentrate leaves excess surfactant (soap) on the glass. When the water evaporates, this surplus surfactant remains as a microscopic film. The moment your windshield wipers sweep across the glass during a rainstorm, or when night headlights hit the windshield, this film manifests as a blinding white smear. Furthermore, soapy residues are highly static and will actively attract airborne dust, causing your windshield to get dirty again much faster. Stick strictly to the recommended dilution levels to maintain the cleaner’s engineered anti-streak properties.
Step-by-Step Wiping Technique for a Streak-Free Finish
With your tools prepared and your solution properly mixed, executing the correct physical wiping technique is the final step to achieving optical clarity. Following a structured, professional sequence prevents recontamination and ensures no spots are missed.
Pre-cleaning the Glass
Before applying your diluted Sonax CleanStar solution, inspect the windshield for loose, abrasive debris. Road grit, sand, and hard dirt particles can act like sandpaper if dragged across the glass with a microfiber towel. Always rinse the exterior windshield thoroughly with clean water, or gently wipe away loose dust with a damp, clean utility towel first. Once the abrasive particles are removed, you can safely proceed to the chemical cleaning phase.
Proper Application
When applying the diluted cleaner, moderation is key. Avoid heavily soaking the glass. A heavy spray will run down the windshield, pooling in the lower window seals, cowl plastic, or worse, dripping down the interior dashboard into sensitive electronic components and air vents. Instead, adjust your spray nozzle to deliver a fine, even mist. Lightly mist one half of the windshield at a time, ensuring complete coverage without excess runoff.
The Two-Towel Method
Professional detailers rely on the two-towel method to eliminate streaks entirely. This technique separates the cleaning process from the final buffing process:
- Towel One (The Cleaning Towel): Take your first clean microfiber towel and fold it into quarters. Use this towel to spread the misted Sonax CleanStar across the glass. Apply light to moderate pressure to agitate and lift the road film, grease, and dirt. The moisture in the towel works with the cleaner to suspend the grime.
- Towel Two (The Buffing Towel): Immediately swap to your second, completely dry, clean microfiber towel. Do not wait for the remaining moisture on the glass to air-dry. Use this dry towel to buff the glass surface. This towel absorbs the remaining liquid along with any suspended dirt, leaving the glass completely dry and residue-free.
Structured Wiping Patterns
Avoid wiping in random, circular motions. Circular wiping simply redistributes the lifted dirt in circles and makes it difficult to identify where a streak has occurred. Instead, use a structured cross-hatch pattern. Wipe the exterior glass horizontally from side to side, overlapping each pass by about fifty percent. For the interior glass, wipe vertically from top to bottom. By using horizontal strokes on the outside and vertical strokes on the inside, you can instantly tell which side of the glass a streak or smudge is on just by looking at its direction.
Interior vs. Exterior Considerations
Cleaning the interior windshield requires extra care. To prevent overspray from landing on your dashboard, leather trim, or steering wheel, do not spray the cleaner directly onto the interior glass. Instead, spray a fine mist of the diluted Sonax CleanStar directly onto your first microfiber towel, then apply it to the glass. This controlled method protects your car’s interior electronics and sensitive materials from chemical exposure.
Troubleshooting Streaks, Haze, and Residue
If you finish cleaning and still notice streaks, haze, or a cloudy residue when looking through the windshield, do not panic. These issues are common but easily diagnosable and correctable.
The primary culprits behind post-cleaning streaks include:
- Saturated or Dirty Towels: If your buffing towel has absorbed too much moisture or dirt from previous sections, it will deposit film back onto the glass rather than removing it.
- Rapid Evaporation: Working in direct sunlight or on a warm windshield causes the cleaner to dry before it can be buffed off.
- Mineral Contamination: Using tap water instead of distilled water for dilution leaves microscopic mineral rings.
- Over-concentration: Excess product residue remains on the glass surface.
To resolve these issues, take a fresh, completely dry, clean microfiber glass towel. Lightly mist a tiny amount of distilled water (without any cleaner) onto the glass, or use a completely dry towel to buff the affected area in a firm, circular motion. This friction helps break up any remaining surfactant haze or light mineral deposits, restoring a clear finish.
However, you must establish a stopping condition. If a persistent haze, rainbow sheen, or scratch-like pattern remains after thorough cleaning and buffing with clean towels, the issue is likely not surface dirt. It may be due to deep glass etching from acid rain, degraded wiper blade rubber transferring silicone oils, or a failing aftermarket window tint on the interior. In these scenarios, continuing to scrub with glass cleaner will not resolve the issue. You should seek a professional glass restoration service or consult a detailing specialist to assess whether the glass requires machine polishing or replacement.
Frequently Asked Questions (FAQ)
Can I use Sonax CleanStar on the inside of the windshield?
Yes, but you must verify safety on your specific product label first. While Sonax CleanStar is generally safe for automotive glass, interior application requires extra caution. Avoid spraying the product directly onto the glass to prevent overspray from contacting dashboards, leather, or electronic displays. Instead, spray the cleaner onto a microfiber towel first. If your vehicle has aftermarket window tint installed, check the product label to ensure it is ammonia-free and safe for tinted films, as strong chemical degreasers can degrade tint adhesives or cause discoloration.
Why does my windshield smear when I use my wipers after cleaning?
If your windshield is perfectly clean but smears the moment you turn on your wipers, the issue is almost certainly not the glass cleaner. Over time, wiper blades accumulate road grime, oil, and environmental fallout, or the rubber itself degrades and hardens. When the wipers sweep across clean glass, they drag these contaminants across the surface, creating a smear.
To fix this, inspect your wiper blades. Clean the rubber squeegee edge using a damp microfiber towel and a small amount of diluted glass cleaner. If the rubber is cracked, torn, or stiff, replace the wiper blades immediately to prevent poor visibility and potential scratching of your newly cleaned windshield. Also, ensure your wiper fluid reservoir is filled with clean, high-quality fluid rather than plain tap water, which can reintroduce minerals to the glass.
Community discussion
Share your experience or ask a question. Comments are reviewed before publication.