
To keep your car wash mop in excellent condition and protect your vehicle’s paintwork from scratches, you must thoroughly clean, dry, and store the mop head after every single use. A dirty mop head retains abrasive grit, sand, and road grime that act like sandpaper during your next wash, leading to unsightly swirl marks and clear coat damage. Furthermore, leaving a damp mop in a poorly ventilated space encourages the growth of mold, mildew, and bacteria, which degrade the fibers and produce foul odors. By establishing a disciplined maintenance routine, you preserve the softness and absorbency of the fibers while extending the overall lifespan of your detailing equipment.
Prepare the Right Cleaning Supplies
Before cleaning your car wash mop, identify its specific material by checking the manufacturer’s care label. Most modern detailing mops feature microfiber, chenille “noodles,” or synthetic fibers, each requiring gentle handling to maintain their paint-safe properties. Avoid using harsh household chemicals such as chlorine bleach or laundry detergents containing fabric softeners. Bleach chemically degrades synthetic polymers, causing the fibers to become brittle and shed, while fabric softeners leave a microscopic coating that clogs the fibers and severely reduces their water absorbency.
Instead, gather a dedicated wash bucket, clean water, and a mild cleaning agent. A dedicated microfiber restorer solution is ideal, as it is formulated to release stubborn automotive waxes, polishes, and oils without leaving behind residues. If a specialized cleaner is unavailable, a mild, additive-free liquid laundry detergent or a gentle car wash shampoo will suffice. Keeping these supplies separate from your household cleaning items ensures your car care tools remain free from cross-contamination.
Products mentioned in this guide




![[SG] Car Wash Mop ✨ Car Shampoo Window Cleaner Car Cloth Car Brush Car Mop](https://img.lazcdn.com/g/p/32f40ca9edbe236ae444a08011af58d0.png_400x400q80.png_.webp)
![[SG SELLER] Car wash mop chenille three-section telescopic special brush soft hair cleaning car washing tool Extendable Pole](https://img.lazcdn.com/g/p/152fda19162c3ab77eddec33adb083ca.png_400x400q80.png_.webp)
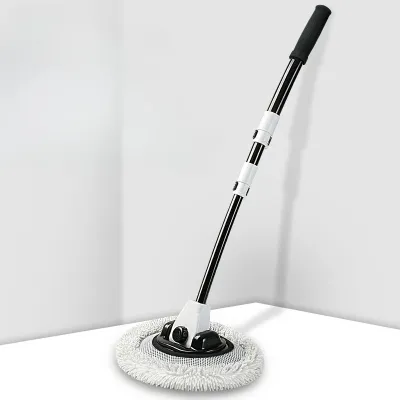
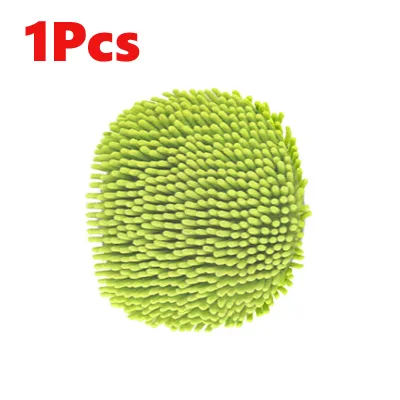
Prices are valid at publication and may change. Please refer to the product page for the latest price.
Step-by-Step Routine for Washing the Mop Head
Begin the cleaning process with a thorough pre-rinse under a strong stream of running water. Use a garden hose or a utility sink tap to flush away loose dirt, sand, and surface debris from the outer layers of the mop. This initial rinse is crucial because it removes large, abrasive particles before you agitate the fibers, minimizing the risk of grinding grit deeper into the material.

Next, submerge the mop head in your prepared bucket of lukewarm water and cleaning solution. If the mop head is detachable, remove it from the plastic or metal frame to access the inner pockets, elastic bands, and backing material where dirt often hides. Gently massage and agitate the fibers by hand, working the soapy water through the material to loosen embedded road film, grease, and brake dust.
For heavily soiled mops, allow the head to soak in the cleaning solution for ten to fifteen minutes. This soaking period gives the surfactants in the soap enough time to break down stubborn oily binders that hold dirt to the synthetic strands. After soaking, agitate the material one final time to ensure all contaminants are dislodged from the core.
Rinse the mop head thoroughly under clean, running water, squeezing the fibers gently to flush out all soap residue. Continue rinsing until the runoff water is completely clear and no soap bubbles appear when you compress the material. Residual soap left within the fibers can dry into a stiff, tacky film that attracts dirt and causes streaks on your vehicle’s paint during subsequent uses.
Conclude the washing phase with a meticulous visual and tactile inspection. Spread the fibers apart under a bright light and run your fingers through the strands to feel for any trapped grit, pine needles, or tar spots. If you detect any hard particles, pick them out individually or repeat the washing process, as even a single overlooked grain of sand can cause deep scratches on your vehicle’s clear coat.
Proper Drying Techniques to Prevent Mold and Odors
After rinsing, gently press the excess water out of the mop head, working from the base of the attachment pocket down to the tips of the fibers. Avoid twisting, wringing, or pulling the material forcefully, as these actions can tear delicate stitching, stretch out elastic bands, or break the synthetic fibers. Gentle compression is all that is required to prepare the mop for the drying phase.
Air drying is the safest and most reliable method to dry your car wash mop. Hang the mop head in a well-ventilated indoor area or a shaded outdoor spot that receives plenty of natural airflow. Do not expose the mop to direct, intense sunlight or place it near high-heat sources like radiators or space heaters. Excessive heat can melt or warp synthetic fibers, causing them to shrink, harden, and lose their paint-safe softness.
In highly humid climates, such as Singapore, drying can take significantly longer, which increases the risk of mildew and bacterial growth. To accelerate the drying process safely, place the hanging mop near an electric fan or a dehumidifier to maintain constant air circulation. This active airflow helps evaporate moisture from the dense inner layers before mold has a chance to colonize the material.
Before moving the mop to its storage location, verify that every part of the assembly is completely dry. Feel the thickest sections of the mop head, including the inner foam core, the backing fabric, and the attachment pockets. Even if the outer fibers feel dry to the touch, any moisture trapped deep within the core can lead to internal mold growth, sour odors, and fiber rot over time.
Storing Your Mop to Maintain Its Shape and Cleanliness
Proper storage protects your clean car wash mop from airborne dust, pests, and physical damage. The most effective storage method is to hang the mop vertically by its handle using a wall-mounted tool organizer or a utility hook. Hanging the tool keeps the mop head suspended in the air, allowing continuous ventilation and preventing the fibers from becoming flattened or misshapen under the weight of the handle.
Never rest the mop head directly on the floor of a garage, shed, or utility closet. Concrete and wooden floors can transfer moisture, dirt, and insects directly into the clean fibers, ruining your cleaning efforts and introducing abrasive contaminants. Additionally, avoid leaving the mop head inside an enclosed, unventilated space, such as a sealed plastic bucket or a damp storage chest, which traps stagnant air and moisture.
If you store your detailing gear in a dusty garage or the trunk of your vehicle, protect the dry mop head with a breathable storage cover. A clean, lightweight mesh laundry bag or a simple cotton pillowcase works perfectly for this purpose. These breathable covers shield the fibers from settling dust and debris while still allowing any trace moisture to escape safely.
Signs It Is Time to Replace Your Car Wash Mop
Despite meticulous care, all car wash mops eventually wear out and must be replaced to ensure they remain safe for automotive paintwork. Regularly inspect the mop head for matted, tangled, or flattened fibers that do not return to their plush state after washing. Matted fibers lose their ability to lift and trap dirt, meaning they will drag contaminants across your vehicle’s surface instead of safely encapsulating them.
Shedding is another clear indicator of material degradation. If you notice synthetic strands or chenille loops falling off during washing or use, the fibers are breaking down and can no longer provide safe, uniform coverage. Using a shedding mop can also leave unsightly lint and debris all over your freshly washed vehicle.
Pay close attention to persistent musty or sour odors that survive a thorough washing and drying cycle. If a mop head continues to smell like mildew, bacteria or mold have colonized the inner foam core or backing material, making it unsafe for continued use. Finally, inspect the structural components, including the telescoping handle, locking joints, and mounting base, for cracks, rust, or loose fittings. A failing joint or cracked base can collapse during use, causing the hard plastic or metal frame to strike and damage your vehicle’s bodywork.
Frequently Asked Questions (FAQ)
Can I wash my car wash mop in a washing machine?
You can wash many detachable car wash mop heads in a washing machine, but you must check the manufacturer’s care label first to confirm compatibility. If machine washing is permitted, use a gentle cycle with cold or lukewarm water and a mild, liquid detergent free of dyes, perfumes, or fabric softeners. Wash the mop head separately or only with other microfiber car care towels to prevent lint transfer from cotton clothing or household linens. Never put the mop head in a machine dryer unless the manufacturer explicitly states it is safe on a no-heat air-fluff setting, as the high heat of a standard dryer cycle can easily melt synthetic fibers and ruin their softness.
How often should I deep clean my car wash mop?
You should perform a basic rinse and light wash after every single use, but a thorough deep clean is recommended every five to ten washes, depending on how dirty your vehicle was. A deep clean involves soaking the mop head in a specialized microfiber restorer or a mild vinegar solution to strip away accumulated wax residues, road oils, and mineral deposits. Additionally, if you ever accidentally drop the mop head on the ground during a car wash, stop using it immediately and perform a comprehensive deep clean to ensure no abrasive stones or dirt particles remain trapped in the fibers before it touches your paint again.
Community discussion
Share your experience or ask a question. Comments are reviewed before publication.