
Proper motorcycle chain maintenance at home is one of the most effective ways to preserve your bike’s performance, ensure a smooth ride, and prevent costly drivetrain repairs. By systematically removing abrasive road grime and applying a high-quality chain lube and cleaner, you protect the critical components that transfer power from your engine to the rear wheel. This straightforward task requires only a few basic tools, the correct chemical products, and a safe, methodical approach.
Neglecting this essential routine can lead to rapid wear of both your chain and sprockets, resulting in rough gear shifts, power loss, and potentially dangerous mechanical failures. For riders looking to maintain their motorcycles in peak condition, understanding the nuances of chain design and chemical compatibility is the first step toward successful home maintenance.
Why Proper Chain Maintenance Extends Drivetrain Life
A motorcycle’s chain drive is the critical link in its powertrain, responsible for transferring kinetic energy from the engine’s output shaft to the rear wheel. This system operates under extreme tension, high rotational speeds, and constant exposure to environmental elements. Because the chain is completely exposed on most motorcycles, it acts as a magnet for road debris, dust, and moisture, all of which can quickly degrade its components if left unchecked.
Products mentioned in this guide
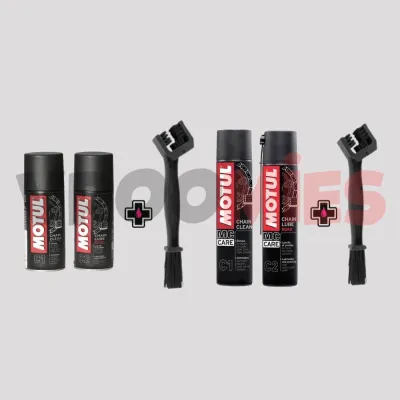
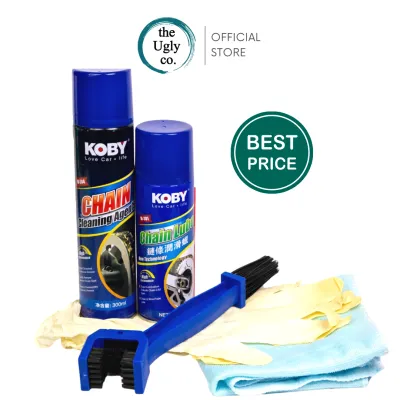
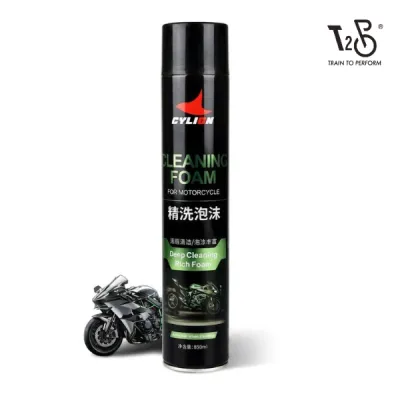
Prices are valid at publication and may change. Please refer to the product page for the latest price.
In Singapore’s tropical climate, chain maintenance becomes even more critical. The region’s characteristically high relative humidity, which frequently exceeds 80 percent, combines with sudden, heavy downpours to create a highly corrosive environment for exposed metal. Rainwater washes away protective lubricants, while road spray deposits an abrasive mixture of fine sand, dirt, and engine oil residue onto the links. Without a consistent maintenance routine, this mixture forms a grinding paste that rapidly accelerates wear on the chain’s rollers, pins, and sprocket teeth.
Regularly cleaning and lubricating your chain provides substantial safety and performance benefits. A well-maintained chain ensures smoother, more predictable power delivery, reducing driveline snatch and improving throttle response. It also prevents the chain from stretching unevenly or developing tight spots, which can cause vibrations and accelerate wear on the gearbox output shaft bearing. Most importantly, proper maintenance minimizes the risk of catastrophic chain failure—such as a snapped chain locking up the rear wheel or punching through the engine casing—ensuring a safer ride on busy expressways like the PIE or CTE.
Essential Tools and Compatible Cleaners for Your Chain Type
Before starting your chain maintenance, it is essential to gather the correct tools and understand the specific design of your motorcycle’s chain. Using incompatible chemicals or incorrect tools can cause permanent damage to the chain’s internal structure, leading to premature failure.

Selecting O-Ring Safe Cleaners and Lubricants
Modern motorcycles typically use sealed chains, which include O-ring, X-ring, or Z-ring designs. These chains feature tiny rubber seals sandwiched between the inner and outer link plates. The purpose of these seals is to lock in a highly specialized factory grease around the internal pins and bushings while keeping dirt and water out. In contrast, standard unsealed chains lack these rubber rings and rely entirely on external lubrication to protect their moving parts.
Because sealed chains rely on delicate rubber components, you must be extremely careful when choosing chemical cleaners and lubricants. Standard solvents like petrol, paint thinners, or harsh industrial degreasers can cause the rubber seals to swell, crack, or dissolve completely. Once these seals are compromised, the internal factory grease escapes, and water and grit enter, causing rapid internal wear that cannot be corrected by external lubrication.
Always consult your motorcycle owner’s manual to verify the manufacturer’s recommended solvents and lubricants for your specific model. When shopping for maintenance products, look for a dedicated chain lube and cleaner kit that is explicitly labeled as safe for O-ring, X-ring, and Z-ring chains. These specialized formulas are engineered to dissolve stubborn road grime and old grease without degrading the synthetic rubber compounds used in modern chain seals.
Must-Have Brushes, Stands, and Protective Gear
Having the right physical tools on hand makes the maintenance process cleaner, safer, and far more efficient. Personal protective equipment is highly recommended; wearing nitrile gloves protects your skin from harsh solvents and stubborn black grease, while safety glasses shield your eyes from accidental chemical splashes or flying debris during the cleaning process.
A dedicated chain cleaning brush is an invaluable tool for this job. These brushes typically feature a three-sided bristle design that allows you to clean the top, bottom, and sides of the chain simultaneously, significantly reducing scrubbing time. If a dedicated brush is unavailable, a soft-bristled nylon brush, such as an old toothbrush, is an excellent alternative. Avoid using wire brushes or brass-bristled brushes, as their stiff metal bristles can easily tear or puncture the delicate rubber seals.
To clean and lubricate the chain effectively, you must be able to rotate the rear wheel freely. Elevating the rear wheel using a rear paddock stand or your motorcycle’s built-in center stand is essential. Attempting to roll the motorcycle back and forth along a driveway to access different sections of the chain is inefficient and increases the risk of tipping the bike over.
Finally, prepare your work area to manage chemical runoff and overspray. Place a large piece of thick cardboard, a plastic drip tray, or several layers of old newspaper directly beneath the lower run of the chain and the rear swingarm. This simple step protects your garage floor or HDB multi-storey car park deck from permanent grease stains and chemical runoff, making cleanup quick and hassle-free.
Step-by-Step Process with Your Chain Lube and Cleaner
Cleaning your motorcycle chain is a systematic process that requires patience and attention to detail. By following these structured steps, you can safely remove accumulated road grit and old, contaminated grease without damaging the chain’s delicate internal seals.
Preparation: Begin by parking your motorcycle on a flat, level surface. Secure the bike on its center stand or a rear paddock stand so that the rear wheel is completely off the ground and can spin freely. Before touching the chain, ensure that the motorcycle’s engine is completely turned off, the transmission is shifted into neutral, and the ignition key is removed. This eliminates any risk of accidental engine startup, which could lead to severe, life-altering injuries.
Application: Position yourself near the lower run of the chain, behind the footpegs. Shake your dedicated chain cleaner spray can thoroughly to mix the active ingredients. Hold the nozzle a few inches away from the chain and apply a generous coat of cleaner to the lower run, focusing on the inner and outer plates. Slowly rotate the rear wheel backward by hand to expose new sections of the chain, repeating the process until the entire length is thoroughly coated. Allow the cleaner to sit on the chain for the exact duration specified on the product label—typically two to five minutes—to give the solvents time to break down the hardened grease and road grime.
Scrubbing: Once the cleaner has softened the grime, take your chain cleaning brush and gently agitate the dirt on all four sides of the chain. Pay close attention to the rollers (the center cylinders) and the gaps between the inner and outer side plates where dirt and grit tend to pack in tightly. Use moderate, even pressure; scrubbing too aggressively with a stiff brush can pinch or displace the rubber O-rings, compromising their sealing ability.
Wiping and Rinsing: Use a clean, lint-free cotton rag or microfiber towel to wipe away the dissolved grime, dirty solvent, and loose debris. If your specific chain cleaner is water-soluble and requires rinsing, use a very gentle stream of water from a garden hose or a hand spray bottle to wash away the residue. Never use a high-pressure washer or a pressure washer nozzle at a car wash; the high-velocity water jet can easily force water, soap, and abrasive grit past the rubber seals, trapping moisture inside the internal pins where it will cause rapid, hidden rust.
Drying: Before applying any fresh lubricant, the chain must be completely dry. Use a clean, dry microfiber towel to thoroughly wipe down every link, removing any remaining moisture or solvent. If you have access to low-pressure compressed air, you can use it to blow moisture out of the tight gaps between the plates. Allowing the chain to air-dry for an additional 10 to 15 minutes is highly recommended, as any remaining solvent on the metal will break down your fresh lubricant, preventing it from adhering to the chain.
How to Apply Chain Lube for Maximum Penetration and Minimum Fling
Applying chain lubricant is not just about coating the metal; it is about delivering protection to the precise friction points where metal meets metal and metal meets rubber. Correct application ensures maximum durability while preventing the lubricant from slinging off onto your bike’s bodywork or rear tire.
Timing: Always apply lubricant to a chain that is completely dry and free of cleaning solvents. The ideal time to lubricate your chain is immediately after a short ride when the chain is slightly warm to the touch. The heat generated by riding causes the metal components to expand slightly and lowers the viscosity of the incoming lubricant, allowing it to flow more deeply into the rollers, bushings, and rubber seals. If you are doing this after cleaning, let the bike sit or take a very brief, gentle ride to warm the chain before application.
Application Technique: Shake your chain lube spray can vigorously for at least 30 seconds. Aim the spray nozzle at the inside of the lower chain run—this is the side of the chain that directly contacts the teeth of the front and rear sprockets. As you slowly rotate the rear wheel backward by hand, apply a steady, controlled spray along the entire length of the chain. By applying the lubricant to the inside run, centrifugal force will naturally push the lubricant outward into the internal rollers and pins as you ride, rather than flinging it off the chain immediately.
Target Areas: Focus your spray on the critical areas where friction occurs: the two rows of rubber seals (where the inner and outer plates meet) and the center rollers. You do not need to heavily coat the flat outer faces of the side plates; a very light wipe is sufficient to prevent surface rust. Excess lubricant on the outer plates serves no mechanical purpose and will only act as a magnet for road dust and grit, quickly turning into an abrasive paste.
Curing: After applying the lubricant, use a clean rag to gently wipe away any excess product from the outer side plates and the swingarm. Allow the lubricant to set and cure for the time recommended by the manufacturer—typically 15 to 30 minutes, though leaving it overnight is highly recommended. This curing period allows the carrier solvents in the spray to evaporate completely, leaving behind a highly tacky, protective film that resists flinging off onto your rear wheel, swingarm, or brake rotors when you ride.
Critical Safety Warnings and Mistakes That Destroy O-Rings
While cleaning and lubricating your motorcycle chain is a straightforward DIY task, it carries significant safety risks if proper precautions are ignored. Understanding these boundaries protects both your physical safety and your motorcycle’s mechanical integrity.
Safety Warning: The most critical safety rule of chain maintenance is to never run the engine and put the motorcycle in gear while cleaning or lubricating the chain. Attempting to let the idling engine spin the rear wheel to speed up the process is an extremely dangerous practice that has resulted in countless severe finger injuries, lacerations, and amputations. Always turn the engine off, remove the key, and rotate the rear wheel manually by hand. Keep your hands, loose clothing, and cleaning rags well clear of the sprocket teeth and the chain pinch points at all times.
Product Mistakes: Avoid using unverified household chemicals or aggressive solvents on your chain. Products such as petrol, diesel, kerosene (unless explicitly recommended by your chain manufacturer), acetone, paint thinners, or standard multi-purpose penetrating sprays should not be used on sealed chains. These harsh chemicals can quickly degrade, swell, or dissolve the delicate rubber O-rings or X-rings, leading to premature seal failure and rapid chain wear.
Tool Mistakes: Never use wire brushes, steel wool, or abrasive kitchen scouring pads to clean your chain. These abrasive materials will physically score the metal surfaces of the links, creating microscopic grooves where rust can easily take hold. More importantly, they can easily tear, puncture, or displace the rubber seals, allowing the critical internal grease to escape and abrasive road grit to enter.
Stop Condition: Chain maintenance can only do so much to extend the life of a worn-out drivetrain. If during your inspection you notice severe, deep rust pitting, seized or kinked links that remain stiff even after thorough cleaning and lubrication, or uneven chain stretching (where the chain tension noticeably changes as you rotate the wheel), stop riding. These are clear indicators of a worn-out chain that has reached the end of its service life. Continuing to ride on a compromised chain poses a severe safety risk, as it can snap under load or derail from the sprockets, potentially locking up the rear wheel. In these situations, consult a qualified motorcycle mechanic to have the chain and sprockets replaced as a set.
Post-Maintenance Verification and Chain Tension Checks
After completing the cleaning and lubrication process, performing a final verification ensures that your motorcycle is safe, roadworthy, and ready for your next ride.
Visual Inspection: Conduct a thorough visual check of the entire chain run. Verify that the rollers and rubber seals have an even, light coating of lubricant without any dry spots. Carefully inspect your rear tire tread, wheel rim, and brake rotors to ensure no cleaning solvent or chain lubricant has accidentally oversprayed onto them. If you detect any oily residue on your braking surfaces or tire tread, clean it off immediately using a dedicated brake cleaner and a clean rag, as any contamination can severely compromise your braking performance and traction.
Tension Check: A clean chain provides the ideal opportunity to check your chain tension. Refer to your motorcycle owner’s manual for the exact slack specification, which is typically measured on the lower run of the chain, midway between the front and rear sprockets. For most street motorcycles, the recommended slack ranges between 20mm and 30mm, though this can vary depending on the model. If the slack is outside the manufacturer’s specified range, loosen the rear axle nut and use the swingarm adjustment bolts to correct the tension, ensuring the rear wheel remains perfectly aligned. Once adjusted, torque the axle nut to the manufacturer’s specified torque setting.
Test Ride: Before embarking on a long journey, take your motorcycle for a short, low-speed test ride around your neighborhood. Listen closely for any unusual clicking, whining, or grinding noises coming from the drivetrain, which could indicate a misaligned wheel or incorrect chain tension. After returning, perform a quick visual check to ensure the lubricant has cured properly and is not flinging off onto your bike’s bodywork or rear tire.
Frequently Asked Questions (FAQ)
How often should I clean and lube my motorcycle chain?
As a general rule of thumb, most motorcycle manufacturers recommend cleaning and lubricating your chain every 500 to 800 kilometers. However, your specific riding environment plays a significant role in determining this frequency. In Singapore, where heavy tropical downpours, high humidity, and standing water are common, you may need to perform this maintenance more frequently—especially after riding through heavy rain. Make it a habit to perform a quick visual inspection of your chain before every ride; if the rollers look dry, shiny, or show signs of surface rust, it is time for maintenance.
Can I use standard multi-purpose penetrating oils to clean an O-ring chain?
No, you should not use standard multi-purpose penetrating oils or household degreasers to clean a sealed motorcycle chain. These products are often formulated with highly active solvents designed to break down rust and grease, but they can easily penetrate, swell, or dissolve the delicate rubber O-rings or X-rings. Once the rubber seals are compromised, the critical factory grease packed inside the chain will wash away, leading to rapid, irreversible wear. Always use a dedicated motorcycle chain cleaner that is explicitly certified as safe for sealed chains.
Community discussion
Share your experience or ask a question. Comments are reviewed before publication.