
Selecting the right parking camera system involves matching your vehicle’s physical dimensions, your daily driving environment, and the technical specifications of the hardware to your specific safety requirements. In tight urban environments, such as multi-storey car parks with narrow ramps and compact lots, a reliable camera system acts as an essential second set of eyes. To find the ideal setup, you must evaluate key factors: lens angles, sensor resolutions, display configurations, and installation compatibility.
This guide provides a structured decision framework to help you navigate these specifications. By understanding how different camera features address specific parking challenges, you can select a system that enhances safety and fits your vehicle seamlessly.
Quick Guide: Matching VSYS Camera Features to Your Parking Scenario
Different driving environments present unique hazards that require specific camera capabilities. Matching your primary parking challenges to the correct hardware features ensures you get the most utility out of your system.
Products mentioned in this guide
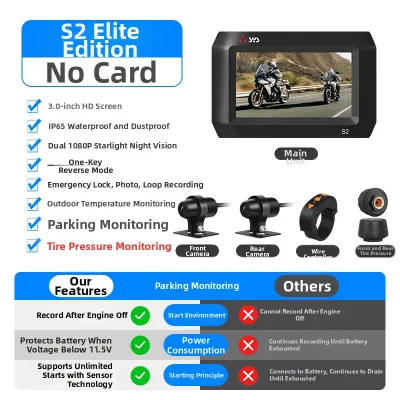
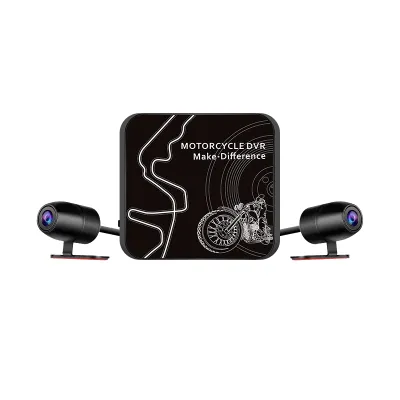
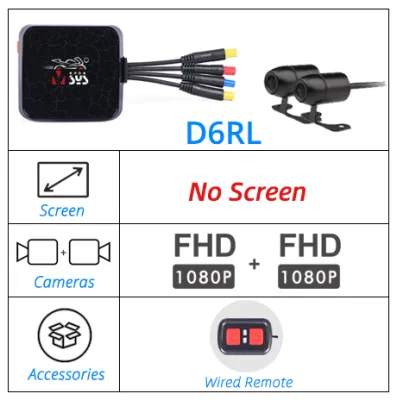
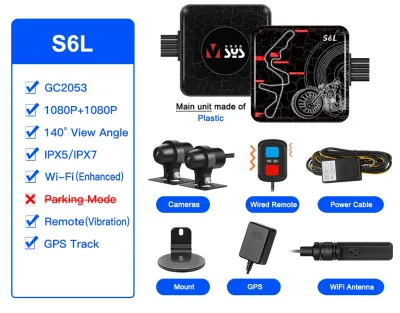
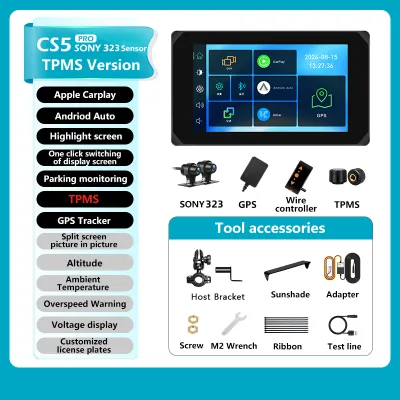
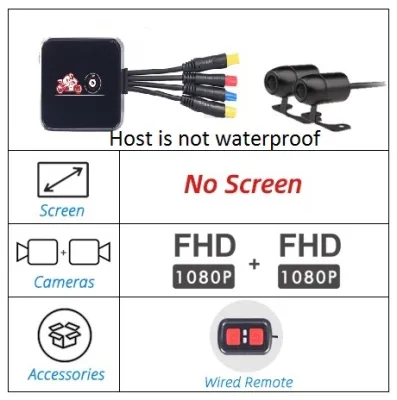
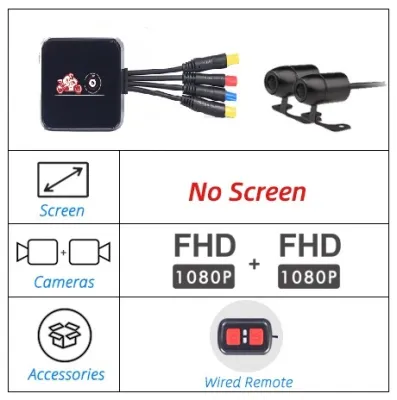
Prices are valid at publication and may change. Please refer to the product page for the latest price.
- Tight Urban Parking and Multi-Storey Car Parks: Narrow concrete pillars, tight corners, and highly restricted clearance require wide-angle lenses (typically 120 to 170 degrees) combined with dynamic trajectory lines. Dynamic lines project your vehicle's path based on steering input, helping you avoid scraping wheels or bumpers against low curbs.
- Low-Light, Basement, or Night Parking: Dimly lit basement car parks or unlit side streets make obstacles hard to spot. To counter this, look for low-lux image sensors, infrared (IR) LEDs, or high-sensitivity night vision technology. These features amplify minimal ambient light to deliver a clear image on your dashboard monitor.
- Blind-Spot Monitoring and Multi-Lane Merging: Large blind spots along the sides of longer vehicles present risks during lane changes or tight maneuvers. Dual-lens or multi-channel camera configurations provide a comprehensive view of areas that standard mirrors miss, with secondary cameras placed on side mirrors or rear corners.
Essential Specifications to Evaluate in VSYS Parking Cameras
Before purchasing any camera system, you must verify the technical specifications on the product labels or spec sheets to ensure they meet your operational needs.

Field of View (FOV) and Lens Angle
The field of view determines how much of the area behind or around your vehicle is visible on the screen. A wider FOV (such as 150 to 170 degrees diagonally) captures more of the surrounding environment, which is highly beneficial for detecting pedestrians or cross-traffic approaching from the sides. However, extremely wide angles can cause a “fisheye” effect, distorting distance perception and making objects appear further away than they actually are.
A narrower FOV (such as 110 to 120 degrees) offers a more realistic sense of distance, making it easier to judge how close you are to a wall or another parked car. You must choose a balance based on whether you prioritize side clearance or rear distance accuracy.
Resolution and Sensor Type
High-definition resolutions, such as 720p or 1080p AHD (Analog High Definition), ensure that small obstacles, low curbs, and license plates are clearly visible. Standard definition systems (such as CVBS) may save on cost but often lack the clarity needed to distinguish fine details in low-contrast environments.
Complementing resolution is the sensor type. Modern high-sensitivity CMOS (Complementary Metal-Oxide-Semiconductor) sensors are highly efficient, offer fast frame rates, and provide excellent low-light performance that matches or exceeds older CCD (Charge-Coupled Device) technology in automotive applications.
IP Ratings for Weather Resistance
Exterior-mounted cameras are constantly exposed to harsh environmental conditions, including heavy tropical downpours, high humidity, and road grime. The Ingress Protection (IP) rating indicates how well the camera housing prevents water and dust from damaging the internal electronics.
Look for an IP rating of at least IP67, which certifies protection against dust ingress and temporary immersion in water. For maximum durability against high-pressure car washes and severe rainstorms, an IP68 or IP69K rating is highly recommended to prevent internal condensation and lens fogging over time.
Monitor Size, Brightness, and Display Capabilities
The dashboard display must be easily readable under direct sunlight. High-brightness monitors (measured in nits) prevent glare from washing out the screen during bright midday driving. IPS (In-Plane Switching) panels offer wider viewing angles compared to standard TFT screens, ensuring the image remains clear even if the monitor is mounted at an angle.
If you use a multi-camera setup, ensure the monitor supports split-screen or picture-in-picture modes. This allows you to view multiple angles simultaneously without cluttering your dashboard with multiple screens.
Selecting the Right Setup Based on Your Vehicle Type
Vehicle dimensions—specifically length, height, and rear overhang—directly dictate where you should mount your camera and which lens configuration is most effective. Dashboard space is another critical constraint; a massive monitor might block forward visibility in a compact car, while a tiny screen is useless in a large commercial van.
Compact Cars and Sedans
These vehicles typically have a short rear overhang and a lower ride height. A standard single-lens rearview camera mounted near the license plate is usually sufficient to cover the immediate rear area.
- Mounting and Placement: The camera is typically mounted just above the license plate, angled slightly downward to capture the rear bumper and the ground immediately behind it.
- Monitor Integration: A compact 4.3-inch to 5-inch display, or a clip-on rearview mirror monitor, integrates cleanly without disrupting the dashboard layout or blocking the driver's forward view.
- Limitations: While this setup covers the immediate rear area, it does not address side blind spots. If you frequently navigate tight parallel lots, upgrading to a system with side-view cameras or active parking guidelines is worth considering.
SUVs, Vans, and Commercial Vehicles
Larger vehicles suffer from significant blind spots directly behind the tailgate or rear doors, as well as along the sides. A dual-lens or multi-channel system is highly beneficial here.
- Mounting and Placement: Mounting a camera high up on the roofline or rear spoiler, tilted downward, provides an excellent view of the bumper area, which is crucial for hitching trailers or parking close to walls. A second camera can be mounted lower down for standard rearview coverage.
- Cabling and Hardware: These setups require longer, heavier-duty extension cables (often shielded to prevent signal degradation over long distances) and robust mounting brackets that can withstand vibrations from commercial use.
- Monitor Integration: Larger dashboards can easily accommodate 7-inch to 9-inch monitors, which are ideal for displaying split-screen feeds from multiple cameras simultaneously.
Pre-Purchase Compatibility and Installation Checks
Before finalizing your purchase, you must verify that the camera system is compatible with your vehicle’s electrical architecture and physical layout.
Electrical Compatibility and CAN Bus Systems
Many modern vehicles use a CAN bus (Controller Area Network) system to monitor electrical components, including the reverse lights. Tapping directly into the reverse light wiring to power your camera can cause voltage fluctuations, screen flickering, or dashboard error codes because the system detects an unexpected change in electrical resistance.
To prevent this, you may need a power relay or a CAN bus filter. These devices draw stable power directly from the battery or fuse box, using the reverse light wire only as a low-current trigger signal to turn the camera on.
Power Source and Dashboard Space
Decide between a simple cigarette lighter power adapter or a hardwired installation. Hardwiring keeps your cabin clutter-free and frees up power sockets, but it requires routing wires through the vehicle’s trim panels to the fuse box.
Ensure you have a clear, flat mounting surface on your dashboard or windshield that does not obstruct your forward view or interfere with airbag deployment zones. Always check local road safety regulations regarding dashboard obstructions.
Safety and Professional Installation
Working with automotive electrical systems carries inherent risks, including short circuits, blown fuses, or damage to sensitive electronic control units (ECUs). If your installation requires removing interior door panels, routing cables through weather-sealed rubber grommets, or tapping into complex fuse boxes, it is highly recommended to consult a qualified automotive electrician.
Always refer to your vehicle’s original manufacturer manual before making any modifications to the wiring harness. Ensure all aftermarket wiring is properly fused, insulated, and secured away from moving parts or heat sources.
Frequently Asked Questions (FAQ)
Do VSYS cameras work with factory-installed infotainment screens?
Aftermarket cameras typically output standard analog video signals (like CVBS or AHD) via RCA connectors, whereas factory infotainment screens often use proprietary connectors and digital signals. To bridge this gap, you will need a vehicle-specific video input adapter or an RCA-to-OEM wiring harness designed for your exact vehicle make, model, and year.
Additionally, you must verify that the camera’s signal format (NTSC or PAL) and resolution match what your factory screen can accept. If integration is too complex or costly, using a standalone monitor included with the camera kit is often the most reliable and straightforward solution.
How do I clean and maintain the exterior camera lens?
Exterior lenses accumulate road grime, dust, and water spots, which degrade image quality. To clean the lens safely, use a clean, soft microfiber cloth and a mild, non-abrasive automotive glass cleaner or soapy water. Never use dry paper towels, rough cloths, or harsh household chemical cleaners, as these can scratch the delicate protective coatings on the lens.
Avoid directing high-pressure water sprays from car washes directly at the camera housing, as the intense pressure can breach the rubber seals, leading to internal moisture ingress and permanent fogging. If you notice persistent condensation inside the lens, the seal has likely failed, and the camera module may need replacement.
What should I do if the camera display flickers when reversing?
Flickering is usually caused by an unstable power supply or signal interference. First, inspect the power connection at the reverse light or fuse box. Ensure the ground wire is securely fastened to a clean, unpainted metal chassis point, as a weak ground is a common cause of video noise.
Next, check the video cable connections along the length of the vehicle. Loose RCA plugs or damaged cables can interrupt the signal. Ensure the video cable is not routed parallel to high-current vehicle wiring harnesses, which can induce electromagnetic interference. If basic checks do not resolve the issue, consult a professional auto electrician to test the voltage stability and signal integrity.
Community discussion
Share your experience or ask a question. Comments are reviewed before publication.