
Selecting the correct side mirror replacement for your Toyota Altis requires a systematic approach to ensure physical fitment, electrical compatibility, and road safety. Because this popular sedan has spanned multiple generations and trim levels, a mirror that fits one model year may not align with the mounting points or wiring harness of another. By identifying your vehicle’s exact specifications and verifying the technical features of the replacement part, you can restore your visibility and maintain your car’s safety features without costly compatibility errors.
In many regions, driving with a damaged or non-functional side mirror is not only a safety hazard but also a violation of local road transport regulations. Ensuring your replacement mirror meets factory standards is essential for passing periodic vehicle inspections. Taking the time to understand the differences in housing shapes, wiring configurations, and glass types will help you make an informed decision and avoid the frustration of purchasing an incompatible component.
Identify Your Toyota Altis Generation and Trim
To find a side mirror that fits your Toyota Altis perfectly, you must first pinpoint your vehicle’s exact generation and manufacturing year. The Toyota Altis has undergone several major redesigns over the decades, with each generation featuring distinct door contours, aerodynamic profiles, and mounting footprints. A mirror designed for an older generation will not bolt onto a newer chassis, as the angle of the door frame and the positioning of the mounting studs differ significantly.
Products mentioned in this guide
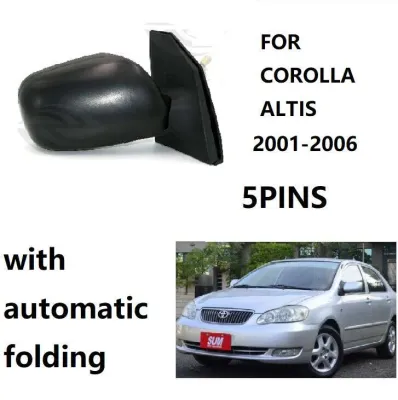
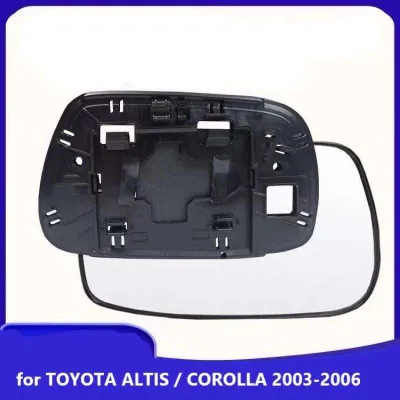
Prices are valid at publication and may change. Please refer to the product page for the latest price.
You can find your vehicle’s precise manufacturing details by locating the Vehicle Identification Number (VIN). The VIN is typically stamped on a metal plate visible through the bottom of the driver’s side windshield, printed on a sticker inside the driver’s door pillar, or listed on your official vehicle registration and log card documents. Cross-referencing this number with an official Toyota parts database or consulting an authorized parts dealer will reveal the exact production month and year of your vehicle, which is crucial for identifying mid-generation facelift changes.
Trim levels also dictate the electrical complexity of your side mirrors. Base trims may feature simple manual-adjust glass, while mid-tier and premium trims often include power-folding motors, integrated LED turn signals, heated glass, or blind-spot indicators. Reviewing your vehicle’s original specification sheet or inspecting the existing mirror’s functional capabilities helps you determine which features are factory-installed. Installing a mirror with fewer features than your original trim may trigger dashboard warning lights or disable convenient safety functions.
Evaluate Side Mirror Types and Feature Upgrades
When shopping for a replacement side mirror, you will generally choose between Original Equipment Manufacturer (OEM) parts and aftermarket alternatives. OEM mirrors are produced by or for Toyota, ensuring an exact match in terms of plastic density, glass clarity, and mounting alignment. While OEM parts offer the highest assurance of compatibility and durability, they typically carry a higher price tag. Aftermarket alternatives are produced by third-party manufacturers and offer a wider range of price points, but you must carefully verify their build quality and certification standards to ensure they meet local road safety regulations.

Standard functional features vary widely across different mirror assemblies. Manual mirrors require physical adjustment of the glass or housing by hand, whereas power mirrors use internal electric motors controlled by a switch on the driver’s door panel. Heated mirrors feature integrated heating elements that clear condensation, mist, or rain from the glass surface, which is highly useful for maintaining visibility in humid or wet climates. Auto-dimming glass uses electrochromic technology to reduce glare from the headlights of trailing vehicles, protecting your vision during night driving.
Modern iterations of the Toyota Altis may feature advanced safety integrations, such as Blind Spot Monitoring (BSM) systems. These systems use radar sensors located in the rear bumper to detect vehicles in your blind spots and illuminate a warning icon on the side mirror glass. Some premium trims also integrate cameras into the underside of the mirror housing to support a 360-degree panoramic view system. If your vehicle is equipped with these advanced safety systems, any replacement mirror must feature the corresponding glass cutouts, internal wiring, and sensor mounts to remain functional.
Essential Compatibility and Fitment Checks
The electrical connector is one of the most common failure points in DIY mirror replacement. Even if two mirrors look identical from the outside, their internal wiring plugs may differ. You must count the number of pins in your vehicle’s existing wiring harness before purchasing a replacement. For example, a basic power mirror might use a 3-pin or 5-pin connector, while a fully optioned mirror with heating, power folding, and turn signals might require a 7-pin, 9-pin, or even larger connector. Connecting a mirror with an incompatible pin configuration can cause electrical shorts or render key features inoperable.
Physical fitment is equally critical to prevent wind noise, water leaks, and vibration. The base plate of the replacement mirror must match the contour of your car’s door frame exactly. Inspect the bolt hole alignment on the replacement mirror’s base plate against the factory mounting holes on your door. Additionally, ensure the mirror housing clears the door panel and window glass when fully folded or adjusted. A poorly fitting base plate can allow rainwater to seep into the door cavity, potentially damaging the window regulator and door speakers over time.
Replacement side mirrors are typically sold in two finishes: pre-painted to match specific factory paint codes, or finished in a matte black primer. If you purchase a primer-ready housing, you will need to budget for professional painting to match your vehicle’s body color. Alternatively, some designs allow you to transfer your existing, undamaged outer plastic cover (mirror cap) onto the new replacement housing assembly, saving you the time and expense of painting the new part.
Sourcing Channels and Purchasing Considerations
Authorized dealerships offer the highest assurance of compatibility and authenticity, though often at a premium. Specialized automotive parts distributors provide a balance of OEM and high-quality aftermarket options. When shopping on online marketplaces or ecommerce platforms, verify the seller’s reputation, read customer reviews, and ensure the product listing explicitly details compatibility with your specific Altis model year. Avoid purchasing from unverified sources that do not offer clear product specifications or return policies.
Never rely solely on the vehicle model name when purchasing a replacement mirror. Request the exact OEM part number from the seller and cross-reference it with your vehicle’s existing part or the manufacturer’s official parts catalog. This number is often stamped on the underside of the mirror housing or on the internal plastic frame. Matching the exact part number suffix is particularly important, as it often denotes specific color codes, market-specific features, or regulatory compliance standards.
Electronic components, especially those containing sensitive sensors or motors, carry a risk of shipping damage or manufacturing defects. Prioritize sellers who offer clear return policies and warranties. Ensure the warranty covers electrical malfunctions, such as motor failure or faulty heating elements, and not just physical damage upon arrival. A robust return policy protects your investment if you discover a compatibility issue during the installation process.
Installation Safety and Professional Fitment
Attempting to install an electrical side mirror without proper precautions can lead to short circuits, blown fuses, or damage to your vehicle’s main electronic control unit. Incorrectly pinned aftermarket connectors can send voltage to the wrong circuits, potentially disabling other door controls or triggering persistent dashboard warning lights. Always handle electrical connectors with care and avoid forcing plugs into sockets if they do not align naturally.
Before performing any electrical work or removing door panels, consult your vehicle owner’s manual and safely disconnect the negative battery terminal. This simple step eliminates the risk of accidental short circuits while unplugging and plugging in the mirror’s wiring harness. Keep track of all screws, plastic clips, and wiring retainers removed during the process, as missing fasteners can lead to loose door panels and annoying rattles while driving.
While replacing a basic manual mirror is a straightforward mechanical task, advanced mirrors with BSM sensors or 360-degree cameras require specialized handling. After installing a mirror with BSM glass, the radar sensors may require professional calibration at an authorized service center to ensure they detect surrounding traffic accurately. If you are uncomfortable removing door trim panels, handling delicate wiring clips, or performing electrical tests, seek the assistance of a qualified automotive technician to ensure a safe and compliant installation.
Frequently Asked Questions (FAQ)
Can I upgrade my manual folding mirrors to power folding on an older Toyota Altis?
Upgrading from manual to power-folding mirrors is technically possible but requires significant modifications. You will need to source a mirror assembly equipped with an internal folding motor, a compatible door switch panel, and the appropriate wiring harness. Because base models often lack the pre-installed wiring for power-folding functions, you must route new electrical lines through the door jamb and connect them to the vehicle’s power distribution block. Professional installation is highly recommended to ensure the wiring is safely insulated, routed away from moving window components, and properly fused to prevent electrical fires.
Why is my replacement side mirror vibrating at high speeds?
Vibration in a replacement side mirror is usually caused by loose mounting hardware, a degraded rubber gasket, or poor structural design. First, check that all mounting bolts securing the mirror base to the door frame are tightened to the manufacturer’s specified torque. Ensure the rubber sealing gasket is positioned correctly, as any gaps can allow wind to enter and cause physical instability. If the mounting is secure but the glass itself is vibrating, the issue may stem from worn internal adjustment gears or a low-quality aftermarket housing that lacks the structural rigidity of the original factory part.
Community discussion
Share your experience or ask a question. Comments are reviewed before publication.