
Securing an On-Board Unit (OBU) on your vehicle’s dashboard requires a mounting solution that can withstand cabin heat, resist road vibrations, and keep the device visible without blocking critical controls. A modular RAM Mount configuration is highly suited for this task because it allows you to customize the base, arm, and cradle to match your specific vehicle layout and OBU dimensions. To build the ideal setup, you must select a heat-resistant dashboard base, a matching socket arm that preserves your line of sight, and a cradle that holds the device securely while leaving card slots and ventilation grilles completely unobstructed.
Because OBUs vary in weight, shape, and card-insertion requirements, there is no single pre-packaged mount that fits every scenario. Instead, the best approach is to evaluate your dashboard’s material, your local climate, and the physical specifications of your device to assemble a compatible three-part system. By understanding how these components interact, you can ensure a stable installation that remains secure even during long periods of parking in direct sunlight.
How the Modular RAM Mount System Works
Unlike traditional single-piece mounts, the RAM Mount system relies on a three-part modular design consisting of a mounting base, an intermediate socket arm, and a device-specific cradle or holder. Each component connects via an elastomer-coated rubber ball-and-socket joint. This design provides multi-axis adjustment, allowing you to tilt, swivel, and rotate the OBU to achieve the perfect viewing angle while dampening the vibrations transmitted from the road through the vehicle’s chassis.
Products mentioned in this guide
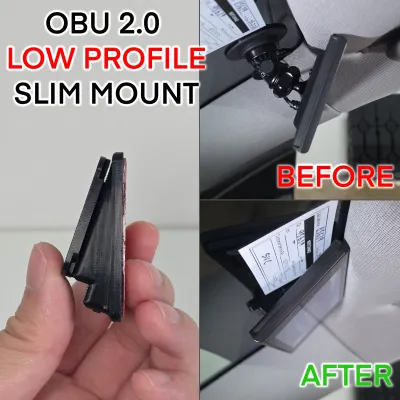
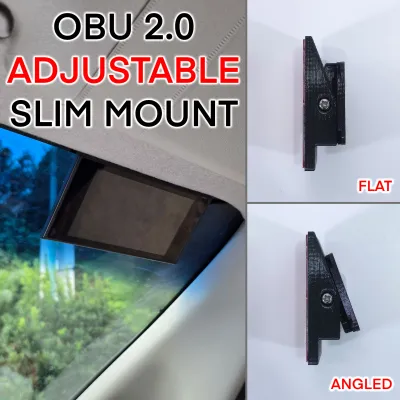
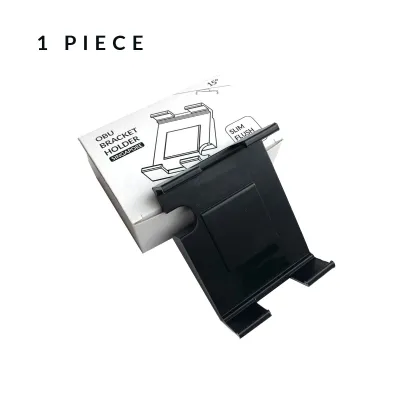
![[Readystock] OBU ERP2.0 Display Mount Casing (Case only)](https://img.lazcdn.com/g/ff/kf/S5a5fb223703d4dfaa6f798ab25e70453b.jpg_400x400q80.jpg_.webp)
Prices are valid at publication and may change. Please refer to the product page for the latest price.
The system is categorized by ball sizes, which dictate the weight capacity and overall stability of the mount. The most common sizes for passenger vehicle interiors are the B-size (featuring a 1-inch ball) and the C-size (featuring a 1.5-inch ball). A B-size system is generally rated to support light electronics up to approximately 2.25 kilograms under standard conditions, making it the typical choice for standard OBUs and mobile devices. The larger C-size system is engineered for heavier equipment or extreme high-vibration environments, offering a more rigid connection at the expense of a larger physical footprint on your dashboard.
Before purchasing any components, you must verify your OBU’s exact weight and physical dimensions by consulting the device’s technical documentation. Matching these specifications to the manufacturer’s rated weight capacities ensures that the socket joints will not slip or sag when exposed to sudden bumps or cornering forces. Always ensure that all three components of your custom configuration—the base, the arm, and the holder—use the exact same ball size to guarantee a secure, mechanical fit.
Choosing a Secure Dashboard Base for Hot Climates
Selecting the right mounting base is critical for ensuring the OBU remains attached to the dashboard, especially in tropical climates like Singapore where cabin temperatures can rise dramatically. Drivers have three primary options for securing the base to the dashboard, each with distinct structural trade-offs:

- Adhesive Bases: These bases utilize high-strength, double-sided adhesive pads to bond a low-profile ball mount directly to the dashboard surface. They conform slightly to minor curves and textured plastics, making them highly versatile. However, they require a permanent or semi-permanent bond and can be difficult to clean if removed.
- Suction Cup Bases: These rely on a mechanical twist-lock or lever mechanism to create a vacuum seal. While they are highly portable and allow you to reposition the mount easily, they require a perfectly smooth, non-porous surface to maintain tension. They rarely hold securely on textured, soft-touch, or curved dashboard plastics.
- Drill-Down Bases: These bases are fastened directly into the dashboard structure using mechanical screws. This method provides the absolute highest level of security and vibration resistance. However, it permanently damages the dashboard panel, which can lower the vehicle's resale value, and requires careful inspection behind the panel prior to installation to avoid damaging hidden electrical wiring or climate control ducts.
In regions with intense sunlight and high humidity, a parked vehicle’s cabin can act as a greenhouse, raising dashboard temperatures well above 60 degrees Celsius. This extreme heat can soften the chemical bonds of adhesive pads or cause the air trapped inside a suction cup to expand, leading to sudden vacuum loss and causing the mount to fall. When selecting a base, check the manufacturer’s packaging for specified operating temperature ranges to ensure the materials are rated for high-heat environments.
Regardless of the base type you choose, you must observe strict safety boundaries during installation. Never position the mounting base, arm, or OBU within or directly adjacent to passenger airbag deployment zones. Consult your vehicle’s owner’s manual to locate all dashboard and side-curtain airbag modules. A mount placed in the path of a deploying airbag can become a dangerous high-velocity projectile in the event of a collision.
Selecting the Right Arm Length and Ball Size
The intermediate socket arm connects the dashboard base to the OBU cradle, and its length directly influences both the stability of the device and your forward visibility. Socket arms are generally available in short, medium, and long configurations. Choosing the correct length requires balancing the physical layout of your dashboard with the mechanical forces generated while driving.
Short socket arms keep the OBU positioned close to the dashboard base, which minimizes the leverage exerted on the mount. This short distance significantly reduces screen vibration and prevents the arm from sagging over time. However, short arms offer limited clearance, which may make it difficult to angle the OBU away from direct sunlight or position it around dashboard curves. Medium and long arms provide greater reach and flexibility, allowing you to position the device closer to your line of sight. The trade-off is that longer arms amplify road vibrations, which can make the OBU screen difficult to read on uneven roads and place additional stress on the mounting base.
To maintain system integrity, you must match the socket size of the arm to the ball size of your base and cradle. For example, a B-size base with a 1-inch ball must be paired with a B-size double-socket arm. Attempting to force mismatched components together or using unapproved adapters can compromise the grip, leading to sudden slippage while the vehicle is in motion.
When adjusting the arm, utilize the dual ball-and-socket joints to find an optimal viewing angle that minimizes screen glare without obstructing your view of the road. The OBU should be positioned so that you can monitor its display with a quick glance, keeping your primary focus on traffic. Once the desired position is reached, tighten the arm’s adjustment knob firmly to lock the joints in place.
Picking the Right Cradle for Your OBU
The cradle is the component that directly grips your OBU, and it must hold the device securely without interfering with its daily operation. Because OBUs often feature built-in displays, status lights, ventilation grilles, and slots for inserting payment or smart cards, a standard universal holder may not always be suitable. You must carefully compare different cradle styles to find one that accommodates these specific physical features.
Universal spring-loaded cradles, such as the X-Grip series, use rubber-capped posts to clamp the sides of a device. These holders are highly adaptable and easy to use, but you must verify that the rubber posts do not press against any physical buttons on the OBU or block the card slot. If the cradle’s grip points obstruct the slot where you insert your smart card, you will be forced to remove the OBU from the mount every time you pass through a toll gantry or enter a parking garage, which defeats the convenience of a hands-free mount.
Alternatively, custom-molded or strap-based cradles provide a more tailored fit. Custom holders are shaped to match the exact dimensions of specific device profiles, ensuring that all ports, buttons, and card slots remain completely accessible. If a custom-molded holder is not available for your specific OBU model, look for adjustable side-clamp holders that allow you to position the support feet manually, ensuring they avoid critical areas of the device.
Before purchasing a cradle, measure the height, width, and depth of your OBU using a caliper or ruler. Compare these measurements against the minimum and maximum dimensions specified by the cradle manufacturer. Avoid using holders that rely solely on light surface friction to retain the device, especially if your OBU is heavy or if your vehicle is subject to frequent vibrations from stiff suspension or rough road surfaces. A mechanical locking or positive-retention cradle is always preferred for heavy dashboard accessories.
Safe Installation and Ongoing Maintenance
Achieving a reliable mount installation depends heavily on proper surface preparation and routine maintenance. Even the highest-quality adhesive or suction base will fail prematurely if applied to a dirty or improperly prepared dashboard. Following a structured installation process ensures the longest possible service life for your mounting hardware.
First, identify a flat, non-textured section of your dashboard that does not block your view or interfere with vehicle controls. Clean this area thoroughly using isopropyl alcohol to remove accumulated dust, oils, and dashboard protectants. Before applying the alcohol, perform a spot test on an inconspicuous, hidden area of the dashboard to verify that the solvent does not discolor or degrade the plastic or leather trim. Allow the surface to dry completely so that no moisture remains trapped beneath the base.
If you are installing an adhesive-backed base, peel away the protective liner and press the base firmly onto the cleaned surface, applying even pressure across the entire contact area for at least thirty seconds. Most high-strength adhesives require a specific curing period to reach their full bonding strength. Avoid attaching the socket arm, cradle, or the weight of the OBU to the base for at least 24 hours—and ideally up to 72 hours—after application. Loading the mount too early can cause the adhesive to shear, leading to premature failure.
Over time, the constant vibrations of daily driving and exposure to temperature fluctuations can cause the mechanical connections of your mount to loosen. Establish a routine maintenance schedule to inspect your mounting setup every few weeks. Check the tightness of the socket arm’s adjustment knob and hand-tighten it if necessary. For suction cup bases, release the vacuum lever, clean the rubber pad with water to remove dust, and re-apply the suction to maintain a strong seal. Regularly inspect adhesive edges and rubber suction cups for signs of peeling, cracking, or dry rot, particularly after the vehicle has been parked in direct sunlight, and replace any degraded components immediately to ensure driving safety.
Frequently Asked Questions (FAQ)
Will the heat inside a parked car cause the RAM Mount to fall off?
Extreme cabin heat can cause mounting failures by softening the adhesives used on mounting pads or by causing the air inside a suction cup to expand, which reduces the vacuum seal. To minimize this risk, verify that your mounting components are rated for high-temperature automotive environments. You can also protect the mount by placing a reflective sunshade across your windshield when parked in direct sunlight, or by parking in shaded or indoor parking structures whenever possible to keep interior temperatures lower.
Can I mount the OBU on the windshield instead of the dashboard?
While mounting the OBU on the windshield glass provides a smooth, non-porous surface that is ideal for suction cup bases, it can present safety and legal challenges. A windshield-mounted device can obstruct your forward line of sight and may violate local traffic regulations regarding windshield obstructions. Before choosing a windshield mount, consult your local transport authority’s guidelines to ensure your installation remains fully compliant with road safety laws, and always position the mount in a corner or low area where it does not block your view of traffic.
Community discussion
Share your experience or ask a question. Comments are reviewed before publication.